
For any type of licensed system, the first step is to enable the monitor.
Prerequisite: Verify that the HaloENGINE license is active. Refer to the section "Phase 2. Activate License (First time)".
-
On the left navigation bar, click Customer Configuration, and then select the customer ID (halo_customer) from the list.
-
On the HaloENGINE Features tab, click Configure. The HaloENGINE Features page appears as shown in the figure below:
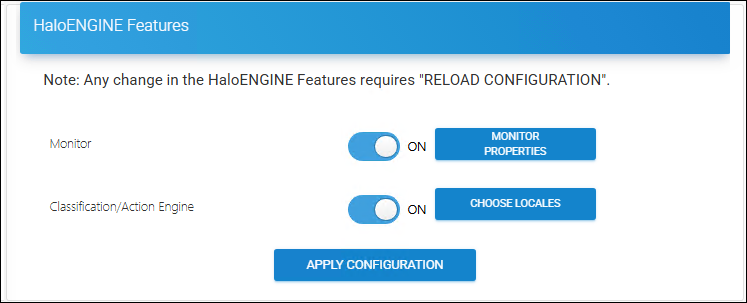
Enable Monitor
-
Enabling the Monitor is the first step.
-
Click on the slider button to enable Monitor, and then click Apply Configuration.
Results:
-
A confirmation message appears after changing the default configuration.
-
Click Reload Configuration to make the changes take effect.
-
Enable Classification/Action Engine
Follow the steps below to enable the classification engine:
-
Click the slider button to enable or disable the Classification/Action Engine.
-
The Choose Locales button is enabled automatically.
-
Click Choose Locales. The Choose Locale page appears, as shown in the figure below:
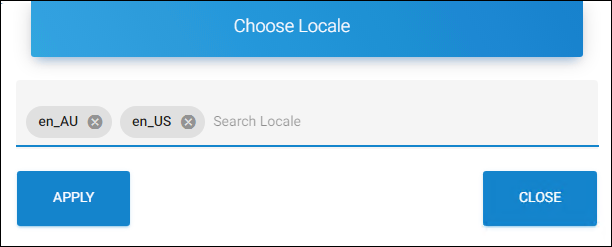
Locales
-
Search and select one or more texts for translation. For example, en_US.
-
Click Apply.
Results:
-
Selected texts for translation are added to the list.
-
You can either press Apply Configuration now and then reload configuration to let the changes take effect, or you can configure further settings and then press Apply Configuration.
-
Monitor Configuration
Prerequisite: Ensure that Monitor is enabled, as mentioned above.
Follow the steps below to configure the Monitor:
-
On the HaloENGINE Features page, click Monitor Properties.
-
The Monitor Configuration page appears as shown in the figure below:
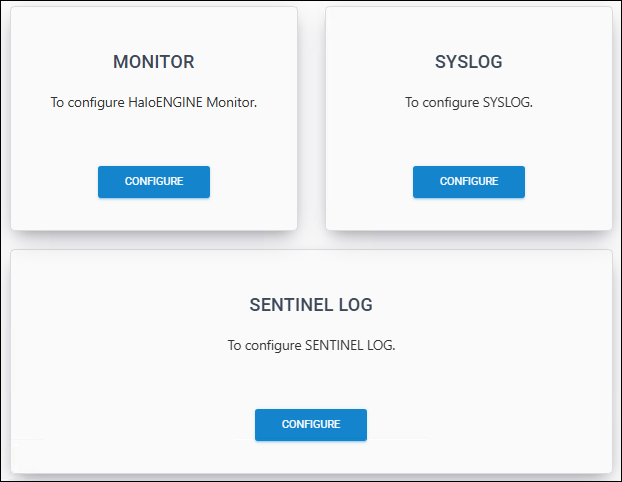
Monitor Configuration
-
Configure Monitor, Syslog, and Sentinel Log individually, as described in the following sections.
Monitor Properties
Follow the steps below to configure the monitor properties:
-
On the Monitor tab, click Configure and then enter the following details on the Monitor Properties page as shown in the figure below:
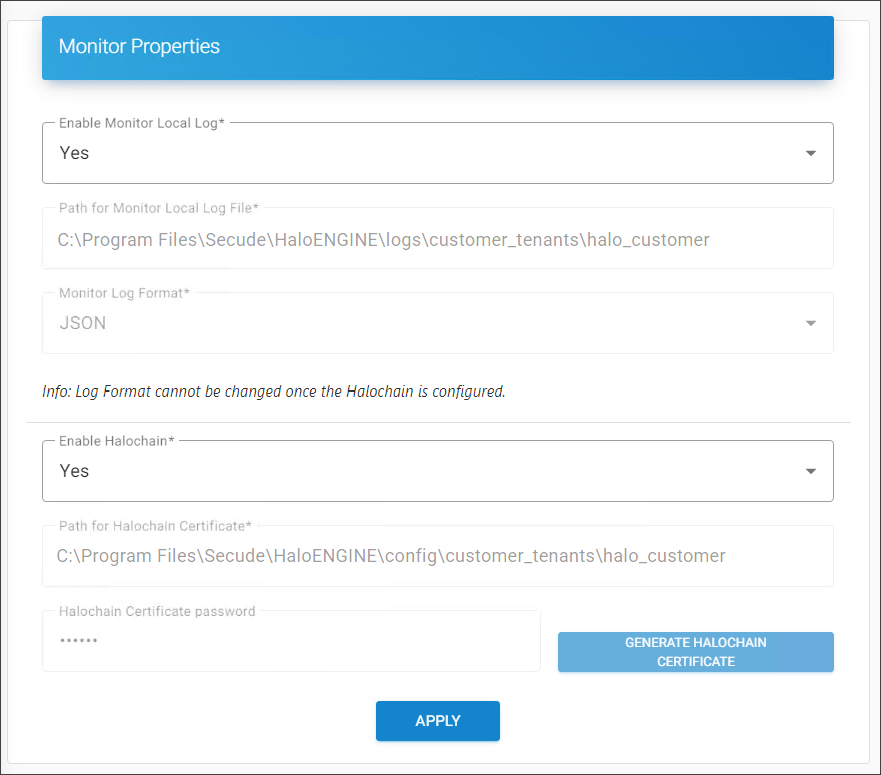
Monitor Log Configuration
-
Enable Monitor Local Log − Select Yes or No to enable or disable the local monitor log. If enabled, the default path is
C:\Program Files\Secude\HaloENGINE\logs\customer_tenants\halo_customer. -
Monitor Log Format − Choose one of the following monitor log formats (CEF/LEEF/JSON). Please note that it is not possible to change the log format once Halochain is configured, and the field will be disabled once you enable Halochain.
-
Enable Halochain − Select Yes or No to enable or disable the Halochain feature. If enabled, the default Halochain certificate path is
C:\Program Files\Secude\HaloENGINE\config\customer_tenants\halo_customer. -
Halochain Certificate Password − Enter a password for Halochain and click Generate Halochain Certificate. You will receive a confirmation message upon creating a certificate.
-
Click Apply.
Results: A confirmation message will appear after the properties are successfully updated.
Syslog Properties
Prerequisite: Ensure that Monitor Local Log is enabled.
Requirements
Please make sure that the following requirements are met:
-
UDP/TCP enabled.
-
The firewall accepts UDP/TCP packets on the configured port.
-
To forward audit logs to SPLUNK/RSA, you need to configure the audit Syslog accordingly.
Follow the steps below to configure the Syslog properties:
-
On the Syslog tab, click Configure and then enter the following details on the Syslog Properties page as shown in the figure below:
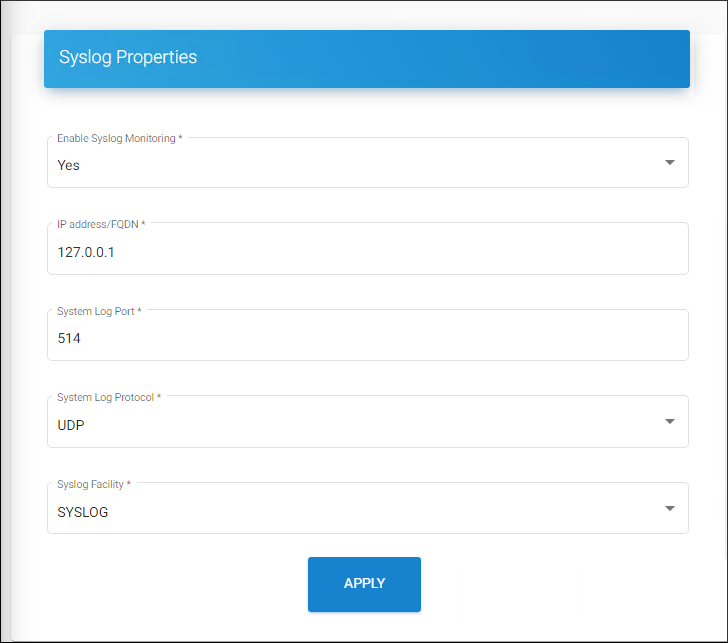
Syslog Properties
-
Enable Syslog Monitoring − Select Yes or No to enable or disable the Syslog.
-
IP Address/FQDN − If enabled, enter the IP address/FQDN.
-
System Log Port − Enter the system log port number. The default port is 514.
-
System Log Protocol − Enter the system log protocol (UDP/TCP). The default protocol is UDP.
-
Syslog Facility − Enter the Syslog facility (KERN/USER/SYSLOG/AUDIT). The default facility is SYSLOG.
-
Click Apply.
Results: A confirmation message will appear after the properties are successfully updated.
Sentinel Log
Prerequisite: Microsoft Sentinel must be configured. Please refer to the section “Forwarding Logs to Microsoft Sentinel”.
Follow the steps below to configure the Sentinel log properties:
-
On the Sentinel Log tab, click Configure and then enter the following details as shown in the figure below:
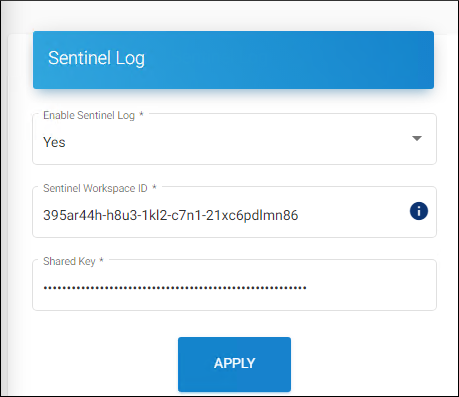
Sentinel Log
-
Enable Sentinel Log − Select Yes or No to enable or disable the Sentinel Log.
-
Sentinel Workspace ID − Enter the Workspace ID of your Microsoft Entra ID. For example,
395ar44h-h8u3-1kl2-c7n1-21xc6pdlmn86. -
Shared Key − Enter the Primary Key of your Workspace ID. For example,
/mjnjgjbKIUTv5M/FJDBFDmdfnidfidi8ujsasusd09uu=ndhdihdkij. -
Click Apply.
Results: A confirmation message will appear after the properties are successfully updated.
What to do next
-
After configuring Monitor, Syslog, and Sentinel Log, click Reload Configuration to apply the changes.
-
Test the log after configuration.
How to obtain logs in Microsoft Sentinel?
Prerequisites:
-
Ensure the HaloENGINE Admin Portal is restarted after configuring Sentinel properties.
-
Perform actions like uploading and downloading only after the admin portal is configured to generate and forward sufficient logs.
Follow the steps to obtain logs in Microsoft Sentinel.
-
Log in to the Microsoft Azure portal.
-
In the search bar, type Microsoft Sentinel. As you start typing, the list filters according to your input.
-
Select Microsoft Sentinel from the search results.
-
The Microsoft Sentinel page appears. Here, you need to click Create at the top of the page.
-
The page displays available workspaces.
-
Select your workspace.
-
Navigate to General > Logs. Forwarded logs will be stored in the
HALOCORE_CLtable. -
Type
HALOCORE_CLin the right-side query panel. As you start typing, the list filters based on your input. -
Select the table
HALOCORE_CLand choose the appropriate query to fetch the logs. For example, whereaction_s contains "" -
Run it to get the results.
-
Based on the query applied, logs will be retrieved.