
The requirements for installing HaloENGINE are detailed in this chapter.
System Requirements
The following table lists the requirements for the HaloENGINE.
|
Components |
Details |
|---|---|
|
Operating System |
Installing HaloENGINE and HaloENGINE Service on the same server is necessary. Please refer to the HaloENGINE Service Requirements Table for further information about operating systems. |
|
Supported browser version |
The most recent versions of Microsoft Edge, Chrome, and Firefox are supported by the HaloENGINE Admin portal. |
Requirements
Prerequisites
The prerequisites and dependencies for installing and configuring the HaloENGINE are summarized in this section.
Obtain HaloENGINE License
Before installing the HaloENGINE, we recommend obtaining the license file (license.lic) from Secude support to enable the HaloENGINE functionalities. The license file you received from Secude will include specific features and system types. This implies that only the system types that you have obtained in the license are accessible by their respective endpoints. After configuring the admin portal, import the license as instructed in the section "Phase 3. Activate License".
For example,
Case 1: If your license file is enabled for feature Protect with the SAP system type, the SOAP interface is enabled internally, but access to the other endpoints (REST Protobuf and API) is restricted. Consequently, only Protect-related features are available on the HaloENGINE admin portal. However, the Monitor feature is included by default.
Case 2: If your licensing file includes the Protect and Block features for the system types Windchill, Teamcenter, and Autodesk Vault, the REST Protobuf interface is enabled internally, but the other endpoints (SOAP and API) are restricted. In this case, the HaloENGINE admin portal provides Protect and Block features. Additionally, the Monitor feature is enabled by default.
The following picture illustrates how the client communicates with the HaloENGINE.
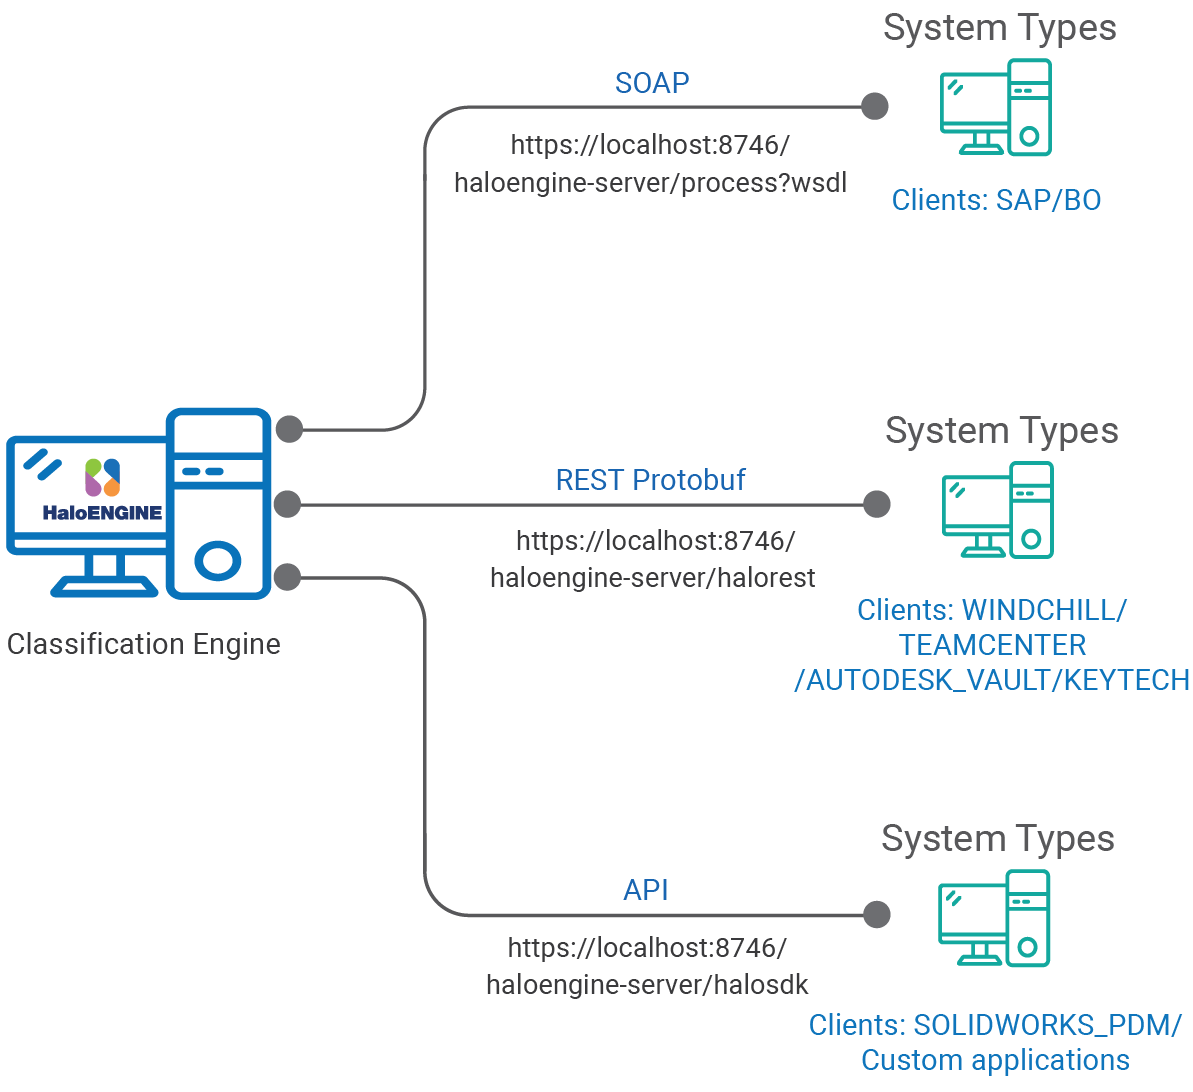
System types and protocol
License File Per Customer
-
For Single Customer mode—you need to have one license file.
-
For Multi-Customer mode—you need to have license files as many ‘customers’ as you would create in the portal.
For instance, if you intend to add three customer IDs to the portal, you will require three licensing files for each of them.-
Customer 1 (BM Automobile AG)—With one feature (e.g., Protect) in a single license file.
-
Customer 2 (DELBONT Industries)—With one or two features (e.g., Protect and Block) in a single license file.
-
Customer 3 (WHEELS INC)—With one feature (e.g., Block) in a single license file.
-
The table below will assist you in deciding the type of license you should obtain from Secude.
|
Customer Requirement |
License Specification |
Description |
|---|---|---|
|
Monitor |
Monitor |
Customer environment that only needs the monitoring feature. |
|
Block |
Monitor + Block |
Customer environment that just requires the blocking feature. However, monitoring is included as a standard feature. |
|
Block and Protect |
Monitor + Block + Protect |
Customer environment that requires blocking and protecting features. A full license with all three features (Monitor, Block, and Protect) must be used. |
Obtaining license
Download SAP JCo (only for SAP clients)
-
Go to https://websmp209.sap-ag.de/public/connectors, click on the SAP Java Connectors link, and select Tools & Services (you need a valid S-User from SAP).
-
Download the zip package as per your operating system (For example, Windows - x64 / x86 bit).
-
Extract the zipped folder.
-
Related tasks: After configuring the admin portal, import the files as instructed in the section "SAPJCo Configuration".
User Management Settings
Make a default (also known as regular) administrator account after installing the HaloENGINE component. This account is referred to as "Super Admin," and it has greater access than a typical administrator account. This account has full access to your HaloENGINE component.
User Accounts
|
User Account 1 |
User Account 2 |
User Account 3 |
|---|---|---|
|
Default Super Admin account |
Customer_Admin |
Customer_User |
|
Role: ROLE_SUPER_ADMIN |
Role: ROLE_CUSTOMER_ADMIN |
Role: ROLE_CUSTOMER_USER |
|
User validation: Locally validated |
User validation: Microsoft Entra authentication |
User validation: Microsoft Entra authentication |
User Accounts
Settings in Azure Portal
User management is often included with Microsoft Azure and involves several request exchanges between the HaloENGINE Admin Portal and the identity provider, Microsoft Entra ID.
Microsoft documentation
Any application that wants to use Microsoft Entra ID for authentication must be registered in its directory. The information in the Microsoft documentation overrides any information published in this section. For a detailed explanation, please see the Microsoft documentation.
In the Azure portal, follow the steps below to configure user authentication and authorization settings.
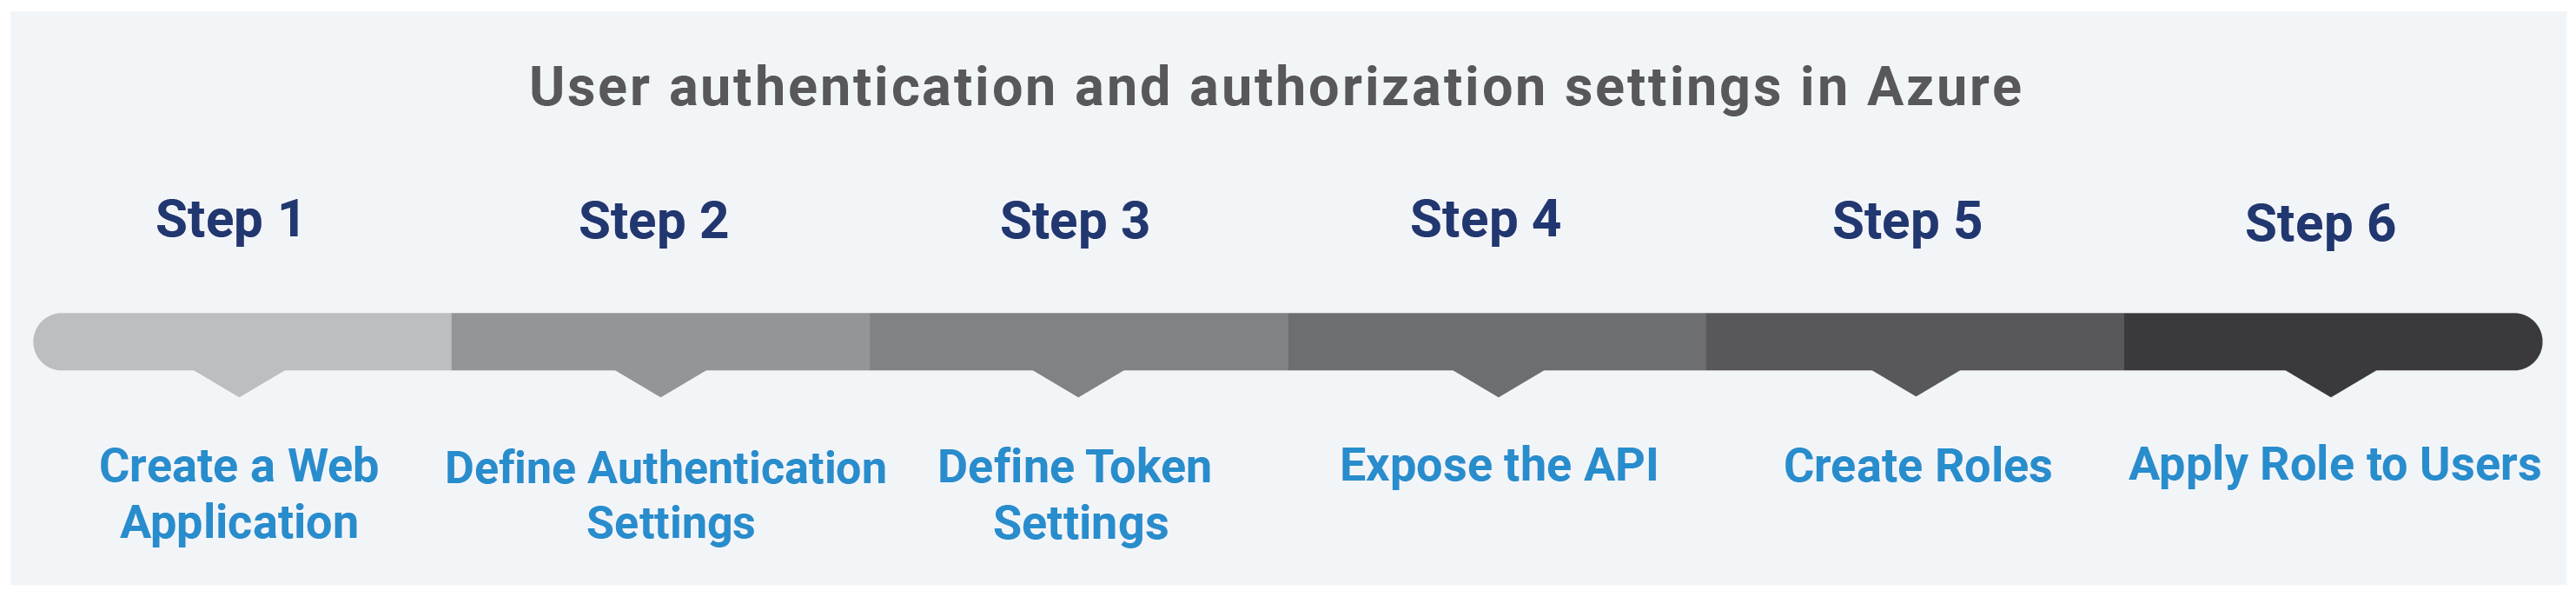
User authentication and authorization settings in Azure
Step 1: Create a New Web Application
-
You can either leverage an existing Web (Redirect URI) application or create a new one in Azure Portal. To serve as an example, the Web application User Management is created.
-
When registration is complete, the Overview page displays the Application ID and Tenant ID values. These values uniquely identify your application on the Microsoft identity platform. To preserve the values, copy them to the clipboard and paste them into a text editor (such as Notepad).
Step 2: Authentication Settings
-
In the left navigation pane, select Authentication.
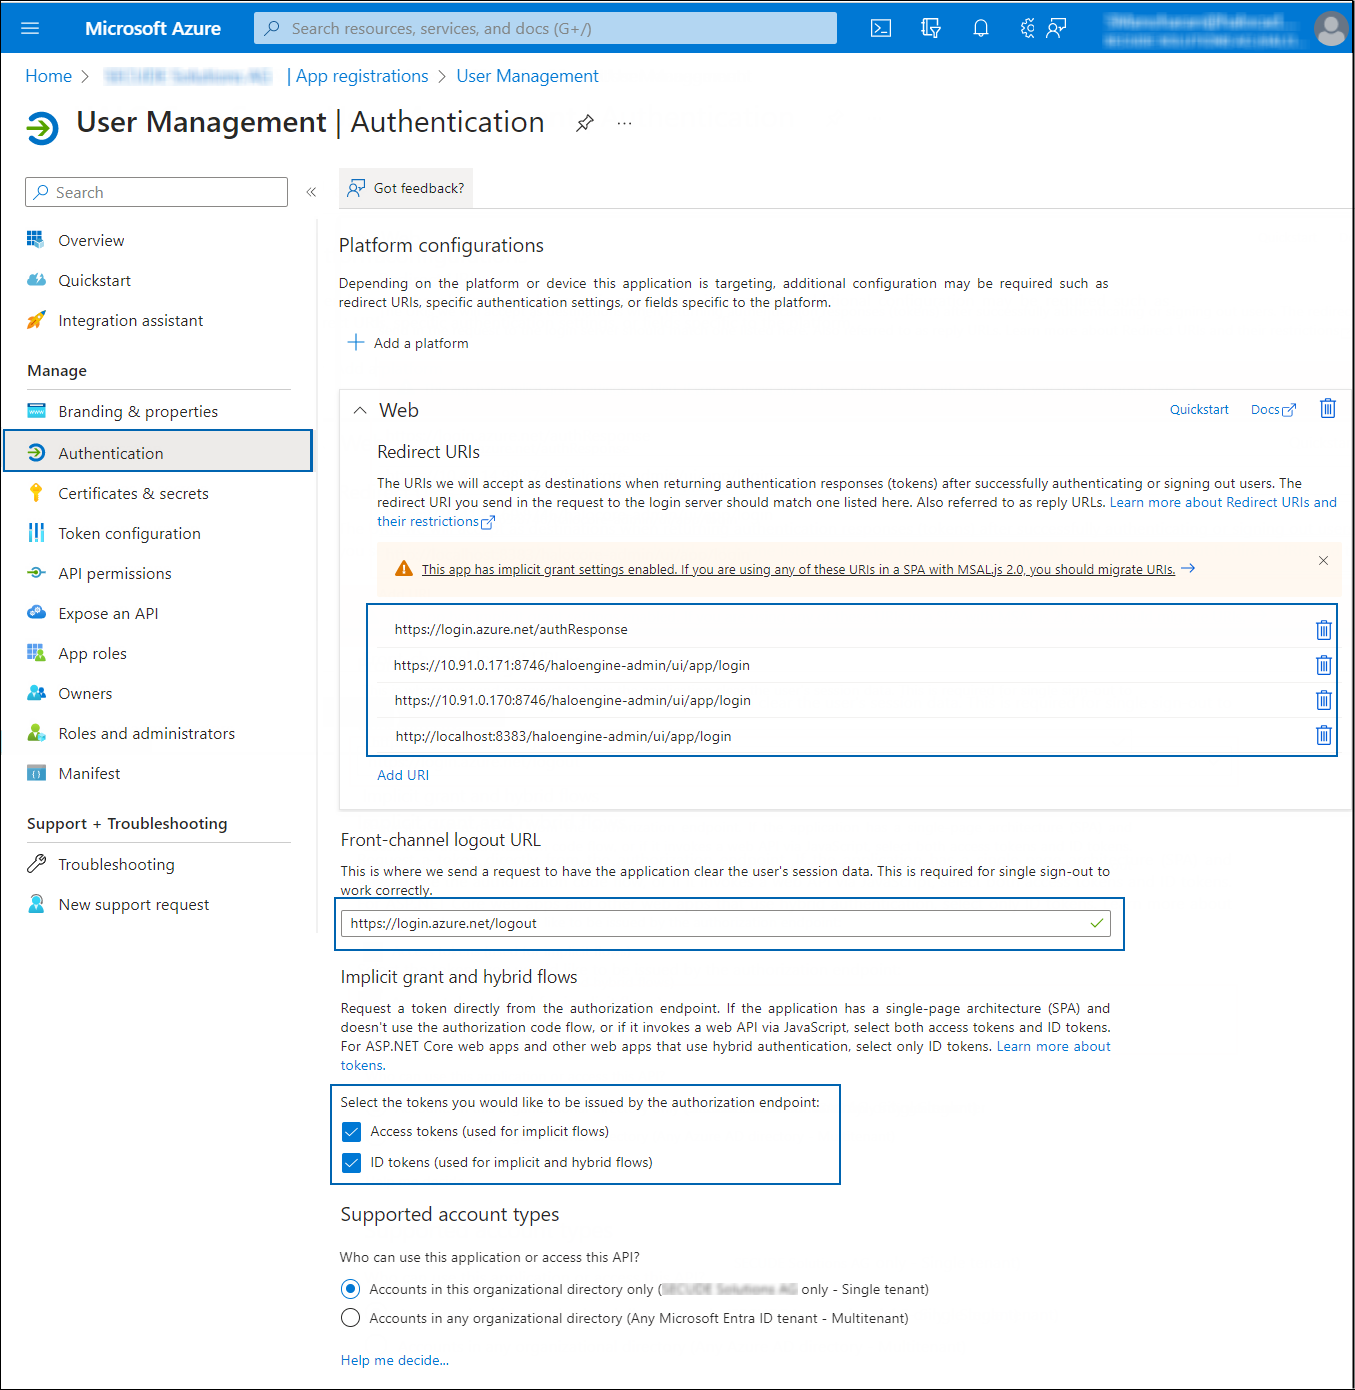
Authentication settings
-
Under the Web section, click Add URI and enter the following reply URLs one by one:
-
https://login.azure.net/authResponse -
HaloENGINE Admin portal URL:
-
https://<ip>:<port>/haloengine-admin/ui/app/login(for example,https://10.91.0.171:8746/haloengine-admin/ui/app/login) -
Or
http://<localhost>:<port>/haloengine-admin/ui/app/login(for example,http://localhost:8383/haloengine-admin/ui/app/login)
-
-
-
Under Front-channel logout URL section, enter the URL −
https://login.azure.net/logout. -
Under the Implicit grant and hybrid flows section, select Access tokens, and ID tokens checkboxes.
-
Click Save.
Step 3: Token Settings
-
In the left navigation pane, select Token configuration and click Add groups claim.
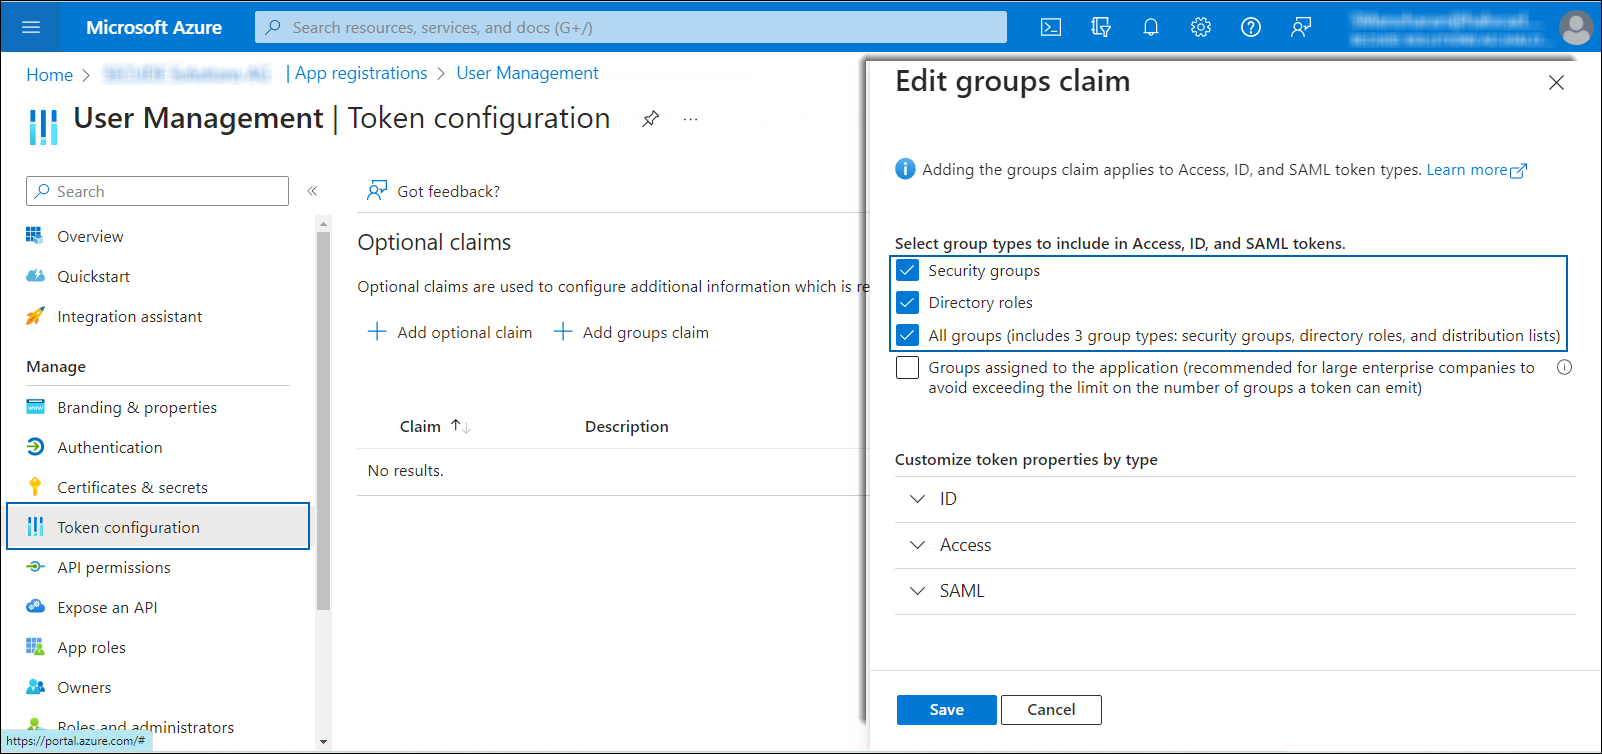
Token Settings
-
Select the following options:
-
Security groups
-
Directory roles
-
All groups
-
-
Click Save.
Step 4: Expose API
-
In the left navigation pane, select Expose an API.
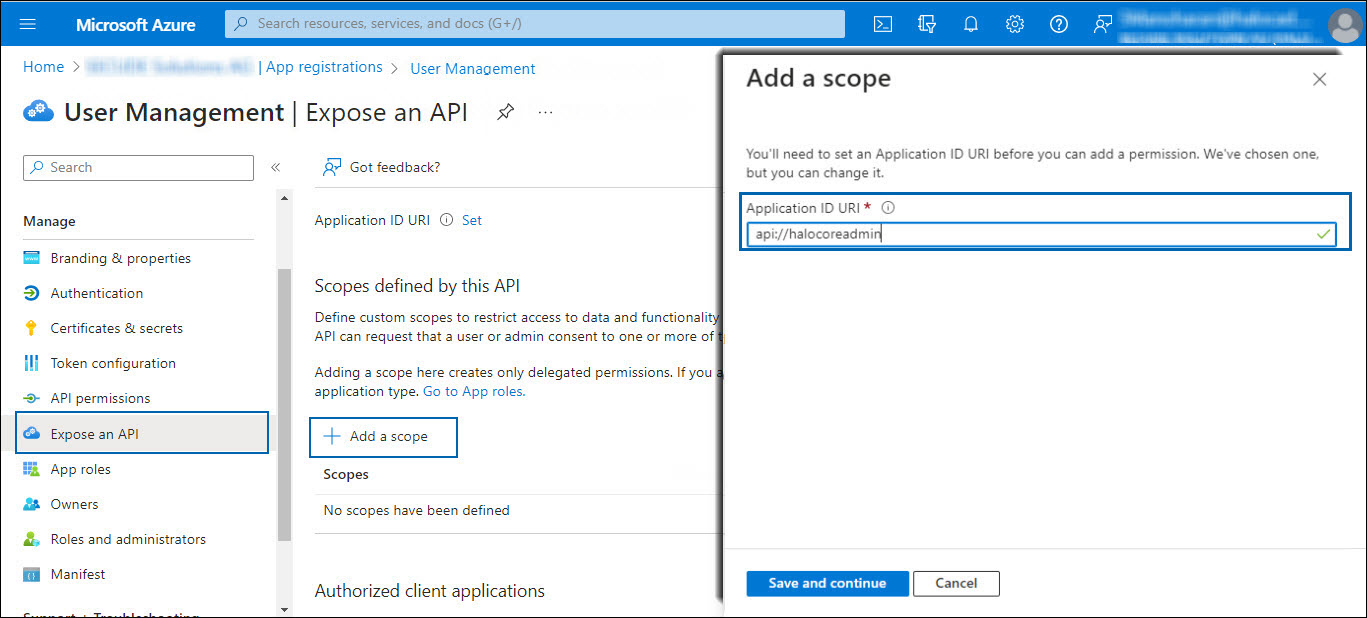
Adding scope#1
-
Click Add a scope and enter the scope following
api://in Application ID URI. In this example,api://halocoreadminis used. -
Click Save and Continue.
-
Again, click Add a scope and enter the following values:
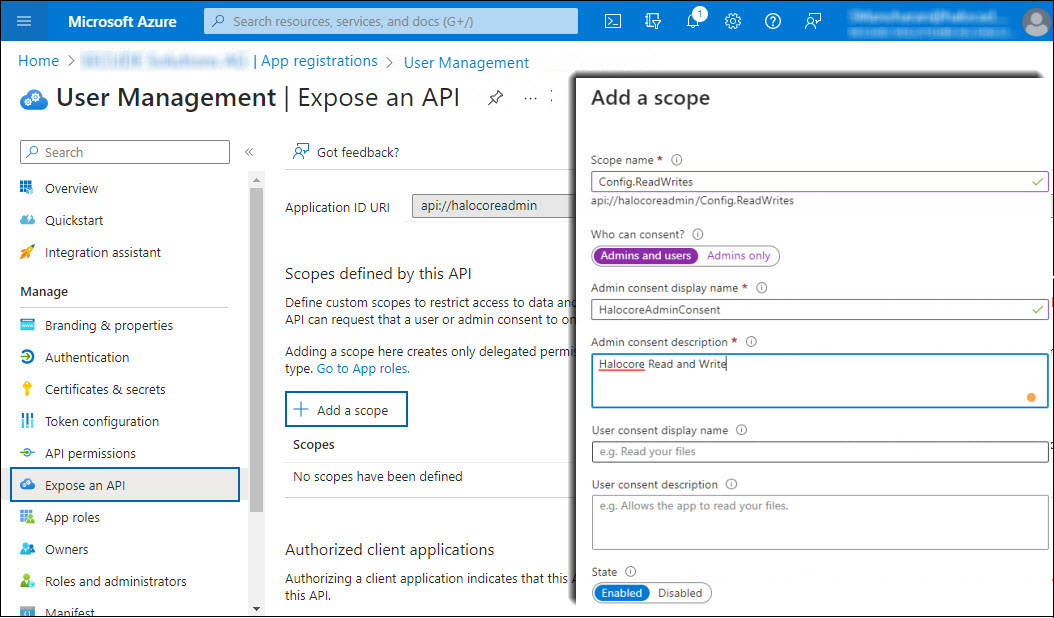
Adding scope #2
-
Scope name: enter
Config.ReadWrites -
Who can consent?: select Admins and users
-
Admin consent display name: enter HalocoreAdminConsent
-
Admin consent description: enter Halocore Read and Write
-
State: select Enabled
-
-
Click Add scope. You can see the scope displayed in the UI.
-
Copy the generated scope
api://halocoreadmin/Config.ReadWritesto the clipboard and save it in a text editor (such as Notepad).
Step 5: Create Roles
-
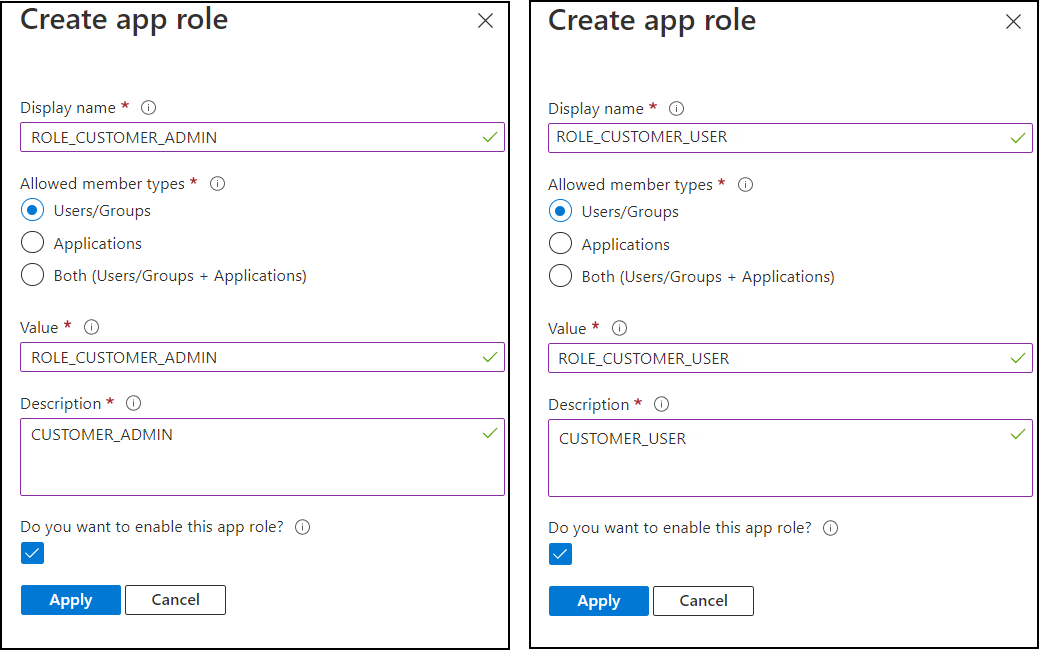
In the left navigation pane, select APP roles.
-
Click Create app role and enter the following values:
-
Display name: ROLE_CUSTOMER_ADMIN
-
Allowed member types: select Users/Groups
-
Value: ROLE_CUSTOMER_ADMIN
-
Description: CUSTOMER_ADMIN
-
Do you want to enable this app role? – Select this option.
-
Repeat the above steps for the role ROLE_CUSTOMER_USER.
Adding Roles
-
-
Click Apply.
-
The roles are added to the list.
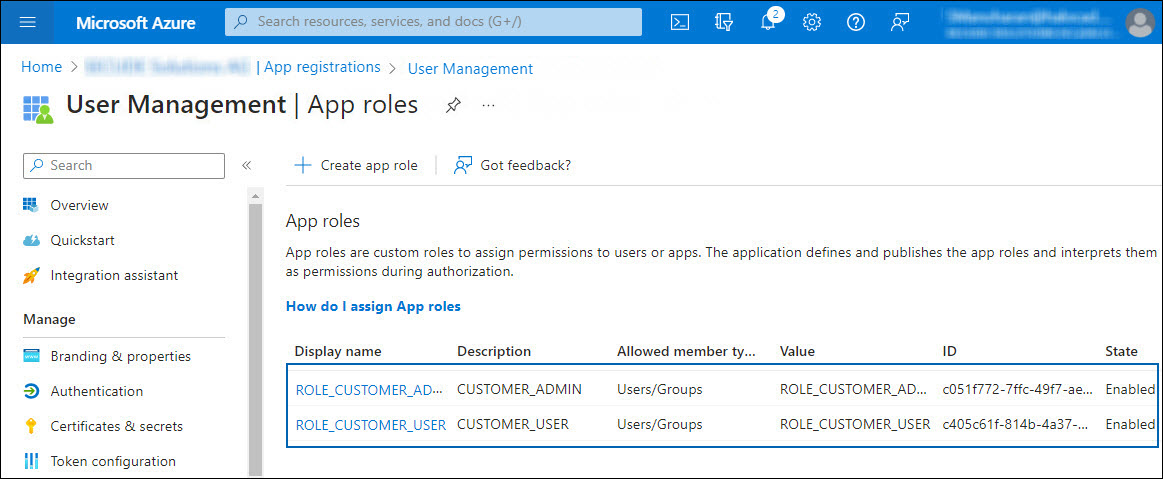
Create Roles
Step 6: Apply Role to Users
-
In the Microsoft Entra ID pane, select Enterprise applications.
-
The Enterprise Applications page will appear with a list of existing Service Principals in your tenant.
-
In the search box, enter your application name. In this example, User Management is entered in the search box.
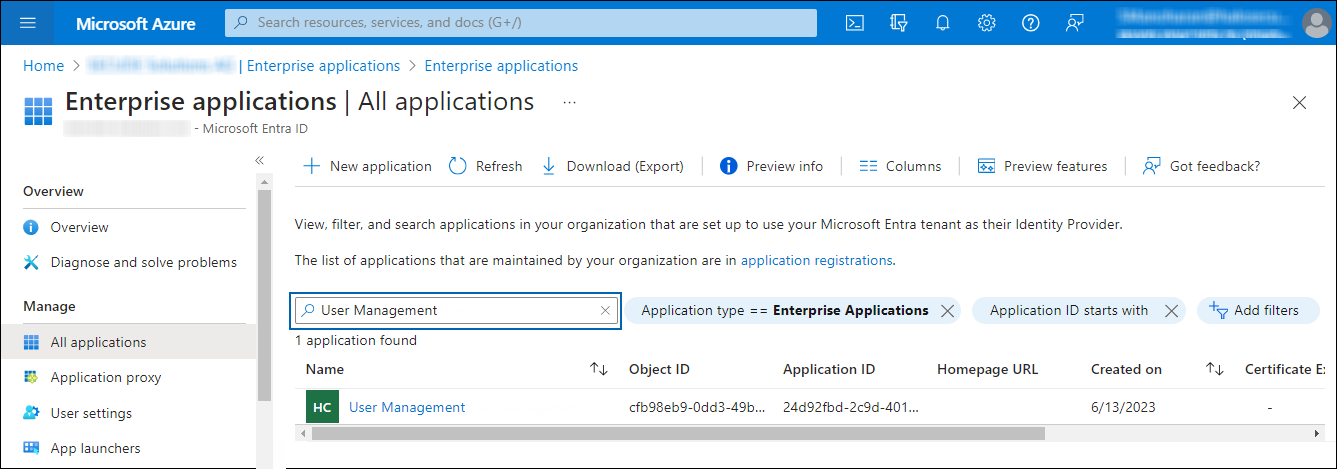
Apply role to user #1
-
The search result will be displayed.
-
Now, click on the link from the list. The Overview page of the application will appear:
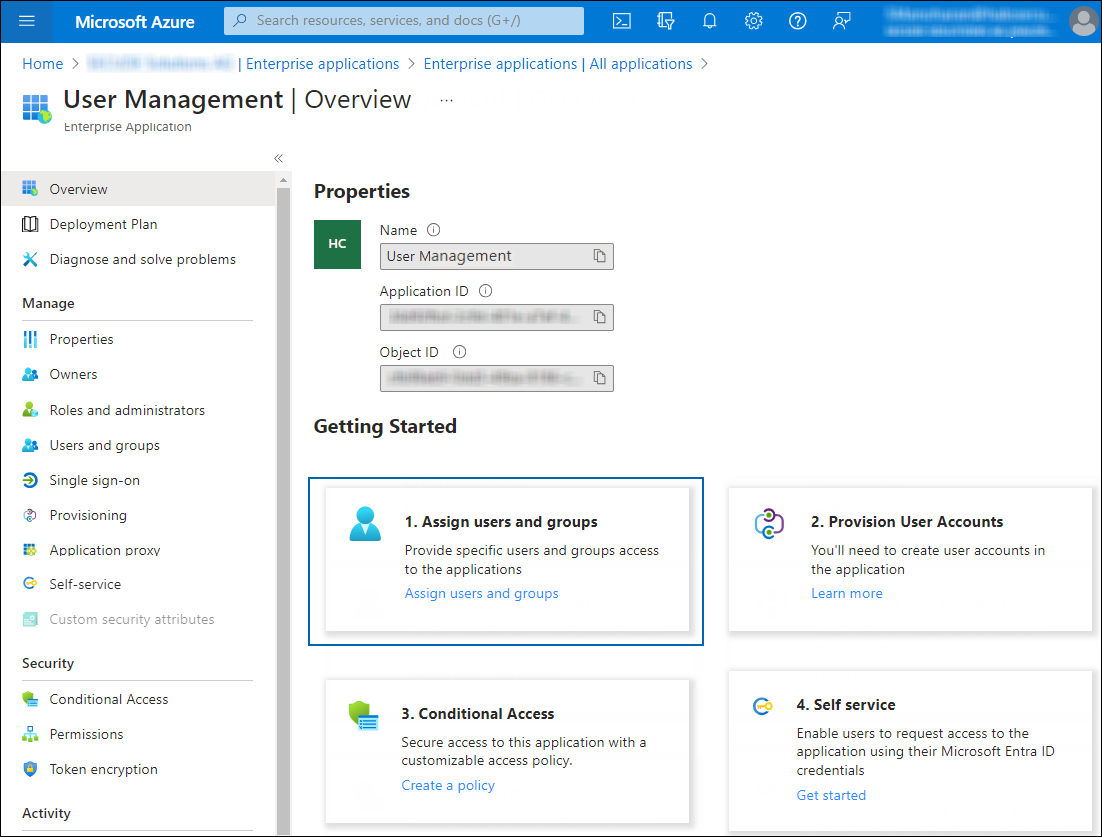
Apply role to user #2
-
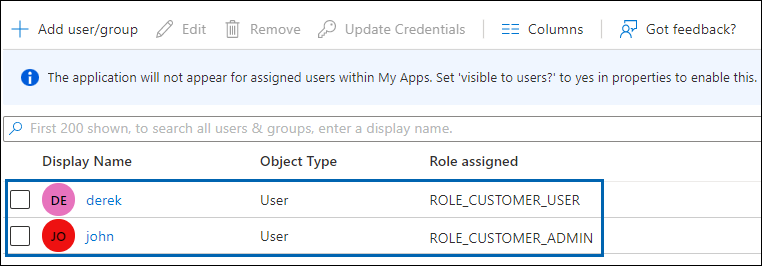
Click Assign users and groups. The Users and groups page will appear.
-
On the Users and groups page, click Add user/group. The Add Assignment page will appear.
-
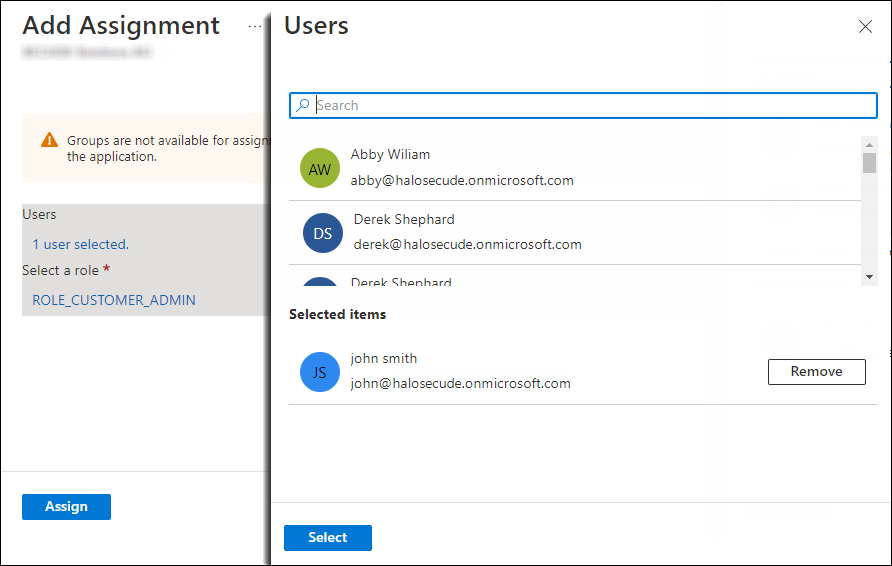
Under Users and groups:
-
Click None Selected and search for a user (for example, John).
-
Click Select and Assign.
Adding users
-
-
Under Select a role:
-
Click None Selected and search the role ROLE_CUSTOMER_ADMIN.
-
Click Select and Assign.
Apply role to user #3
-
-
Repeat the above steps for the role ROLE_CUSTOMER_USER (for example, user Derek is assigned to this role).
-
-
Related tasks: After the initial configuration of the HaloENGINE Admin Portal, you need to use the above values to configure tenant details. Please refer to the section "Phase 10. Tenant Configuration".
Forwarding Logs to Microsoft Sentinel
Microsoft Sentinel is a scalable, cloud-native security information and event management (SIEM) that delivers an intelligent and comprehensive solution for SIEM. Microsoft Sentinel provides cyberthreat detection, investigation, response, and proactive hunting, with a bird's-eye view across your enterprise. To begin using Microsoft Sentinel, the log analytics workspace must be configured.
Configuring Microsoft Sentinel
The explanation given in this section is only meant to serve as an example. Only the fundamental procedures for creating a workspace are shown in this section. Please refer to the Microsoft documentation for a detailed explanation of the configuration and settings. The information in the Microsoft documentation overrides any information published in this section.
Prerequisite: Ensure that you have permission to perform this procedure.
-
Log in to the Microsoft Azure portal.
-
On the search bar, type Microsoft Sentinel. As you start typing, the list filters according to your input.
-
Select Microsoft Sentinel from the search results.
-
The Microsoft Sentinel page will appear. Here, you need to click Create from the top of the page.
-
On the Add Microsoft Sentinel to a workspace page, click Create a new workspace.
-
The Create Log Analytics Workspace page will appear as shown below, and you must enter the required details on this page.
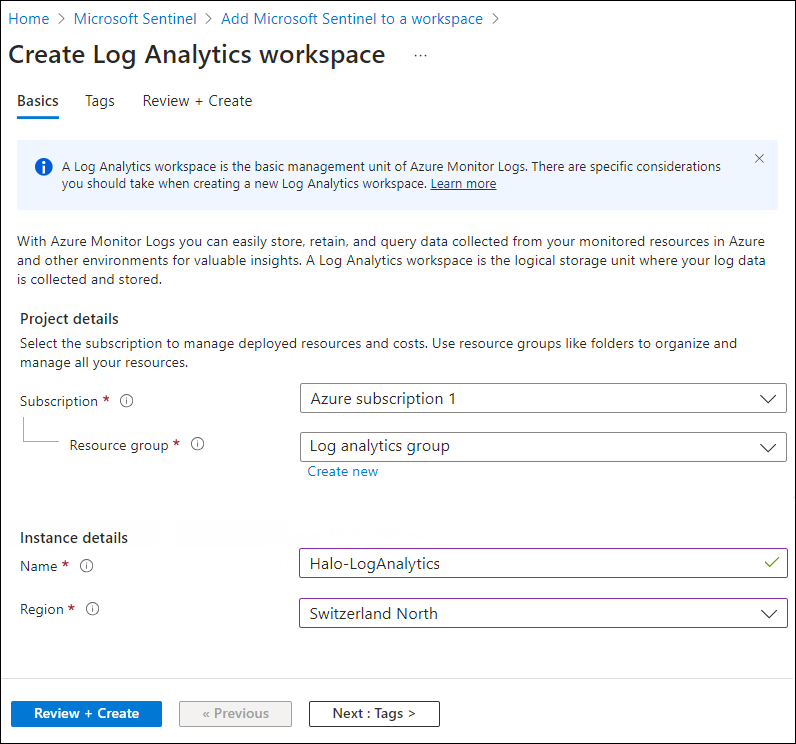
Workspace #1
-
Select a resource group from the list.
-
Provide a name for your workspace.
-
Choose a region from the list.
-
-
Once that is done, you can leave other options as-is, and then click on Review + Create and finally click on Create after the validation.
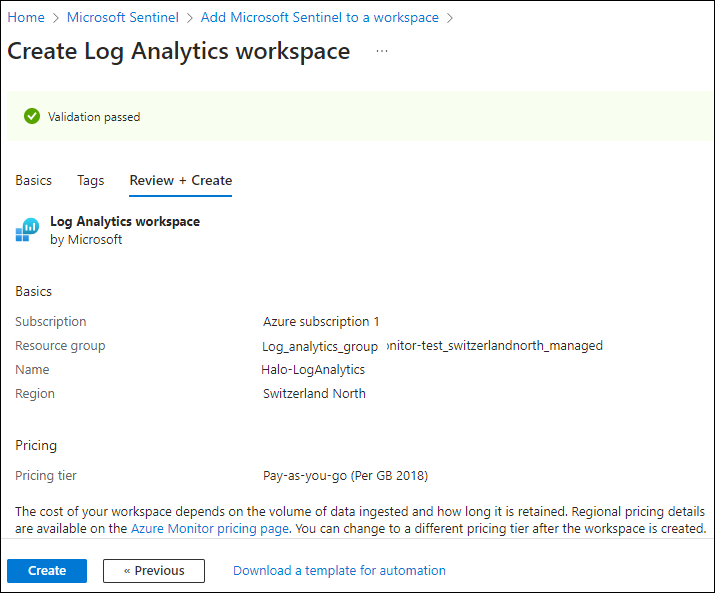
Workspace #2
-
The new workspace will be listed as follows:
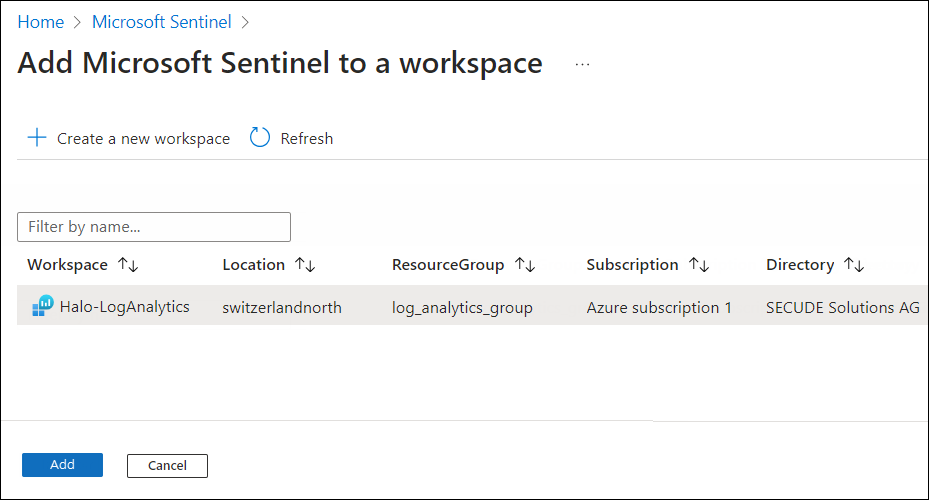
Workspace #3
-
Select the new workspace and click Add. The Add button will only be enabled if you have the required permission.
-
The connection between Microsoft Sentinel and Log Analytics is successfully created.
Fetching Key Details from Log Analytics Workspace
This section describes how to obtain the Log Analytics agent keys. Log Analytics agent keys are required to transfer logs from the HaloENGINE Admin portal to Microsoft Sentinel.
-
On the search bar, type Log Analytics workspace. As you start typing, the list filters according to your input.
-
Select Log Analytics workspace from the search results.
-
The Log Analytics workspace page now includes the new workspace you created in the previous section.
-
Select the new workspace.
-
In the menu, select Settings > Agents.
-
The page will provide the necessary information, including the Workspace ID and Primary Key.
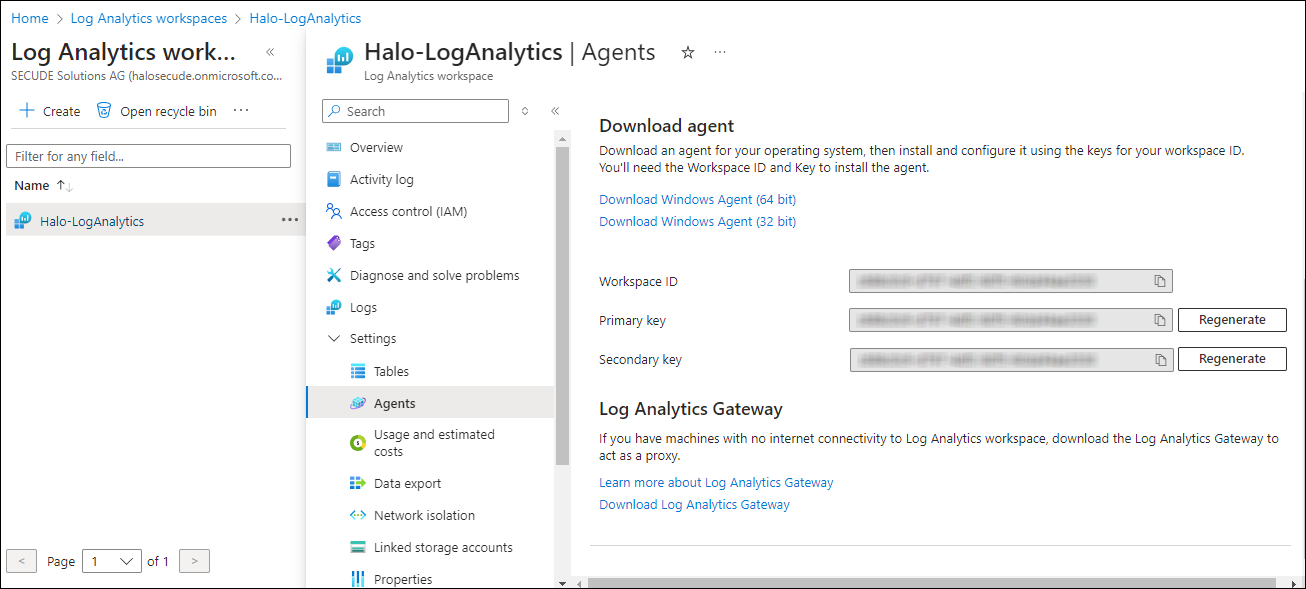
Workspace #4
-
In a text editor (such as Notepad), copy the value of the Workspace ID and Primary key and save it for configuring the “Sentinel Log” in the HaloENGINE Admin portal.