
This section describes the portal features and how to get started with the HaloENGINE Admin Portal.
Features
-
Single Point Management: You may manage all of your systems from the HaloENGINE Admin portal.
-
Role-based access controls and security features: The HaloENGINE Admin portal supports role-based authentication and authorization.
-
User-Friendly UI: The HaloENGINE Admin site offers a user-friendly user interface that is simple to understand with minimal knowledge of the platform.
-
Business logic: The classification engine makes all decisions in terms of business logic.
-
Dashboard: A business-friendly dashboard that displays high-level information in a single view, including live and historical log data from HaloENGINE monitor logs.
Reload and Restart
There will be references to both "reload" and "restart" throughout this manual. To avoid confusion, it's important to be familiar with these two terminologies.
What is meant by reload?
Reloading will instruct the service to reload its configuration files while leaving the current process running. It is considerably faster. When you make changes, such as updating or changing any rules, you must click the 'Reload Configuration' button for the change to take effect.
What is meant by restart?
A restart will instruct the service to stop operating completely and then resume. Restarting the HaloENGINE Tomcat service takes some time. The HaloENGINE Tomcat service must be restarted after any modification to the license activation, certificate, tenant configuration, SAPJCo update, import settings, or Remote Settings.
How to Restart the HaloENGINE Tomcat Service
-
Open the Start screen, type
services.msc, and press Enter or Press theWindows Key+R, type inservices.msc, and press Enter. -
Locate the Display Name - Tomcat 9.0 for HaloENGINE.

Restarting Tomcat Service
-
Click Restart and wait for a few minutes.
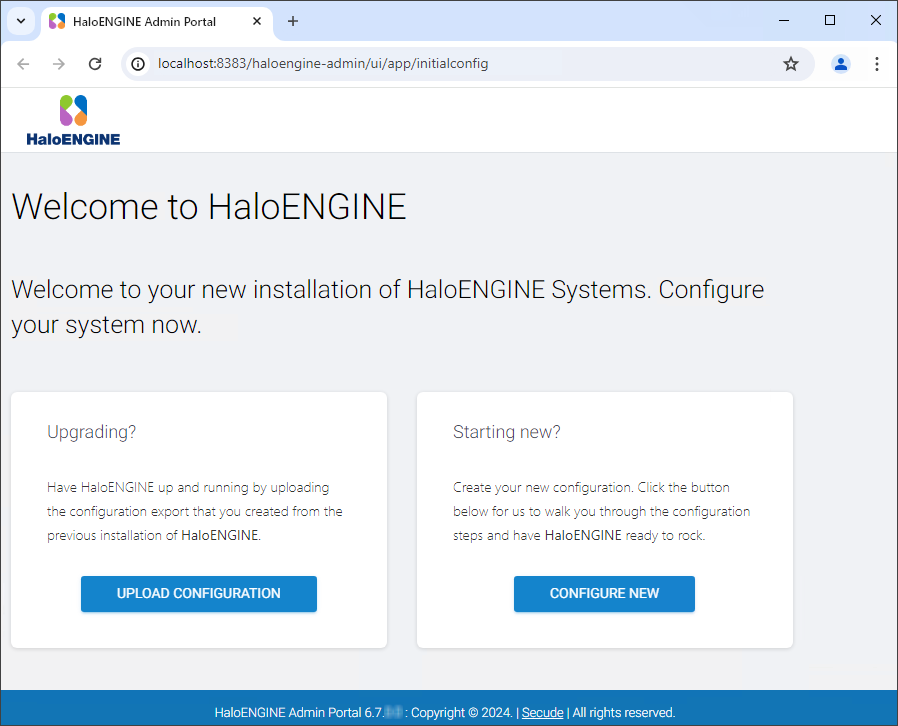
Welcome Page
A welcome page is displayed after clicking the installer link. It appears just the first time you configure the portal.
Welcome page
HaloENGINE provides the following options:
-
Upgrade: Moving to a newer version while keeping the existing configuration file. Please refer to the section “Upgrading (Uploading Existing Configuration File)”.
-
Starting new: Creating a new configuration file to set up HaloENGINE. Please refer to the section “Starting a New HaloENGINE”.
Upgrading (Uploading Existing Configuration File)
Prerequisite: Make sure you have exported the configuration zip file from the pre-existing HaloENGINE.
Follow the instructions below to upgrade:
-
Click Upload Configuration and then click Existing Config Zip File.
-
Select your installation mode − Single Customer/Multi-Customer.
-
You will notice that an attachment button appears to select the file.
-
Click the button and choose the
HaloENGINE-admin-config.zipfile from the Open Windows dialog box. -
The name of the zip file is displayed on the page.
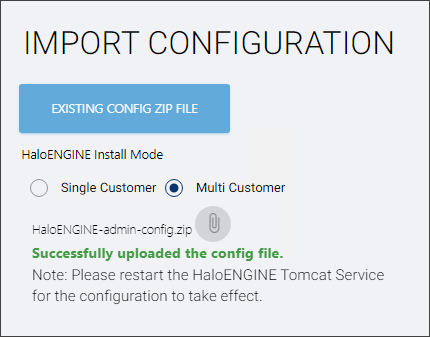
Uploading existing configuration file
-
You will receive a confirmation message after uploading the configuration file.
-
Restart the HaloENGINE Tomcat Service.
-
The next step is to set up the classification engine. Please refer to the section "Setting Up Classification Engine".
Reset Password
If your administrator password in the previous version is less than 12 characters, you must reset it according to the current password policy. To know how to reset the password, refer to the section “Reset Administrator Password”.
Starting a New HaloENGINE
If this is your first time installing HaloENGINE, click Configure and proceed as instructed below:
Step 1. Logging into Portal for the First Time
-
On the Initial Setup page, you must create administrator credentials to access the HaloENGINE Admin Portal.
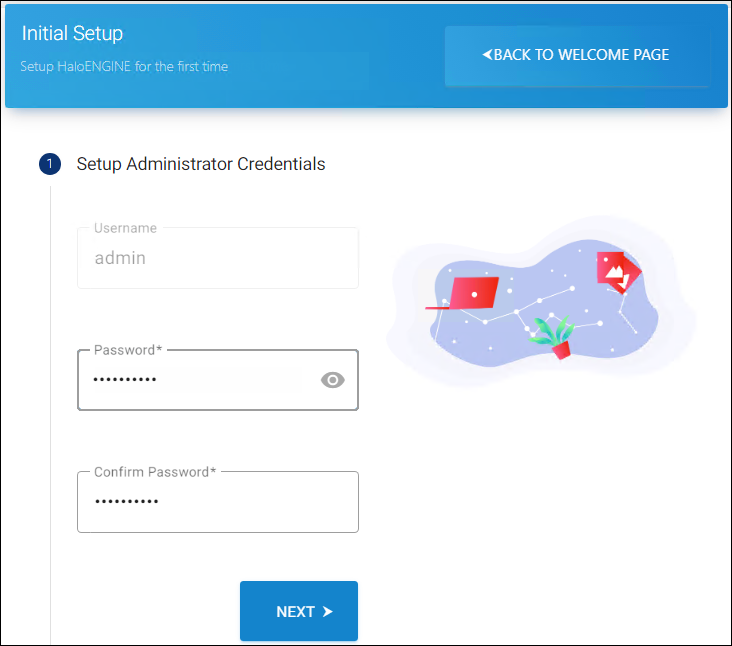
First time logging the page
-
As per policy, enter a strong password, then reenter it. The password-eye icon allows you to reveal or conceal your password.
-
Click Next.
Password Policy
Be sure to use a strong, but memorable password. If you forget the password, HaloENGINE offers a way to reset it. To know how to reset the password, refer to the section “Reset Administrator Password”.
-
Passwords must be between 12 to 30 characters long
-
Password should not contain space
-
A minimum of 1 uppercase letter [A-Z]
-
A minimum of 1 lowercase letter [a-z]
-
A minimum of 1 numeric character [0-9]
-
A minimum of 1 symbol (@+%_-&#?|{}:;!*^$'[ ]" < > \ /)
For exampleHaloE$7Tg}@!
Step 2. HaloENGINE Basic Configuration
-
The following page is used to configure the basic settings.

Basic Configuration Page
-
Default Customer Name—In single customer mode, the default customer name is
halo_customer. After portal initialization, you can change this default customer name. -
Select Log level—Choose a type of error log level (INFO/DEBUG/ERROR/WARN/ALL).
-
Location of HaloENGINE Configuration Files—Enter the configuration file's path. The default path is
C:\Program Files\Secude\HaloENGINE\config. -
HaloENGINE System Log Location—Enter the file path for the HaloENGINE system log. The default path is
C:\Program Files\Secude\HaloENGINE\log. -
HaloENGINE Log Retention Period in day(s)—Set the duration for which the Server logs should be available. The log retention period is determined by the days you specify here. Any event older than your retention period will be deleted. For example, if you specify it as 10, logs older than 10 days are deleted. Range: 0 to 90 days.
-
Tomcat Log Retention Period in day(s)—Specify how long the Tomcat logs should be available. Range: 0 to 90 days.
-
Enable Remote Access—To enable access to configure the HaloENGINE Admin portal remotely (via IP), click on the slider button. Note: Please restart the HaloENGINE Tomcat service if you have made changes in the Configure Remote Access property.
-
Click Next.
Step 3. HaloENGINE Configuration
-
Your server's details, such as the fully qualified domain name, IP address, and default port number, will be filled in automatically on this page. If needed, you can modify the port number. Note: Once the port has been configured, it cannot be changed. Therefore, kindly make the necessary modifications. If you still want to modify the port, back up the configuration and then remove the HaloENGINE. Reinstall the HaloENGINE, then modify the port.
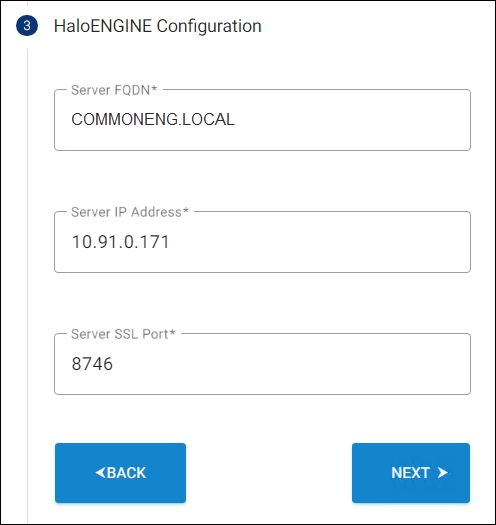
Configuration page
-
Click Next.
Step 4. Completion Page
-
This is the final page of the configuration.
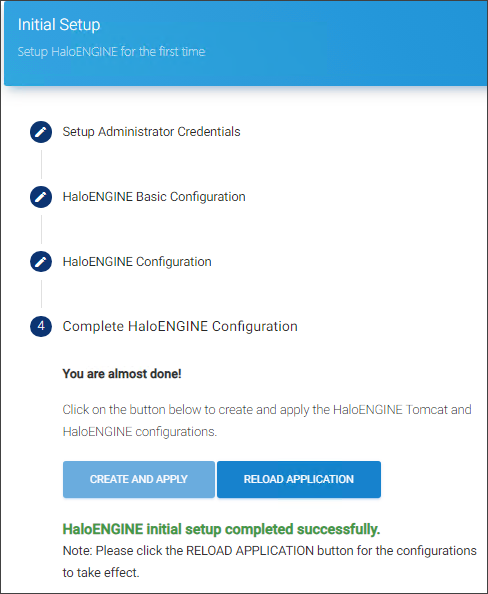
Final configuration page
-
Click Create and Apply to create
config.propertiesfile and update thehc-servlet.xmlfile. -
Click Reload Application to update the changes done. After reloading, the page will redirect to the login page.
-
These settings can always be changed through the portal as detailed in the section "System Configuration".