
Introduction
As a part of the digital process chain, CAD files are highly valued, such as drawings, blueprints, and prototypes that need to be shared with suppliers, partners, or vendors on a day-to-day basis. There is always a high risk of data being lost or stolen, knowingly or unknowingly, when collaborating with suppliers or partners. With Secude’s HaloCAD for Viewers, you can ensure your design files are secure with persistent access controls without any risk of data getting stolen or lost.
About this Manual
This manual walks you through the process of installing, configuring, and operating HaloCAD for Viewers.
General FAQs
This chapter provides answers to the most frequently asked questions (FAQ). If you have any further inquiries, please contact our sales representative or our support team.
-
What can HaloCAD for Viewers offer a user?
HaloCAD for Viewers is a lightweight application to view the protected files in other CAD-Viewer applications with “View only” access to all users who have access to it. -
Is it possible to view all types of CAD files that are protected?
You can only access HaloCAD-protected CAD files that are mentioned as supported file types in the Release Notes. -
What languages are supported by the HaloCAD add-on?
Currently, the HaloCAD add-on only supports the English language. -
What happens if an unauthorized person tries to open a HaloCAD-protected CAD file?
At first, user authentication takes place. It is a process of verifying the identity of the user. If the user fails during the authentication, he/she will be prompted with an error message and access will be denied.
Quick Start Installation Summary
The following image shows the high-level idea of setting up HaloCAD.
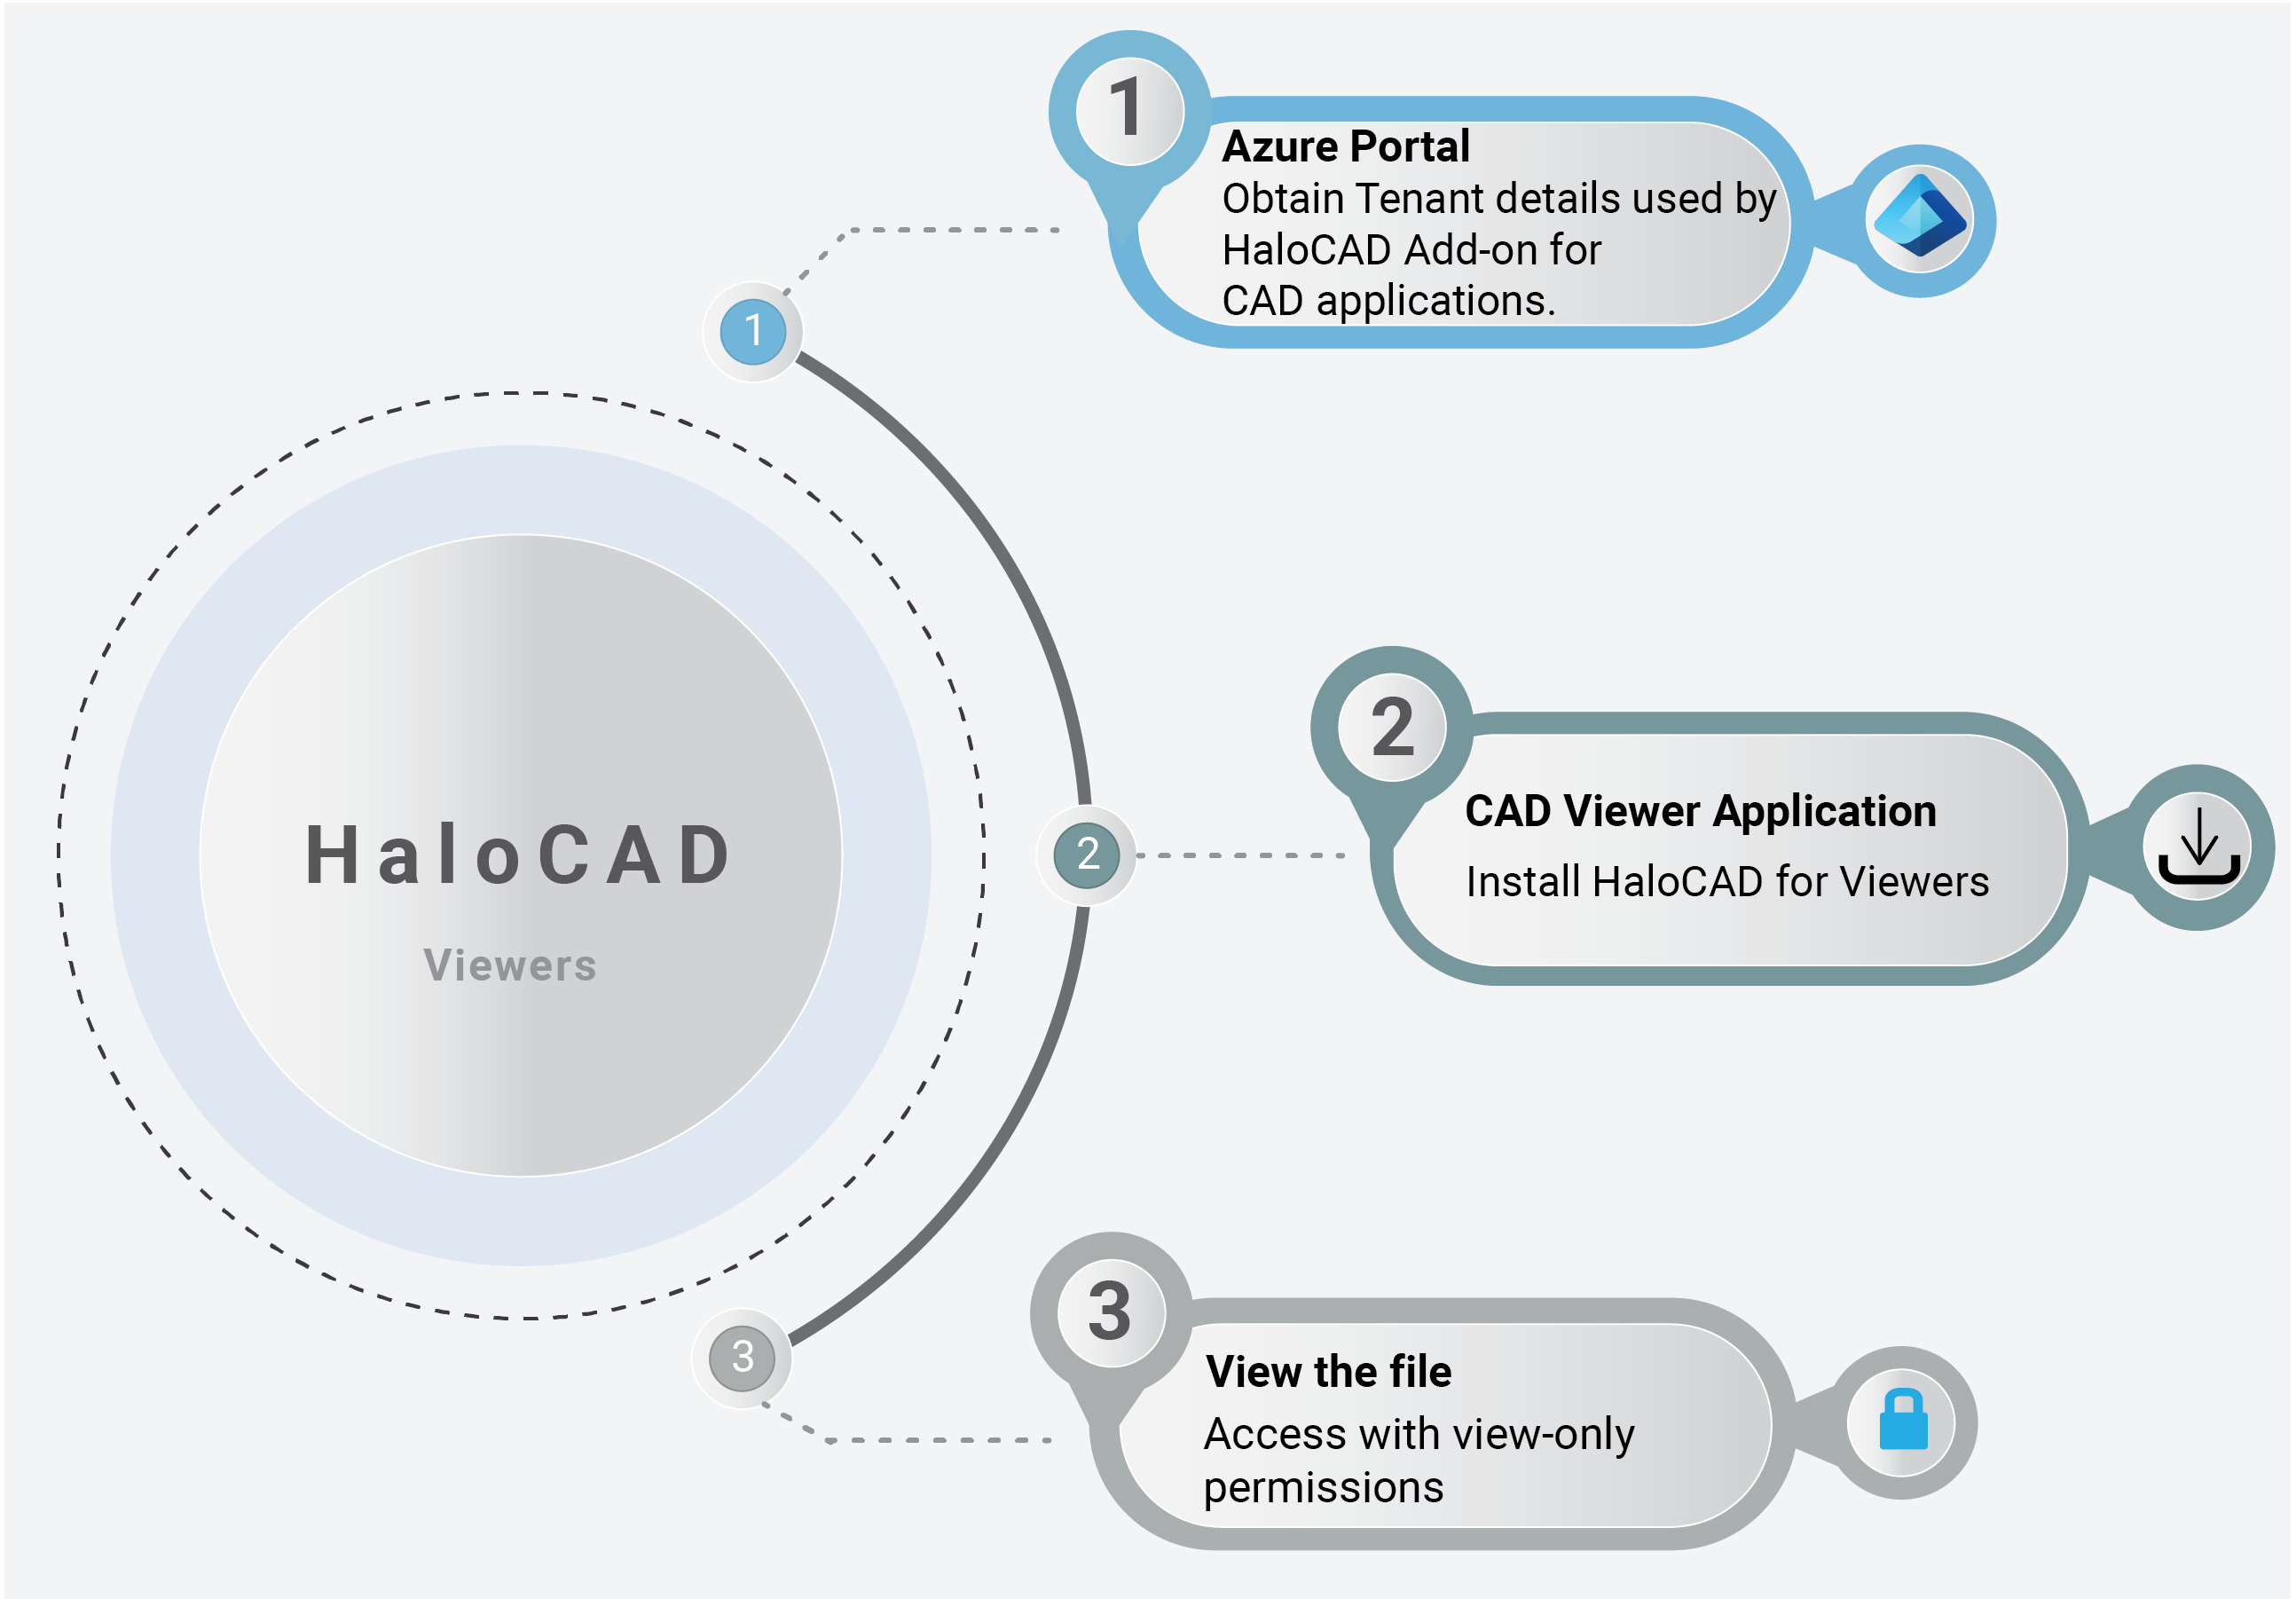
HaloCAD quick start installation steps
Architecture
HaloCAD for Viewers is a lightweight application designed to view HaloCAD-protected files in other CAD-Viewer applications with “View only” access to all users who have access to it. This application is useful for suppliers or partners who need to access HaloCAD-protected models or drawings in their environment. The high-level architecture of HaloCAD for Viewers is illustrated in the following figure.
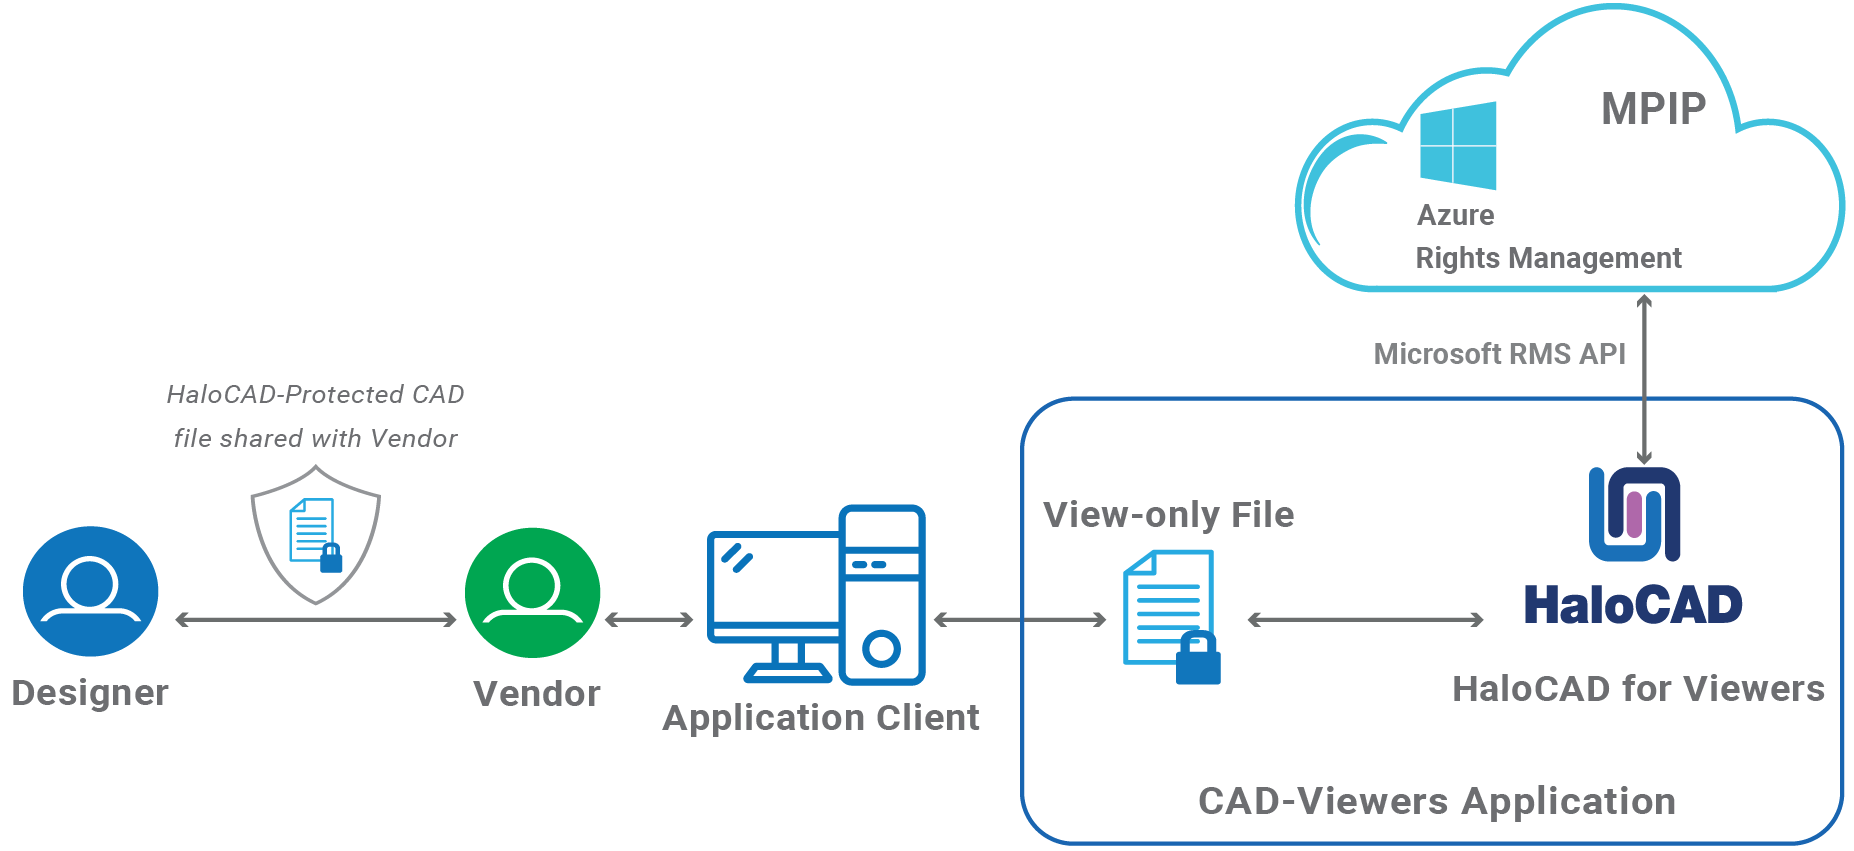
HaloCAD for Viewers
System Requirements
The following system requirements table specifies the minimum and recommended technical specifications, such as software and network resources, necessary to run the product.
|
Components |
Details |
|---|---|
|
Supported Operating Systems |
Windows 11 or above with updates installed. |
|
Supported File Types |
Note: Extensions will be evaluated and added to the list in response to user requirements. |
|
Office 365 Subscription |
|
Requirements
Recommended URLs, addresses, and ports for MPIP
MIP SDK doesn't support the use of authenticated proxies. So, make sure you set the Microsoft 365 endpoints to bypass the proxy. View a list of endpoints at “Microsoft Online Documentation”. However, Microsoft recommends the following:
|
Addresses |
Ports |
|---|---|
|
|
TCP 443 |
|
|
TCP 443, 80 |
|
For event logging
|
TCP 443 |
|
National Cloud |
Microsoft Entra ID authentication endpoint |
|
Microsoft Entra ID for the US Government |
|
|
Microsoft Entra ID (global service) For details on Microsoft Entra ID endpoints, please refer to “Microsoft Online Documentation”. |
|
Recommended endpoints
Secure Installation (Recommended)
As a best practice, any application secrets should not be shared with end-users, third parties, or any trusted vendors. However, to avail of HaloCAD features, there is a need to share such sensitive information for a successful installation.
To overcome this challenge, Secude offers an admin utility tool that can write and encrypt data including Azure application specifics (Application ID, Tenant ID, and Redirect URI), and Cloud type details in an encrypted configuration file. It uses the RSA algorithm for cryptography, allowing only the HaloCAD installer to access the configuration file with the private key during the initialization process, effectively masking the Initialization screen from the user.
Thus, the administrator can share this encrypted JSON file with internal/external parties without disclosing the original tenant details.
HaloCAD Admin Utility Tool
The HaloCAD product package comprises an additional component—hc.admintool.exe.
Prerequisites: Before executing the admin tool, make sure you have the necessary information.
-
Azure application details for initialization
-
Cloud type details
How to Encrypt the Configuration File
-
From the product package, move the admintool folder to your preferred location. For example,
C:\Users\superdocs\Desktop\admintool. -
Open the Command Prompt with elevated rights (Run as Administrator).
-
Navigate to the directory of the admintool folder and type
hc.admintool.exeand press Enter. -
Enter the required details. For example,
Cloud type: Commercial -hc.admintool.exe v6ca776-c74e-437d-98ef-662ecb5751tt https://localhost 9c1cfc28-1ec6-44ea-bec6-e3492ef0cd16 Commercial
Cloud type: US_DoD -hc.admintool.exe v6ca776-c74e-437d-98ef-662ecb5751tt https://localhost 9c1cfc28-1ec6-44ea-bec6-e3492ef0cd16 US_DoD
Cloud type: Custom -hc.admintool.exe v6ca776-c74e-437d-98ef-662ecb5751tt https://localhost 9c1cfc28-1ec6-44ea-bec6-e3492ef0cd16 Custom https://api.aadrm.com https://dataservice.protection.outlook.com -
The output window will now look as follows:
.png?cb=4116417c248497ca6acca79a6bc44dc4)
Admin tool output
-
Results:
-
The
hc.conf.jsonfile will be replaced by an encrypted file namedhc.conf.enc. -
You can now share the configuration file with external users. With this file, users can install the HaloCAD add-on on their workstations seamlessly, without requiring any additional configuration details.
-
Configuration files created with earlier releases are not supported. Always use the admin tool included in the installation package to generate a new configuration file.
-
What to do next
-
Place the encrypted file
hc.conf.encalong with the HaloCAD installer. -
To begin the interactive installation, double-click the installer and follow the instructions as mentioned in the section “Installation Modes”.
-
By reading data from the
hc.conf.encfile, the installer bypasses the "Initialization" screen where it would ask for Azure details.
Installation Modes
You can install the HaloCAD for Viewers in the following modes:
-
Graphical Mode
Graphical mode installation is an interactive, graphical user interface-based method that is driven by a wizard. -
Silent Mode
Silent-mode installation is a non-interactive method of installing the add-on using command lines. -
Via System Center Configuration Manager
With System Center Configuration Manager (SCCM), the add-on is deployed on the targeted computers across your enterprise.
Graphical Mode
Before you begin
The following prerequisites must be met:
-
A user who installs HaloCAD for Viewers must have administrator rights.
-
Make sure your Microsoft Entra tenant information is ready to enter when the setup process prompts for a manual installation. Alternatively, use
hc.conf.encfor a secure installation.
Installation Procedure
Install the HaloCAD for Viewers using the GUI-based setup program provided in the installation package.
-
To begin the interactive installation, double-click the installer
HaloCAD_Viewers_Shield_Setup.exefile. -
Depending on your Windows security settings, you may get a warning such as "Do you want to allow the following program to make changes to this computer?". If you get this security warning, click the Yes button to continue the installation.
-
When the installer starts, the Startup dialog appears, followed by the Welcome dialog.

Startup dialog
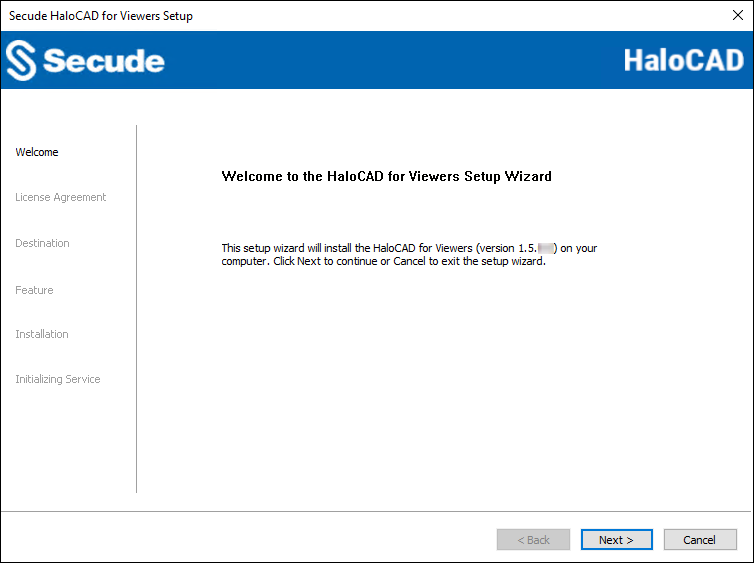
Welcome dialog
-
Click Next to continue the installation.
-
The End-User License Agreement (EULA) dialog appears.

End-User License Agreement dialog
-
Read the End-User License Agreement. If you agree, select I accept the terms in the License Agreement, and click Next to continue.
-
The destination folder selection dialog appears:
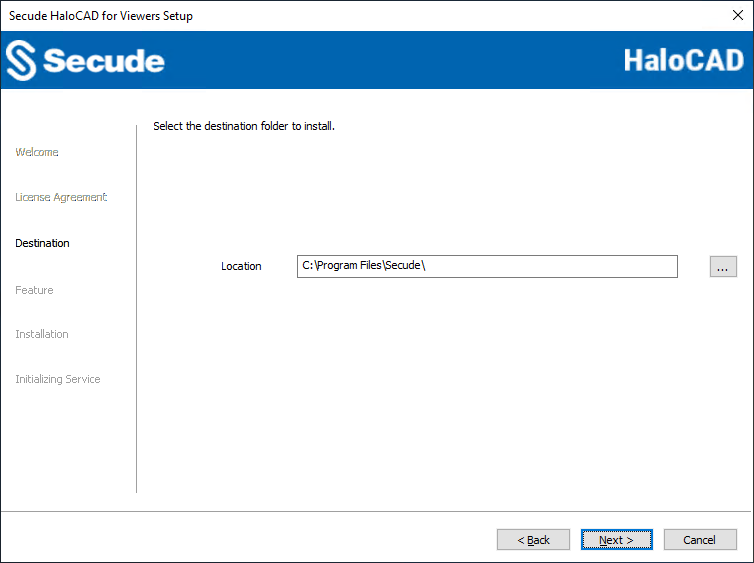
Destination folder selection dialog
-
By default, application files are stored in the program files directory (
C:\Program Files\Secude\). If you would like to choose an alternate location, click the Browse button and select your location preference. When you are finished, click Next. -
The feature selection dialog appears.
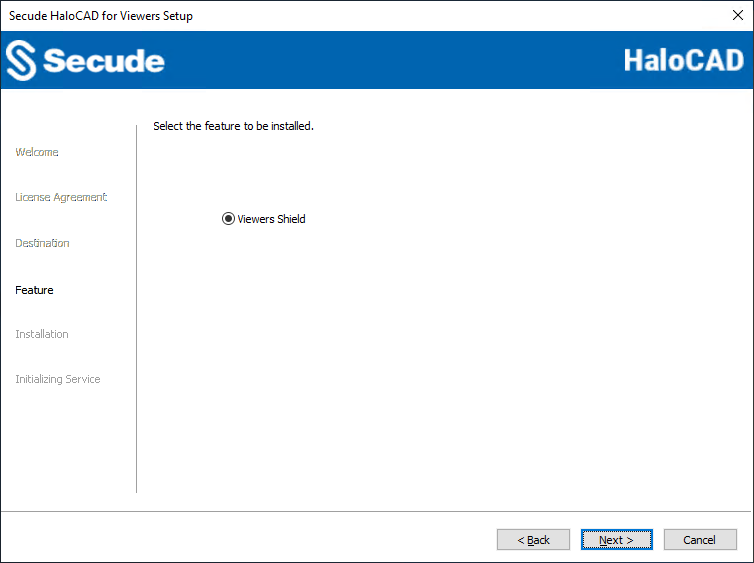
Feature selection dialog
-
The Viewers Shield option is selected by default.
-
To review or modify any installation settings, click Back to return to the previous screens. If you are ready to proceed, click Next to begin installing the application.
-
The installation begins, and the progress is displayed in the dialog.
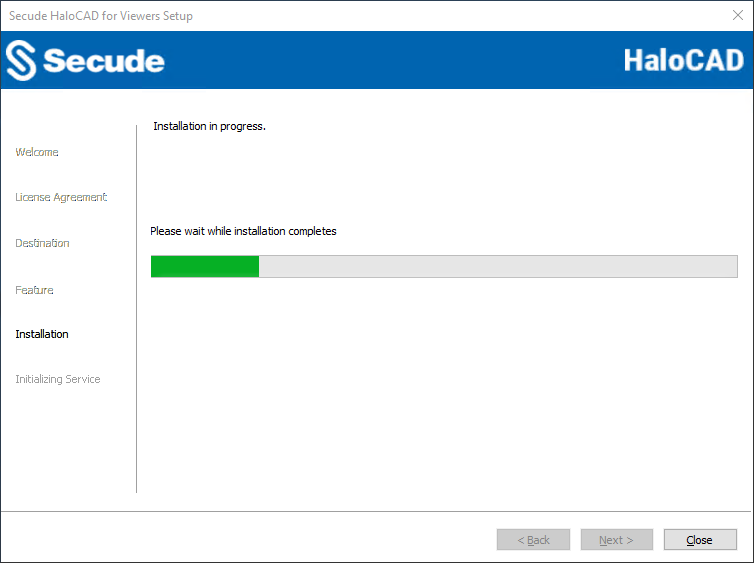
Installation progress dialog
-
When the installation is complete, a message appears confirming that the add-on has been successfully installed. Click Next to proceed.
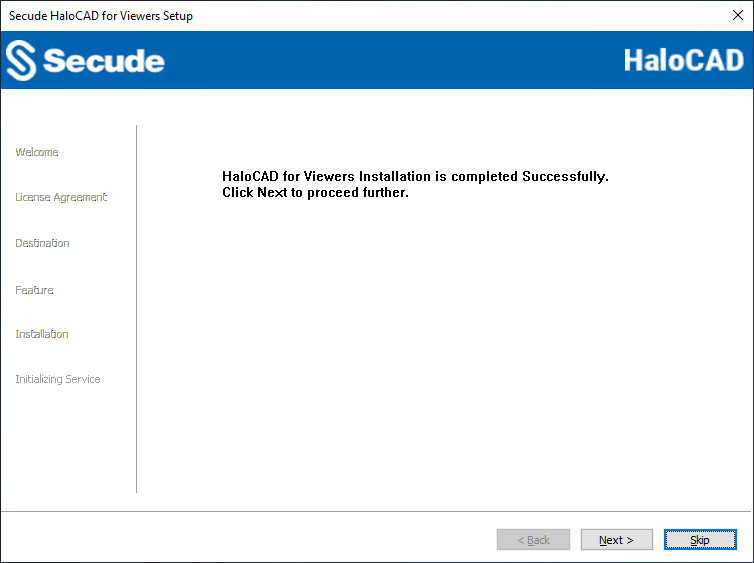
Installation completed dialog
-
The initialization dialog appears. To avoid connectivity issues, make sure to enter the correct Azure application registration information in the screen below. Note: If you have included the
hc.conf.encfile with the installer, the following initialization screen will not appear, and you will just see the completion dialog. The initialization screen appears only if thehc.conf.encfile is not included in the installer folder.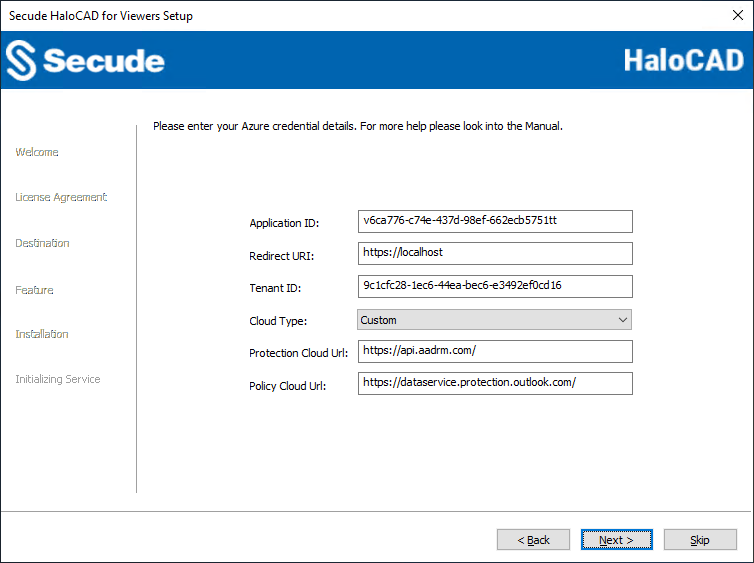
Initialization dialog
-
Application ID: Enter the unique identifier of your registered application. For example,
v6ca776-c74e-437d-98ef-662ecb5751tt -
Redirect URI: Enter the URI which was provided when registering the native application in the Azure portal. For example,
https://localhost -
Tenant ID: If the registered application is Single tenant, you need to enter the globally unique identifier of your tenant if not, you can leave it empty. For example,
9c1cfc28-1ec6-44ea-bec6-e3492ef0cd16. -
Cloud Type: By default, Commercial will be set. However, based on your Azure subscription and configuration, you can change the cloud type from the list — Commercial / Custom / Germany / US_DoD / US_GCC / US_GCC_High / US_Sec / US_Nat / China_01. In the case of Custom cloud type, you need to enter the appropriate URLs in Protection Cloud URL (for example,
https://api.aadrm.com) and Policy Cloud URL (for example,https://dataservice.protection.outlook.com). -
Click Next.
-
-
Once the initialization is completed, you will get the success message as shown below.
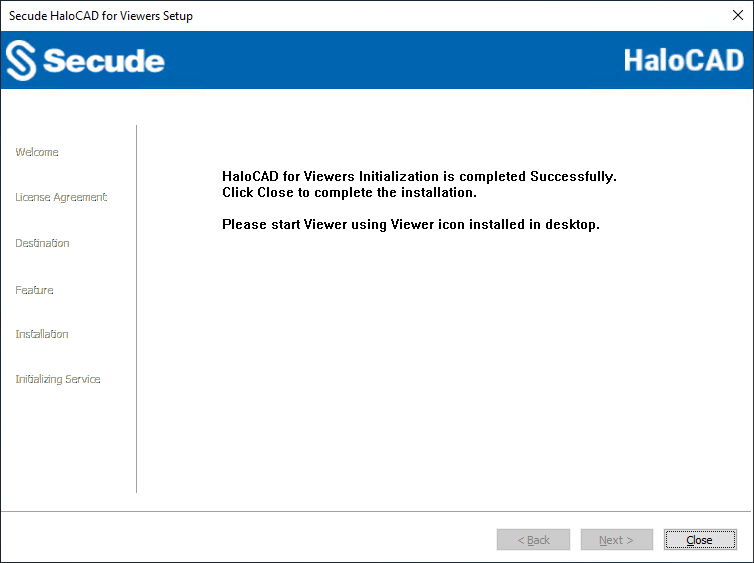
Initialization completed dialog
-
Click Close to close the installation wizard.
-
After the installation, a shortcut icon

Post-installation steps
-
To launch the application, you need to double-click on the HaloCAD_Viewers icon or open the Start menu and go to All apps > select HaloCAD_Viewers. You will see the startup dialog as shown below:

Viewers Startup dialog
-
If the machine has restarted or a new login session has started, the Viewers application will start automatically.
-
Double-clicking on the HaloCAD_Viewers icon when the Viewers application is already running, HaloCAD will display a message as “HaloCAD for Viewer already running”.
-
After logging into the HaloCAD session and signing in through the Microsoft Account Sign-in Assistant, you can access the following log files
-
HaloCAD logs at
%AppData%\Roaming\Secude\HaloCAD\viewers\halocad.log -
MIP SDK logs at
%AppData%\Roaming\Secude\HaloCAD\viewers\mip\logs\mip_sdk.miplog
-
Registry Settings
Prerequisite: Make sure to back up the registry before making any changes, in case you need to restore it later.
Modifying the Registry
The following section explains how the registry is used to store settings related to HaloCAD. To modify the registry value, open Registry Editor, navigate to this path Registry Root Directory = KEY_LOCAL_MACHINE\SOFTWARE\Secude\HaloCAD for Viewers, locate the registry key you want to update, and modify it as needed. You can also view general configuration information for HaloCAD in the same registry path. Note: Only the registry entries listed in the table below should be modified.
|
Name |
Default Value |
Type |
Description |
|---|---|---|---|
|
log_enable |
|
REG_SZ |
Defines the status of the log.
|
|
log_level |
|
REG_SZ |
Log level information is logged in the
|
|
log_purge |
|
REG_SZ |
It indicates removing files older than a defined time frame. By default, the log files older than 7 days will be deleted. |
|
log_rollover |
|
REG_SZ |
Defines the log rollover time, i.e., a new log file will be generated based on the specified minute(s). By default, a new log file will be generated every 100 minutes. |
|
mipallowpii |
|
REG_SZ |
Enable or disable the visibility of Personally Identifiable Information (PII) such as Email names and IP addresses in the MIP SDK logs.
|
Registry value
Next Steps
HaloCAD for Viewers has been successfully installed and initialized in your environment. You may now proceed to open protected files using the supported CAD Viewer applications. For more information, please refer to the section “Operating Instructions”.
Silent Mode
In addition to the graphical mode, HaloCAD for Viewers can be installed in silent mode, which does not display a user interface and requires no user interaction. This provides a convenient way to streamline the installation by executing the command once.
-
Open the Command Prompt with elevated rights (Run as Administrator).
-
Navigate to the installer directory.
-
To know the list of options available in silent mode, follow the steps given below:
TypeHaloCAD_Viewers_Shield_Setup.exe -help
PressEnter
Output
...
HaloCAD_Viewers_Shield_Setup.exe [-install [-viewersshield] [-dir <destination_directory>] <ApplicationID> <Redirect URI> <TenantID/Name> <Cloud Type ("Commercial"|"Custom"|"Germany"|"US_DoD"|"US_GCC"|"US_GCC_High"|"US_Sec"|"US_Nat"|"China_01"|"")> [(if Custom) <Protection Cloud Url> <Policy Cloud url>] ]
For Silent Mode Installation, if ENC file already exists in the same location
HaloCAD_Viewers_Shield_Setup.exe [-install [-viewersshield] [-dir <destination_directory>]
HaloCAD_Viewers_Shield_Setup.exe [-uninstall -silent <true|false>] -
The following is an example to install HaloCAD for Viewers using the command line.
HaloCAD_Viewers_Shield_Setup.exe -install -viewersshield -dir "C:\Program Files\Secude" v6ca776-c74e-437d-98ef-662ecb5751tt https://localhost 9c1cfc28-1ec6-44ea-bec6-e3492ef0cd16 Custom https://api.aadrm.com https://dataservice.protection.outlook.com -
The example below shows how to install the add-on using the
hc.conf.encfile located in the same installation location as mentioned.
HaloCAD_Viewers_Shield_Setup.exe -install -viewersshield -dir "C:\Program Files\Secude" -
Press
Enter. -
Installation is completed.
Via System Center Configuration Manager
The Microsoft System Center Configuration Manager (SCCM) is an administration tool that enables organizations to push out relevant operating systems and applications to Windows users quickly and cost-effectively within its environment.
Using SCCM, the add-on can be installed silently and automatically on the specifically targeted computers across your enterprise.
Before you begin
-
Make sure that you have read the prerequisites given in the section “Graphical Mode”.
-
We recommend familiarizing the best practices for creating a deployment procedure.
-
For information about preparing your environment, please refer to the online Microsoft documentation.
Follow the steps below to deploy using SCCM:
-
This guide assumes that you have already set up a SCCM environment.
-
Use the silent mode commands mentioned in the section “Silent Mode” when needed.
Operating Instructions
This section outlines key operations procedures for working with HaloCAD for Viewers.
How does it work?
At a high level, HaloCAD workflow involves the following steps:
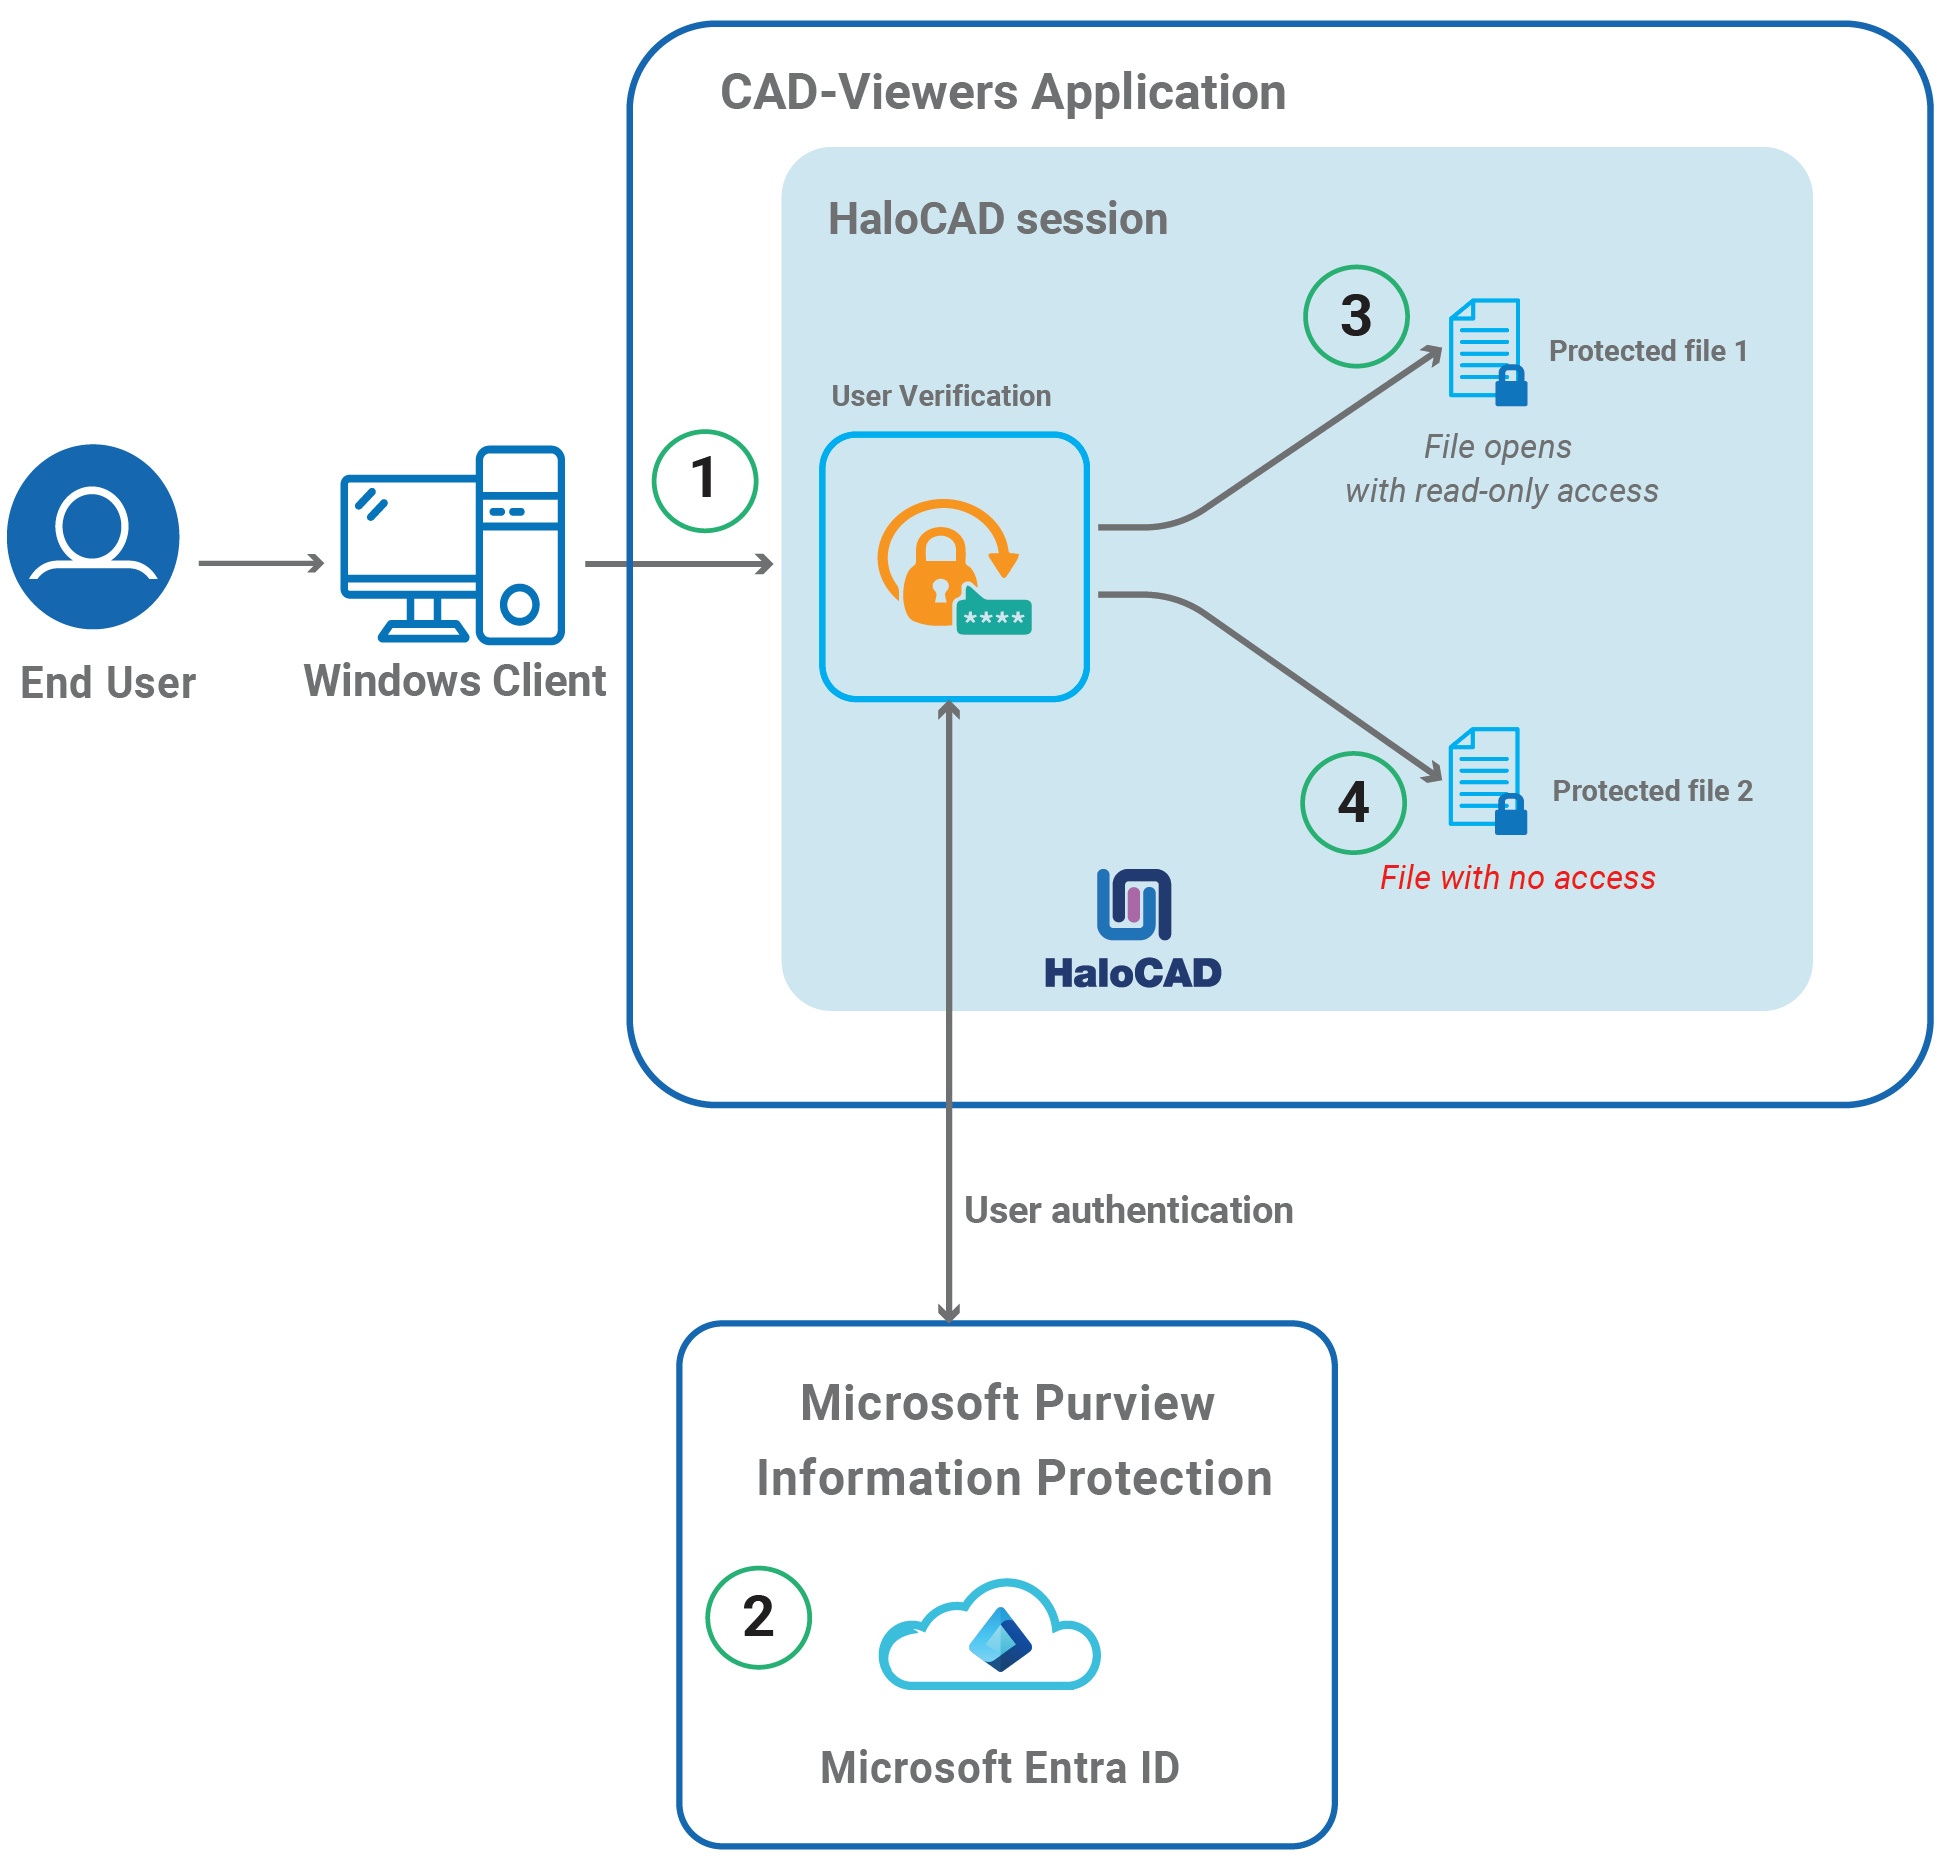
HaloCAD for Viewers
-
The user opens the CAD-Viewers application, HaloCAD loads, and displays the message 'Protected files can be loaded'.
-
The first time logging in to the HaloCAD session requires a connection to Microsoft Azure, which verifies the authenticity of the user. In our scenario, the user intends to open two HaloCAD-protected files (File 1 and File 2) using the CAD-Viewers application.
-
The user is authorized to open File 1 with view-only permission.
-
However, the user does not have sufficient permissions to open File 2, therefore, the file cannot be opened.
How to Open a Protected File in HaloCAD for Viewers?
Prerequisite: Make sure that HaloCAD for Viewers is installed.
-
Open any supported Viewer application. For Example, Teamcenter Visualization Base.
-
HaloCAD for Viewers loads automatically whenever a viewer application is launched, and you will receive the following message.
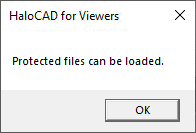
Protected files can be loaded
-
Click OK.
-
Open a HaloCAD-protected file via File > Open. The first time you log into a HaloCAD session, you will need to connect to Azure RMS. As a result, the HaloCAD Microsoft Sign-In window prompts you to enter your login credentials to start a new session.
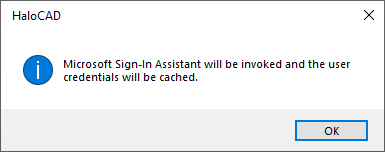
Microsoft Sign-In Assistant invoking message
-
Click OK. Enter your credentials.
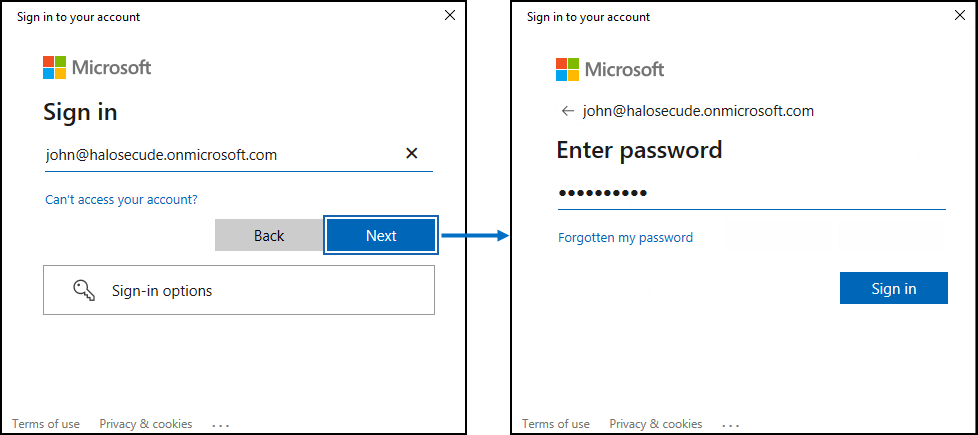
Authentication sign-in prompt
-
Upon successful verification, a connection is established with the Microsoft Entra tenant used during the initialization process.
Result: A view-only version of the file will open.
User Reset
The login credentials are stored in a cache after a user logs into the HaloCAD session, making it easier to access Azure RMS. A user may want to clear the cached credentials for many reasons. To accomplish this, select show hidden icons from the taskbar, then right-click on the Secude icon and choose User Reset.
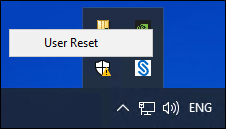
User Reset button
What Happens if You Try to Copy Data or Print Screen?
The most common way to sneak sensitive information out is by copying it (Ctrl + C) and taking a screenshot by Print Screen (PrtScn) or by using the snipping tool. The moment a viewer application is launched, HaloCAD for Viewers is invoked automatically and starts preserving the attributes of both unprotected and protected files. This protection ensures that any attempt to take a screenshot or copy content results in the displayed data being blanked out.
What Happens if You Try to Export or Print?
With "View-only" rights, you can only view the content, and other options are restricted, such as printing. So, when attempting to export via Print > Microsoft Print to PDF, you will receive the following warning message:
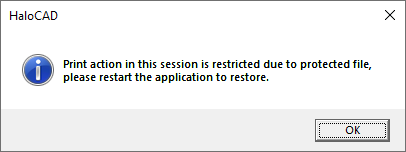
Warning message for the print action
What Happens if You Try to Write or Send the File via Email?
With "View-only" rights, you can only view the content, and other options are restricted, such as Email, Edit, Save, and Save As. So, trying to edit a file of any kind or mail a file via File > Send > Email will result in the following warning message:
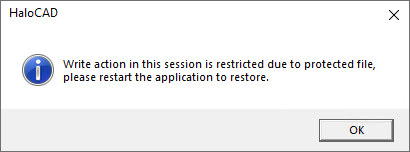
Warning message for the write or email action
Warning message in an unprotected file
You will receive the same warning message while exporting/editing/emailing with an unprotected file if a protected file is already opened in the same session. Here, you need to restart the application and try again.
It is designed in such a way that when opening a protected file, HaloCAD for Viewers does not allow exporting / editing / emailing data, even from an unprotected file. Therefore, please edit a file before opening a HaloCAD-protected file in a HaloCAD session.
Customer Support
Please be ready with the information listed below before contacting our team to help you with the issue you are experiencing. The data that you provide will help us serve you better.
-
Full contact details.
-
HaloCAD build version.
-
Date, time, and description of the error (if possible, provide screenshots).
-
What (if any) third-party products (software or other) were used in conjunction with our product?
-
Any other information necessary to reproduce the error.
Secude offers help and support through
-
Technical support email: support@secude.com
If you choose to contact us by email, please provide your company details and a detailed description of the issue, as well as the log file (if any). Our representative will respond to your email inquiry. -
Phone support: Call +41 41 510 70 70 to talk to our representative to diagnose and resolve the technical problem.
Other resources
Please visit https://secude.com to know about upcoming events, press releases, and to download whitepapers.
Documentation Feedback
Secude understands the importance of technical content when attempting to gain product knowledge and strives to continuously improve product documentation to ensure that users receive the information they want. To provide feedback on the documentation, please send an email to documentation@secude.com. Please include the following details in your feedback:
-
Product name and version
-
Documentation topic
-
Details of the suggestion or error
The technical documentation team will consider your feedback and address it in future documentation updates.
Appendix
This section provides supplemental information.
Enable Support for TLS 1.2 at the Client Workstation for Microsoft Entra ID
To improve the security posture of the tenant and to remain in compliance with industry standards, Microsoft Entra ID stopped supporting the following Transport Layer Security (TLS) protocols and ciphers:
-
TLS 1.1
-
TLS 1.0
-
3DES cipher suite (TLS_RSA_WITH_3DES_EDE_CBC_SHA)
In order for the HaloCAD for CAD add-on to be able to authenticate to Microsoft Entra ID, TLS 1.2 must be activated on the respective client workstation. Please see this Microsoft article to enable TLS 1.2.
Microsoft documentation
The information in the Microsoft documentation overrides any information published in this section.
Secude is not liable for changes to the content of this section because it was extracted from the Microsoft article at the time when the HaloCAD manual was prepared. Do check the most recent updates in this regard from the Microsoft documentation.
In summary, the following steps must be performed:
-
Update the Windows Operating System
-
Update .NET Framework
-
Set the following registry settings:
|
S.No |
Windows Registry |
Values |
|---|---|---|
|
1 |
|
|
|
2 |
|
|
Registry entries
Third-Party Libraries
Third-party software/code is included or bundled with Secude's products according to its appropriate license. Secude conducts testing to make sure the third-party products are compatible with and perform as intended with Secude applications.
The third-party libraries and dependencies used by HaloCAD for Viewers are shown in the table below.
|
Library |
Version |
Source Code |
License Link |
|---|---|---|---|
|
Mhook |
2.5.1 |
||
|
Boost |
1.75.0 |
- |
- |
|
Protobuf Library |
3.15.6 |
https://github.com/protocolbuffers/protobuf/blob/master/LICENSE |
|
|
OpenSSL |
3.4.1 |
||
|
Rapidxml |
1.13 |
https://sourceforge.net/projects/rapidxml/files/latest/download |
|
|
tbb |
2021.6.0 |
https://github.com/dwaddington/tbb-2018/blob/tbb_2018/LICENSE |
|
|
MSAL |
4.72.1 |
https://github.com/AzureAD/microsoft-authentication-library-for-dotnet |
https://github.com/AzureAD/microsoft-authentication-library-for-dotnet/blob/master/LICENSE |
|
ConfuserEx |
1.0.0.0 |
||
|
WTL |
10.0.10320 |
||
|
MIP SDK |
1.17.158 |
https://learn.microsoft.com/en-us/information-protection/develop/version-release-history |
https://docs.microsoft.com/en-us/information-protection/develop/ |
Third-party libraries
Uninstalling the HaloCAD for Viewers
When you no longer use HaloCAD for Viewers, you may uninstall the application. Uninstalling removes all files and registry settings that were added to your computer during the initial installation.
Installer Version Requirement
When uninstalling the HaloCAD add-on, use the installer for the currently installed version, whether you run it by double-clicking or via the command line. Using a different installer version may cause errors.
Method #1
-
Click Start menu > go to Control Panel > Programs > Programs and Features > Uninstall a Program > select HaloCAD for Viewers application from the list > right-click and select Uninstall option or double-click on the installer
HaloCAD_Viewers_Shield_Setup.exefile. -
Depending on your Windows security settings, you may get a security warning as "Do you want to allow the following program to make changes to this computer?". If you get this security warning, click the Yes button to confirm that you want to uninstall the add-on.
-
The HaloCAD installer first scans the current user session for any supported CAD Viewer applications running in the background. If it detects any, it displays a notification prompting you to close those applications before continuing with the uninstallation.
-
Click OK and close all HaloCAD-supported CAD Viewer applications.
-
Redo step 1, and the following confirmation message appears.
Uninstall Message #1
-
Click Yes to confirm the uninstallation of HaloCAD from your computer.
Uninstall Message #2
-
The HaloCAD component has been successfully uninstalled. Click OK to close the dialog box.
Method #2
The following is an example of uninstalling HaloCAD for Viewers using the command line.
-
Open a command prompt.
-
Navigate to the directory of the add-on installer.
Example:HaloCAD_Viewers_Shield_Setup.exe -uninstall -silent true -
The uninstalling process is complete.