
This chapter walks you through the steps of installing HaloENGINE using graphic and silent methods.
HaloENGINE Customer Modes
HaloENGINE can be deployed in two different modes.
-
Single Customer mode - Supports one customer with multiple tenants (HaloENGINE Services). By default, the customer ID halo_customer is used, but it can be modified.
-
In contrast to Single Customer, the Multi-Customer mode supports multiple customers with multiple tenants (HaloENGINE Services). It is designed in such a way that a HaloENGINE Service is targeted to a specific customer, thus other customers cannot gain access to any other HaloENGINE Service(s) of another customer.
The Single Customer and Multi-Customer folder structures after configuration are depicted in the figure below.
HaloENGINE Modes
HaloENGINE With or Without Monitor Log Dashboard Integration
It is necessary to know how you would like to install the HaloENGINE with the following options. HaloENGINE can be used with or without the Monitor Log Dashboard Integration.
Option 1: HaloENGINE with Monitor Log Dashboard
The Monitor Log Dashboard is connected to HaloENGINE through the MongoDB database. During the installation process, you have the option to choose from the following two depending on your database setup:
-
First-time installation of the MongoDB database.
This applies to an environment without a MongoDB database. While installing HaloENGINE, select Install MongoDB in the UI. The dashboard can only be successfully started over this connection.
-
Use the existing MongoDB database.
This applies to an environment where a MongoDB database has already been installed. To connect, all you need to do is use the current MongoDB connection string.
Option 2: HaloENGINE without Monitor Log Dashboard
If you do not want to integrate the dashboard, installing the MongoDB database is not necessary. At a later time, if you want to integrate with the dashboard, you need to uninstall and reinstall HaloENGINE with Option 1.
Interactive Installation
Use the GUI-based setup application included in the installation package to install HaloENGINE. If you want to run without a GUI, refer to the section “Silent Installation”. Note: This version does not support silent installation for integrating HaloENGINE with the dashboard. If you want to integrate, use the GUI installer.
Installation Procedure
-
To begin the interactive installation, double-click the installer
HaloENGINE_Setup.exefile. Depending on your Windows security settings, you may get a warning such as "Do you want to allow the following program to make changes to this computer?". If you get this security warning, click the Yes button to continue the installation. -
When the installer starts, you will see the startup dialog followed by the welcome dialog:
Startup Dialog
Welcome dialog
-
Click Next to continue the installation. The end-user license agreement dialog will appear:
End-User License Agreement dialog
-
Read the End-User License Agreement. If you agree, select I accept the terms in the License Agreement and click Next. The Tomcat memory pool size configuration dialog will appear:
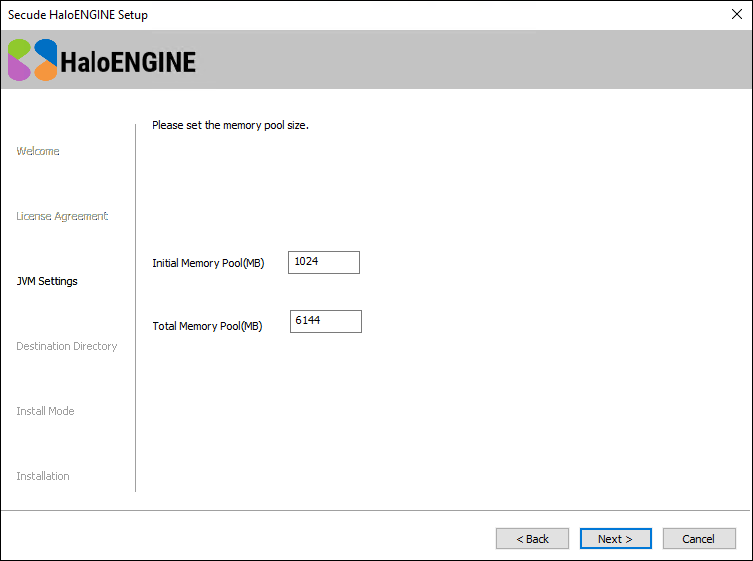
Tomcat pool size configuration dialog
-
If you want to change the default values of the Initial Memory Pool and Total Memory Pool, enter the amount of memory you want to allocate. Note: Ensure that the Total Memory Pool does not exceed the System's available 3/4th RAM.
-
Click Next. The destination folder selection dialog will appear:
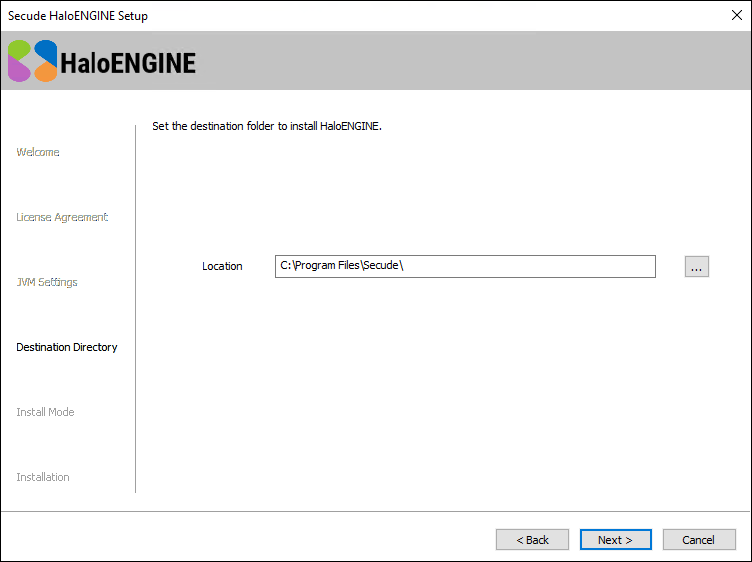
Destination folder selection dialog
-
By default, application files are stored in the program files directory (
C:\Program Files\Secude\). If you would like to choose an alternate location, click the Browse button and select your location preference. When you are finished, click Next. -
The customer mode selection dialog will appear:
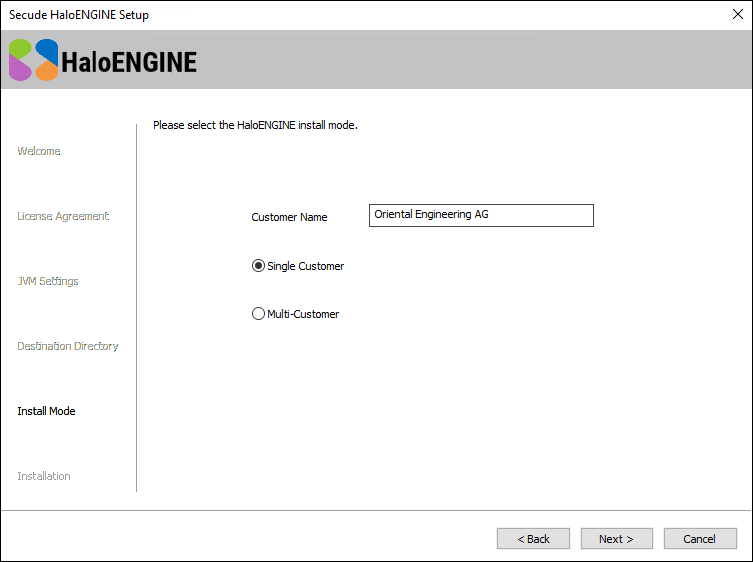
Customer mode selection dialog
-
Enter the name of the organization where HaloENGINE will be implemented. For instance, Oriental Engineering AG purchased HaloENGINE to use within their workplace.
-
Select a mode (Single Customer or Multi-Customer), and click Next.
-
-
Please be patient as the installation will take some time. You can see the installation progress in the dialog:
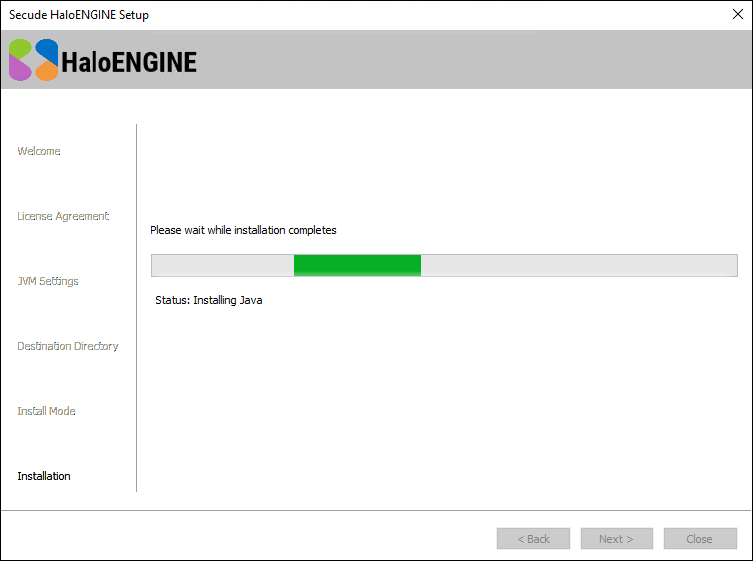
Installation progress dialog
-
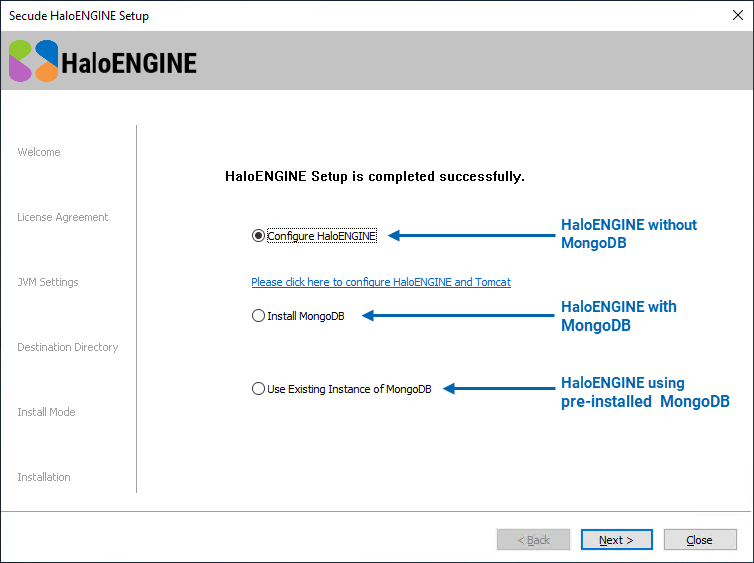
When the installation is completed, you will see a message confirming that the HaloENGINE Server has been successfully installed. Select one of the following options to configure the HaloENGINE Server.
HaloENGINE setup without MongoDB
-
HaloENGINE without MongoDB: Select the Configure HaloENGINE option if you do not want to integrate the dashboard. As shown above, the configuration screen will display a link. Click the link to access the HaloENGINE admin portal, then proceed with point 12.
-
HaloENGINE with MongoDB: Select the Install MongoDB option if MongoDB is not currently installed in your environment. Click Next. The installation starts by displaying a progress bar that indicates the progress of the process. Please be patient as this will take some time. After installing MongoDB, the configuration screen will display a link. Click the link to access the HaloENGINE admin portal, then proceed with point 12.
MongoDBHaloENGINE setup with pre-installed
-
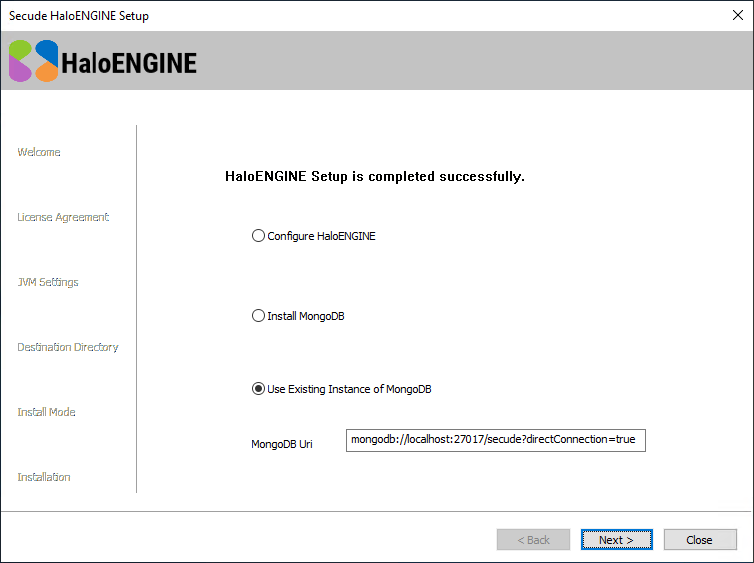
HaloENGINE using pre-installed MongoDB: Select the Use Existing Instance of MongoDB option if the database already exists and then enter the MongoDB connection string in the MongoDB Uri field. The connection string varies depending on your configuration options.
-
With authentication, use the format
<mongodb>://<username>:<password>@<hostname>:<port>/<db_name>?authSource=admin>. For example:mongodb://myDatabaseUser:D1fficultP%40ssw0rd@cluster0.example.mongodb.net/?retryWrites=true&w=majority -
Without authentication, use the format
<mongodb>://<hostname>:<port>/<dbname>?directConnection=true>. For example:mongodb://localhost:27017/secude?directConnection=true
-
-
Click Next,
-
-
The configuration screen will display a link. To access the HaloENGINE admin portal, click on the link.
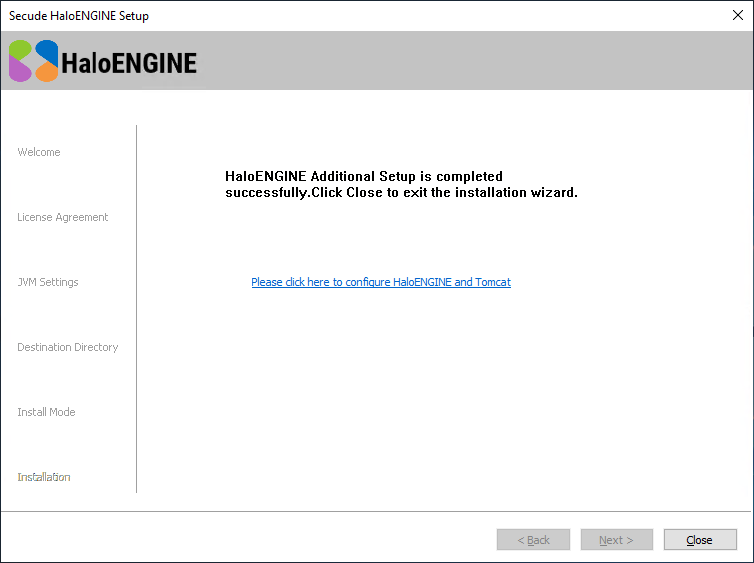
HaloENGINE with additional setup completed successfully
-
Once you click the link, the admin portal will open in your default browser and you will notice a shortcut icon

What to do next
-
Verify that the Maximum memory pool size in HaloENGINE Tomcat (
…bin/HaloENGINE_Tomcat9.exe) does not exceed the system RAM. After setting up the HaloENGINE certificate, verify that the maxSavePostSize (bytes) from the Connector, which is SSLEnabled (inserver.xml) and smaller than the "Maximum memory pool size". -
If you want to send large files (2GB) forward and backward, make sure that the "Maximum memory pool size" is more than the maxSavePostSize (2GB, as specified above).
-
Please refer to the section "Initial Configuration of HaloENGINE Admin Portal" to know more about the initial configuration.
Silent Installation
Besides graphical mode, the HaloENGINE can be installed in silent mode, which does not require user involvement or display a user interface. It is a convenient way to streamline the installation process using the command at once.
-
Open a command prompt and go to the installer's location.
-
Follow the steps below to see the list of options present in silent mode:
TypeHaloENGINE_Setup.exe -help
Press Enter
Output
...
HaloENGINE_Setup.exe -install -initmempool <Initial memory pool size in MB(s).
Minimum size is 128 MB> -totalmempool <Total memory pool size in MB(s).
Maximum size is 3/4 of total RAM size.> -dir <destination_directory> -installmode <SINGLE_CUSTOMER|MULTI_CUSTOMER> -customername <customer_name>
HaloENGINE_Setup.exe -update -installmode <SINGLE_CUSTOMER|MULTI_CUSTOMER> -customername <customer_name>
HaloENGINE_Setup.exe -uninstall -keepconfig <true|false> -
The following are examples of silent mode installation:
Install
HaloENGINE_Setup.exe -install -initmempool 1024 -totalmempool 2048 -dir "C:\Program Files\Secude" -installmode SINGLE_CUSTOMER -customername "Oriental Engineering AG"
Update
HaloENGINE_Setup.exe -update -installmode SINGLE_CUSTOMER -customername "Oriental Engineering AG"
(The current installer version must be greater; otherwise, an error notice will block the update) -
Press Enter.
-
The installation process is complete and you can access the HaloENGINE Admin portal.