
Operations Manual
About this Manual
This manual provides comprehensive guidelines and step-by-step instructions for working with HaloCAD solutions (Label and Protect). Please refer to the Installation Manual included with the product package for information on deployment and configuration.
General FAQs
This section provides answers to the most frequently asked questions (FAQ). If you have any further inquiries, please contact our sales representative or our support team.
What does HaloCAD provide for an organization?
HaloCAD solution protects engineering CAD files and enforces security throughout their full life cycle.How many variants does HaloCAD have?
There are three variants available:HaloCAD Add-on for CAD application (as a standalone add-on)
HaloCAD for PLM
HaloCAD Reader Add-on for CAD application
What is the difference between the HaloCAD Add-on for CAD and the HaloCAD for PLM?
HaloCAD Add-on for CAD is a standalone solution for organizations that do not store their CAD files in PLM, and it enforces protection through user engagement.
HaloCAD for PLM integrates with the respective PLM application and includes the capability of HaloCAD PROTECT and HaloCAD MONITOR, where the MPIP label is applied without user intervention based on how the rules defined in the Classification Engine are applied.What distinguishes the HaloCAD Reader add-on from the HaloCAD Standalone (full add-on)?
The HaloCAD Standalone add-on (full version) protects CAD files using Microsoft's Purview protection solution, whereas the HaloCAD Reader add-on just allows you to view HaloCAD standalone protected files. In addition, the HaloCAD standalone add-on is licensed. In contrast, the HaloCAD Reader add-on is free.What languages are supported by the HaloCAD add-on?
Currently, the HaloCAD add-on only supports the English language.Does the HaloCAD Add-on support all native CAD file types?
Yes, the HaloCAD Add-on supports all CAD native file types.What happens if an unauthorized person tries to open a HaloCAD-protected CAD file?
At first, user authentication takes place. It is a process of verifying the identity of the user. If the user fails during the authentication, he/she will be prompted with an error message and access will be denied.Who decides what labels should be used for various CAD drawings and how it is managed in the background?
An administrator in an organization creates and manages labels (user rights) in the Microsoft Purview portal. Engineers can create a profile, a classification schema, and an action rule based on the sensitivity of their data.What if I don't want a certain file to be protected?
If you don't want the file to be protected, you can apply the "No Protection" label, which does not contain policy properties.Can I create my own labels?
Yes, HaloCAD allows users to create custom permissions labels.
How does it Work?
License Enforcement
After installation, HaloCAD programmatically sends a license validation request to Secude's License Manager when a user tries to log into a session for the first time (by opening the CAD application). There are two scenarios based on administrator installation.
Case 1: The license will be activated automatically during the installation process, and you will be able to continue using the HaloCAD features.
Case 2: If not yet activated, the user will receive an error message and will be unable to access the HaloCAD features. Please refer to the Installation Manual for more information about license activation.
Applying Protection using HaloCAD Add-on
At a high level, HaloCAD workflow involves the following steps:

HaloCAD protection
To create new CAD files, a user launches the CAD application and logs into the HaloCAD session for the first time.
HaloCAD connects with your Microsoft Entra tenant. This manual uses the tenant
halosecude.onmicrosoft.comas an example.Microsoft Entra ID requests for user identification.
Microsoft Purview Information Protection (MPIP) labels are downloaded for the logged-in user (
john@halosecude.onmicrosoft.com) following successful authentication.
File protection: On two files, the user (John) chooses and applies two distinct labels.
HaloCAD enforces the document's protection settings based on the label that is selected. When a user assigns a sensitivity label, it is saved in the document's metadata and the label's protection settings are applied to the content to protect it.
File-Sharing: Assume that
john@halosecude.onmicrosoft.comshares the files with several users. User A, B, and C receive File 1, while User D receives File 2.Content consumption: Users A, B, C, and D attempt to access protected information. Each user account is verified by Microsoft Entra ID, and the file opens after successful authentication. A user is granted use permissions like View, Edit, Print, Copy, Export, and Change rights depending on the label that has been applied. Different levels of usage rights will be granted to each user or user group. Note: The user who initializes HaloCAD will be the author and will have full rights to the document. For more details about labels, please refer to the Microsoft Documentation.
File 1 - The file is fully accessible to
User A@halosecude.onmicrosoft.com.File 1 - Access is read-only for
User B@halosecude.onmicrosoft.com.File 1 -
User C@halosecude.onmicrosoft.comcannot open the file.File 2 - File access was previously granted to
User D@halosecude.onmicrosoft.com, however, it was revoked due to risky suspicious activity.
Logged-in user (HaloCAD session)
In this document, 'logged-in user' refers to the person or user account who has launched the CAD application and signed into Microsoft Entra ID (through the Microsoft Sign-In application). This may not depend on the operating system user who is currently signed in. It is collectively referred to as the 'HaloCAD session'.
Viewing a Protected File Via the HaloCAD Reader Add-on
At a high level, HaloCAD workflow involves the following steps:
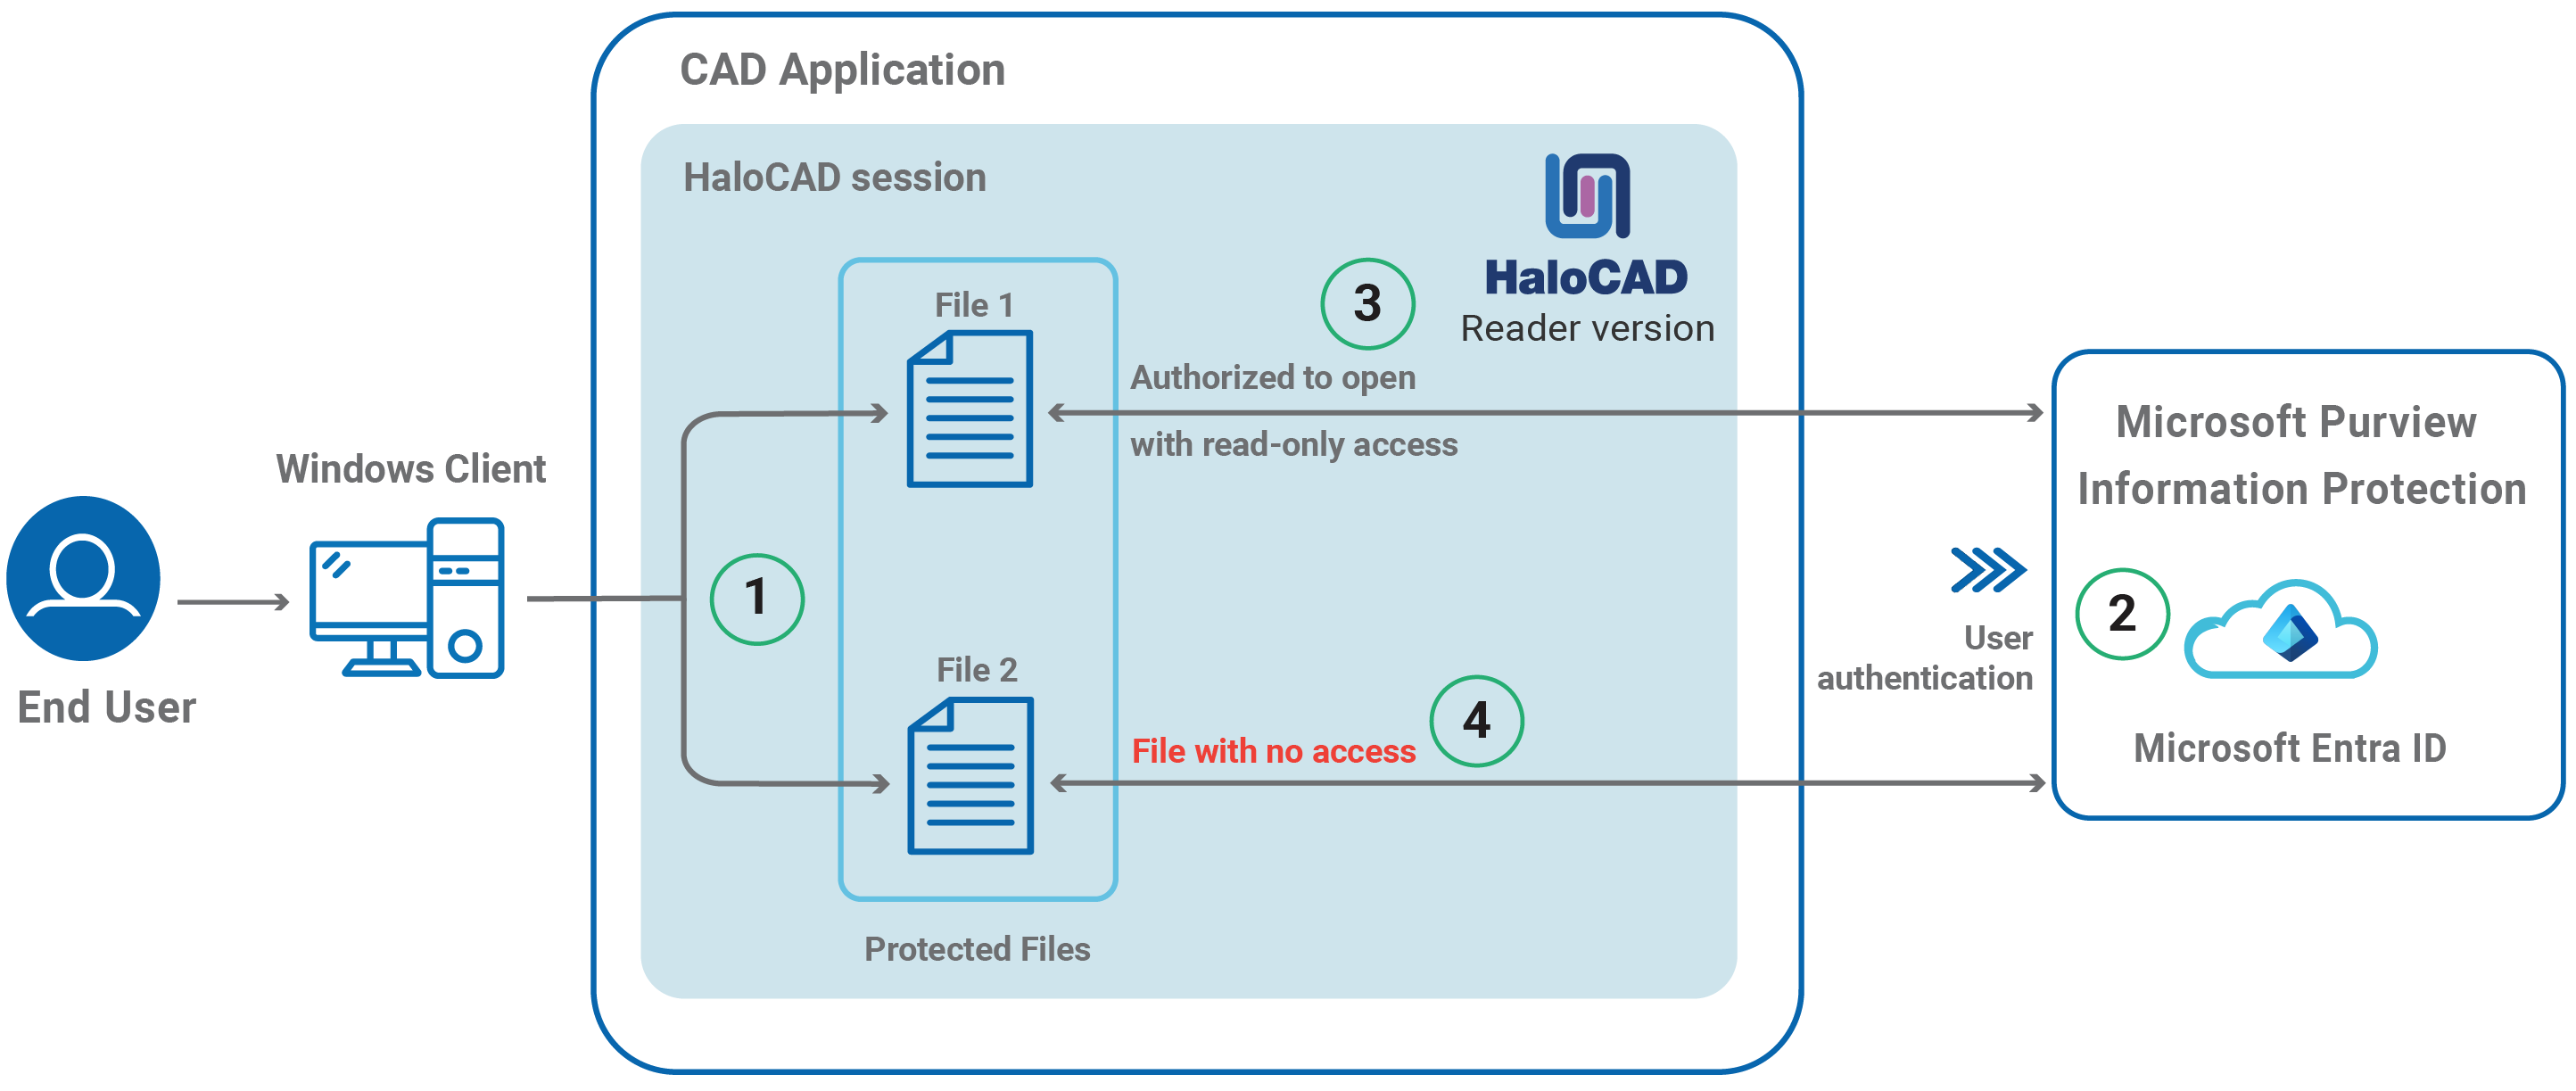
HaloCAD Reader Add-on
A user selects a file protected by HaloCAD.
The first time logging into the HaloCAD session requires a connection to Azure RMS. Microsoft Entra ID verifies the authenticity of the user.
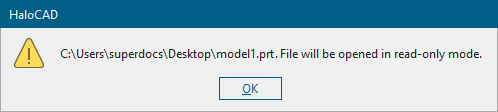
HaloCAD warns you that the file can only be opened in read-only mode. In this example, the user is authorized to open File 1.
However, the user lacks the necessary permissions to open File 2, therefore the file cannot be opened.
Get Started with HaloCAD
This section describes how to protect a file, open a protected file, and use the HaloCAD Reader add-on.
Permissions Level and Usage Rights
Basic Permissions
The following table lists the basic permissions and the usage rights that they contain:
S.No | Permission Level | Usage Rights (Allowed Recipient Actions) |
|---|---|---|
1 | View | Open and read the data (also known as “Read-only”). It includes Zoom and view from different angles (for CAD file types). |
2 | Edit | Edit the file and save it |
3 | Copy | Extract data (including screen captures) from the file into the same or another file. |
4 | Print the content | |
5 | Export | Save the content to a different filename (Save As). Also includes “Export to PDF”. |
6 | Change Rights | Changing the label that is applied to a file includes removing protection and saving it as an unprotected file. |
7 | Owner (Full Control rights) | Grants all rights to the file and all available actions can be performed. And includes the permissions below:
|
Basic Permissions
Author (creator) of a file
The author of a file has all rights and actions mentioned in the above table. Also includes the below permissions:
Open file after the expiry date
Revoke access
Custom Permissions
The following table lists the custom permissions and the usage rights that they contain:
S.No | Permission Level | Usage Rights (Allowed Recipient Actions) |
|---|---|---|
1 | Viewer | Open and read the data (also known as “Read-only”). It includes Zoom and view from different angles. |
2 | Reviewer | Viewer’s allowed permissions plus:
|
3 | Co-Author | Reviewer’s allowed permissions plus:
|
4 | Co-Owner | Co-Author’s allowed permissions plus:
|
5 | Only for me | Grants all rights to the file and all available actions can be performed only by the author of the file. |
Custom Permissions
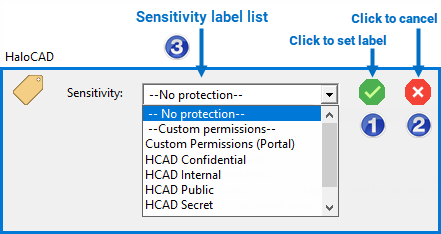
HaloCAD Screen Introduction
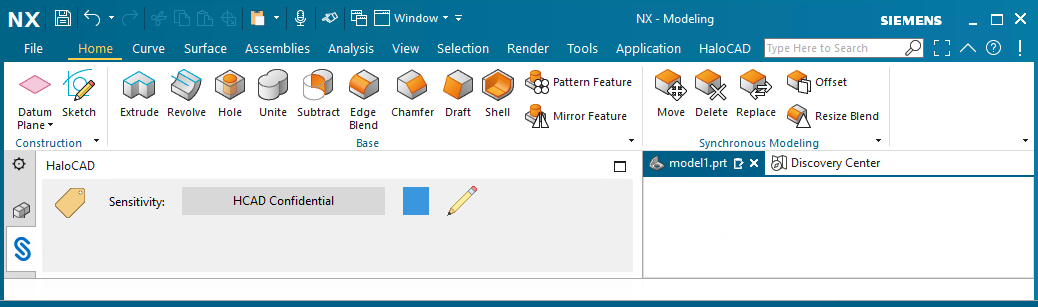
After installing the HaloCAD add-on, you can notice the HaloCAD tab in the CAD application as shown in the below figure:
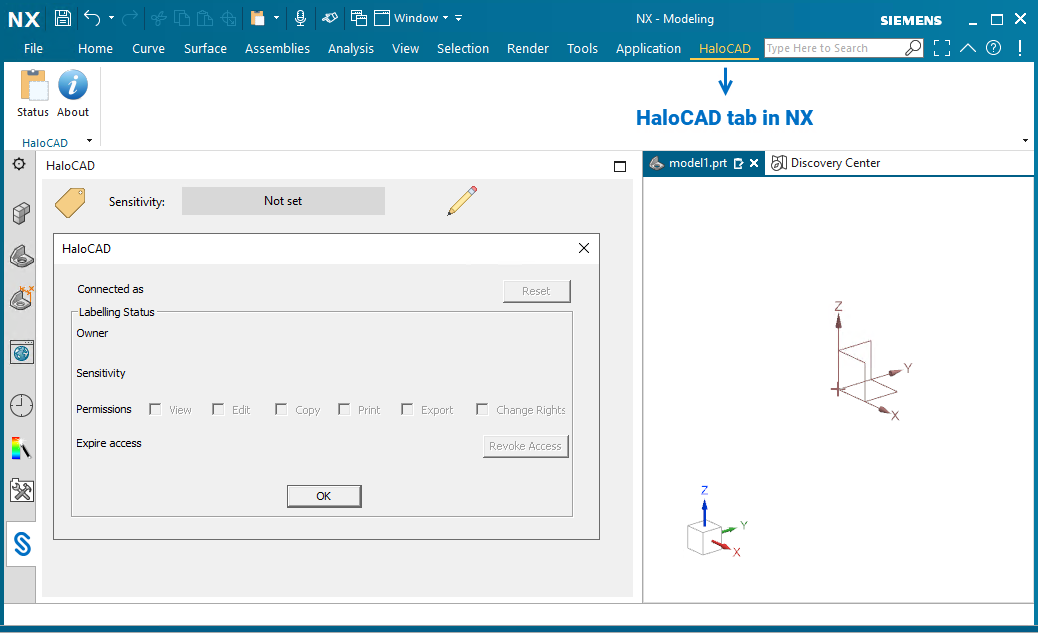
HaloCAD in NX
The following table below outlines each element of the HaloCAD menu.
# | Icons | Description |
|---|---|---|
1 |  | The Status icon displays the status of the file. 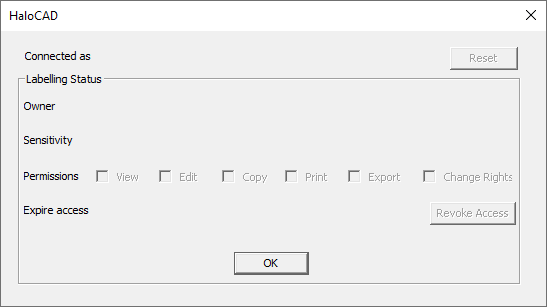
|
2 |  | The About icon displays the application version and license details. To learn more about license activation, please refer to the section “License Activation” in the Installation manual. 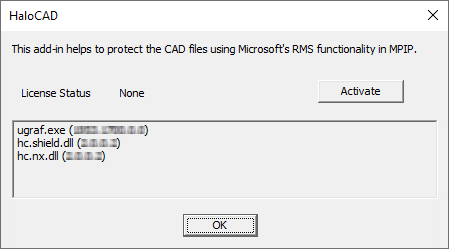 |
3 |  | The Secude icon, displays the HaloCAD pane. If you double-click, the pane opens separately. |
4 |  | Pencil icon - Click to change label: 
|
|
Overview of screen elements
How to Protect a CAD File?
Prerequisite
To protect your organization's data by using sensitivity labels, configure the protection settings to be associated with each label in the Microsoft Purview portal.
To set a default label for documents, configure the following settings in the Microsoft Purview portal: Navigate to Label policies > Settings > Documents > Default settings for documents > Apply a default label to documents > Select a label from the list.
Step 1: Open the NX application
New file: Open an NX model > enter a name for the file > create objects.
Existing file: Select and open a file of your choice.
Step 2: Download labels
You can see the Sensitivity set as Not set for any new file or existing unprotected file.
Click the pencil icon (Click to change label). The first time you log in to HaloCAD, a connection to Azure RMS is required, therefore HaloCAD will prompt you about the Microsoft Sign-In Assistant, as seen below:
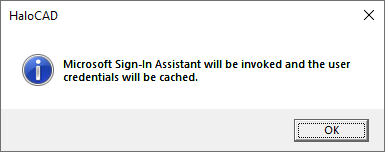
Microsoft Sign-In Assistant invoking message
Click OK and enter your credentials.
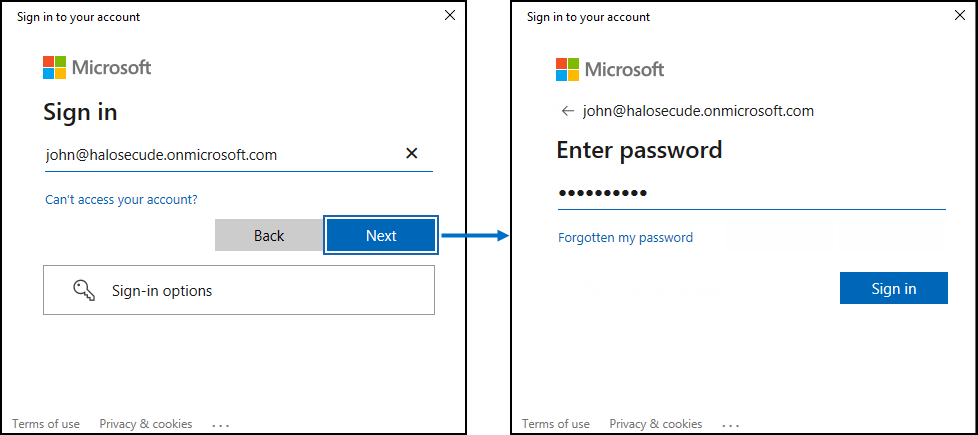
Authentication sign-in prompt
After successful verification, a connection to your Microsoft Entra tenant is established, and the credentials of the currently logged-in user are cached; however, if you want to erase the credential cache, proceed to the section "Logging Off an Active User”.
If the default label has been configured in the label policies, it will appear in the Sensitivity; otherwise, Not Set will be displayed. However, it can be relabeled or removed, which is explained in the later section.
In this example, the default label is not set. So, to apply a label, click the pencil icon (Click to change label). The following notification indicates that labels are being downloaded from Azure RMS.

Fetching the labels
Step 3: Select and apply a label
From the Sensitivity list, select a label and then confirm the selection by clicking on the green check mark - Click to set label icon.
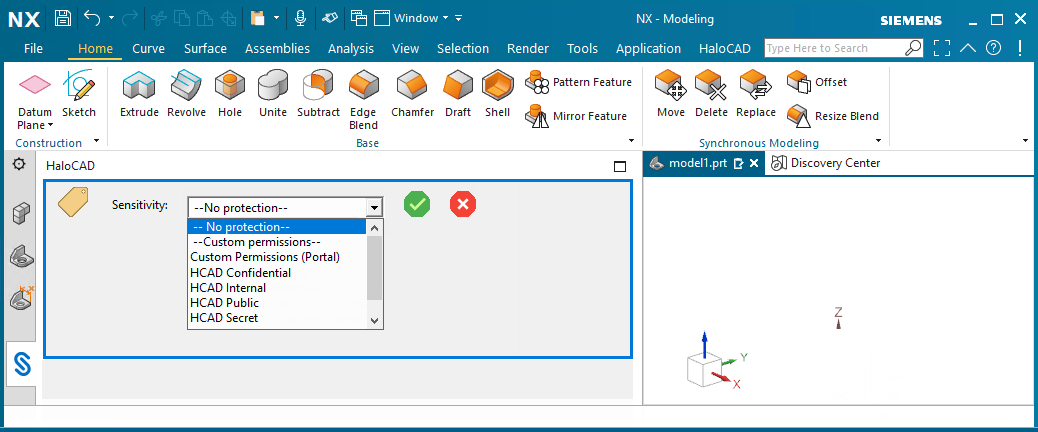
Downloaded labels for the signed-in user
Results: The label is applied to the active document. Note: Click Save and enter a file name, if you are creating a new file. However, for an existing file, the save action is not needed because when you apply the label by clicking on the green check mark (Click to set label icon), the file is also automatically saved.
The following example shows the selected label on the HaloCAD ribbon along with its color configured in the Microsoft Purview portal.
File with applied label
Cancel, Remove, Relabel, and More
Canceling label selection - Unexpectedly, if you have chosen an inappropriate label, it can be canceled by clicking on the red cross mark (Click to Cancel icon). This will cancel only the label that is selected but not yet applied to the file.
Removing Protection - If you want to remove the existing label and keep the file unprotected, select the --No Protection-- label from the list. Note: Whenever you make changes to the label, click the icon green check mark (Click to set label icon) so that the updated label will take effect. The file is saved, and the label is applied to the active document.
Relabeling - After applying the label, if you want to select a different label or a different set of protection settings (Custom Permissions), first click the pencil icon (Click to change label) and then select a different label from the list. For more details, refer to the section “Example 10: Custom Permissions Label”.
Revoke Access - If an author does not want a user to access the shared file for security reasons, you can prohibit it by clicking Revoke Access in the Status UI. Please refer to the section “Example 12: Revoke a File”.
Visual Indicator - HaloCAD allows for the addition of visual indicators for components labeled within an Assembly file. To enable the visual indicator, follow the steps below.
Open a protected assembly file.
Go to Menu -> HaloCAD -> Visual Report. (Note: If the Menu tab is not displayed, right-click on the toolbar > and select Top Border Bar.)
For each component, a small rectangular Secude icon is now displayed on the graphic area.
Moving your cursor over the Secude icon will display the label information.
To deactivate the visual indicator, go to Menu -> HaloCAD ->Deactivate Report.
Logging Off an Active User
To log off (or terminate) an active user from the HaloCAD session, perform the steps below:
Go to the HaloCAD tab > click Status > click Reset.
This removes the user identity from the logged-in user session. By doing this, the current user's session will end and become available for other users to log on.
The following message will appear:
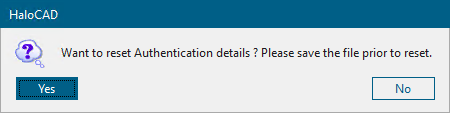
Clear cached credentials #1
Click Yes.
The following message will appear:
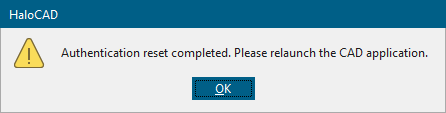
Clear cached credentials #2
Click OK.
You need to restart the application.
Results
After relaunching the application, users can log in to a new HaloCAD session using their credentials.
If you have not relaunched the CAD application, HaloCAD will alert you that, "For HaloCAD to work properly you should relaunch the application now". Click OK on the message and relaunch the application.
What to do next
Login after reset: After the restart, if you open a protected file or click on the pencil icon (Click to change label), the HaloCAD will prompt you about the Microsoft Sign-In Assistant. Click OK and sign in with your credentials.
Microsoft Sign-In Assistant invoking message
Please refer to the section “Common Scenarios” to learn more about HaloCAD functionalities.
How to Export a Protected CAD File to a PDF File?
To convert / export / save a protected file as PDF:
Go to the File menu > click Export > PDF > choose a location and enter a filename.
Click Apply or OK on the Export PDF dialog.
An exported PDF file is saved with protection.
Results: An exported PDF file is saved with protection.
The protected file may need to be viewed after being exported. To open a protected file, Follow the instructions below:
Prerequisite: Make sure that the latest version of Acrobat Reader DC/Acrobat DC.
Double-click the protected file or open the Adobe application, go to the File menu > Open > browse and select the file.
Microsoft Sign-in prompts you to provide your credentials.
Enter the credentials and click Sign in.
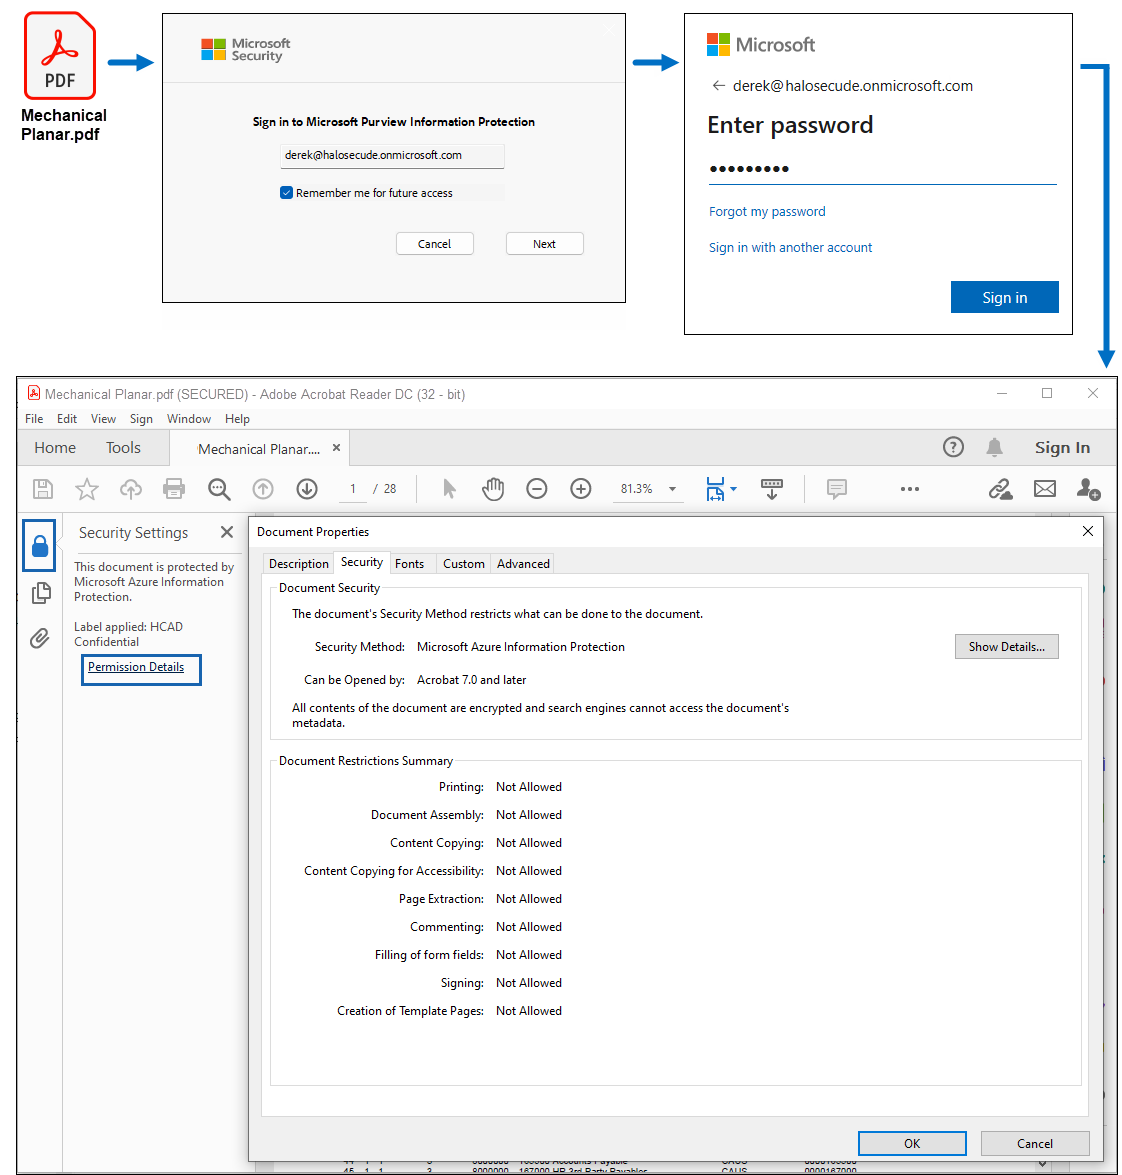
Protected PDF File
To the question “Do you want to stay signed in?”, answer Yes.
Results:Once you have successfully authenticated, the protected file will open.
If authentication fails, you will be prevented from accessing the file.
What to do next
To see the actual permissions that are applied to the file, do one of the following:
Click on the lock icon > Permission Details > Document Properties screen > click Show Details.
Click File > Properties > click Security tab > Document Properties screen > click Show Details.
How to View a Protected File in HaloCAD Reader?
Who should use the reader add-on?
For customers who don't have the HaloCAD solution, Secude offers a viewer program to access HaloCAD-protected files. End users can work with HaloCAD-protected data more easily without installing the full version (standard) of the HaloCAD solution on their desktop.
Reader add-on Vs HaloCAD Standard add-on
Both add-ons utilize the security solution from Microsoft Purview. However, the reader add-on cannot serve as a 'HaloCAD Standard' add-on. It can only read/open CAD files protected by the Standard/Full add-on.
Prerequisite: Make sure that the HaloCAD Reader Add-on for NX is installed.
Double-click the protected file.
You will see that HaloCAD will prompt you about the Microsoft Sign-In Assistant before it lets you access the file.
Click OK. Enter the credentials and click Sign in. (However, you do not require this validation, if your cached account information is available.)
Results:
A read-only version of the file opens with the following message.
HaloCAD Reader message
Click OK on the HaloCAD reader message.
You can also notice the disabled pencil icon (Click to change label) in the Sensitivity ribbon, disabled tabs, panels, and buttons in the CAD application, and disabled permissions (edit, copy, print, export, and change rights options).

Disabled Click to change label icon
What to do next
The reader add-on gives you the following options, similar to the standard add-on:
To view the file's permissions, click the Status icon.
To log out an active user from a HaloCAD session, click the Reset icon.
Common Scenarios
This section presents some common scenarios for illustrative purposes and is meant to provide general guidelines.
Concept: Sensitivity Labels
MPIP labels can be customized to meet the requirements of every organization. The labels are defined and managed directly on the Microsoft Purview portal, and the HaloCAD Add-on retrieves them to make them available for user selection. The permission levels associated with a sensitivity label are automatically imposed on the document when you apply it. Any rights that you do not specifically grant will not be assigned to the user. A label (with view permission) applied to confidential data allows users to only access the content and nothing else.
Let's say, for example, that you set up a label with "Viewer" permission. In this case, the user will be able to view MPIP-protected content, but the following actions and menus will be disabled:
Pencil icon - Click to change label in the HaloCAD Sensitivity ribbon.
All tabs, panels, and buttons in the CAD application.
Edit, Copy, Print, Export, Change Rights, and Revoke options in the Status UI. Refer to Example 1.
In contrast to the previous point, if you configure a label with 'Co-Owner' permission, the user will have full access to the file, including the ability to view, edit content, print, copy, and export the file, as well as change rights (labels). Refer to Example 2.
For more details on labels, please refer to Microsoft Documentation.
How to Open a Protected CAD File?
Follow the below procedure to view the protected file:
Click on the protected file. The Rights Management Service will prompt you to log in the first time you attempt to open a labeled file.
Click OK when prompted, "Microsoft Sign-In Assistant will be invoked and the user credentials will be cached."
Follow the on-screen prompts to complete the authentication process.
On successful confirmation, the file will open.
Depending on the policy settings, users may get different access results for the same document. Please refer to the following examples.
Example 1: Label with Read-only Access
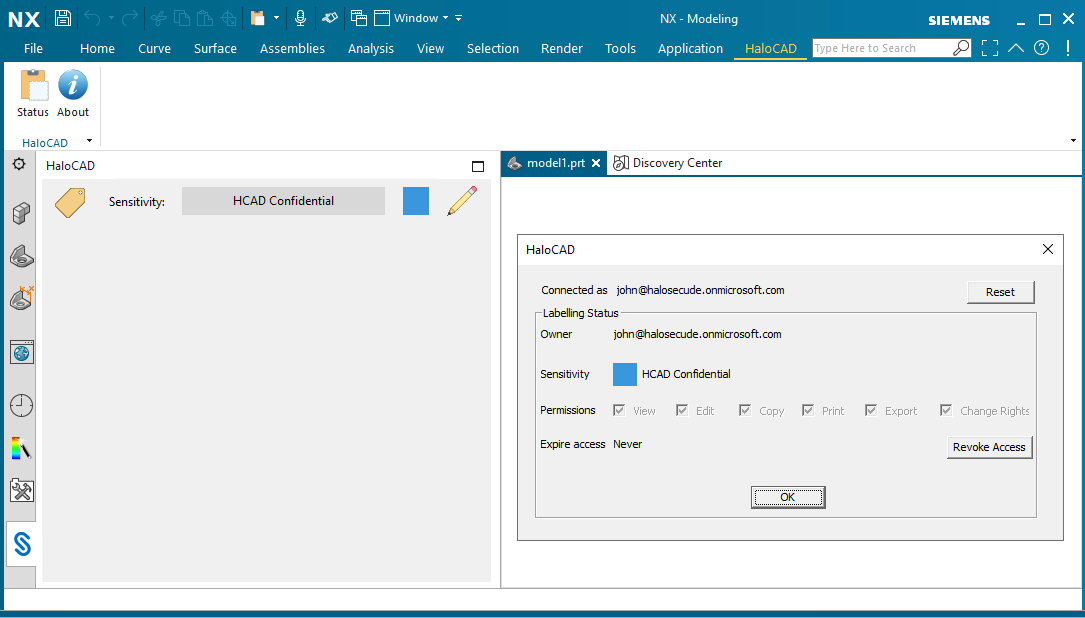
The file presented below is labeled HCAD Confidential, which allows the user to view the data but restricts other activities on the file.
Click the HaloCAD tab, then Status to see the label and your file permissions.
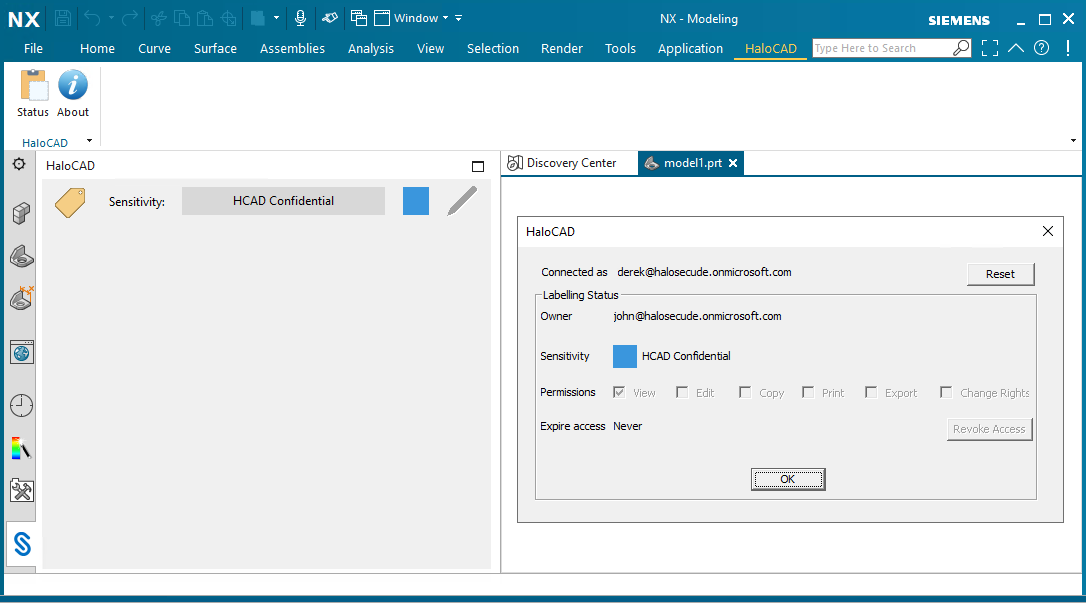
User with restricted access #1
In case if you modify and try to save the file using the File > Close > Save and Close option, you will receive the following HaloCAD pop-up.
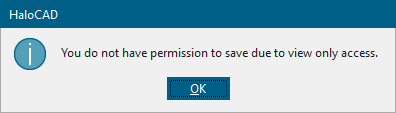
User with restricted access #2
What Happens if You Try to Copy Data or Save File or Print Screen?
The most common technique for stealing confidential information is to copy it (Ctrl + C), take a snapshot using the Print Screen (PrtScn) or snipping tool, and then transmit it somewhere else. Therefore, either taking a picture or copying, the entire contents are blanked out. This is because the label without the "Copy" usage right prevents data copying and screen captures. Similarly, when the user clicks on the File menu, other options such as Save, Print, and so on are disabled because the user does not have the authorization to perform any of these operations.
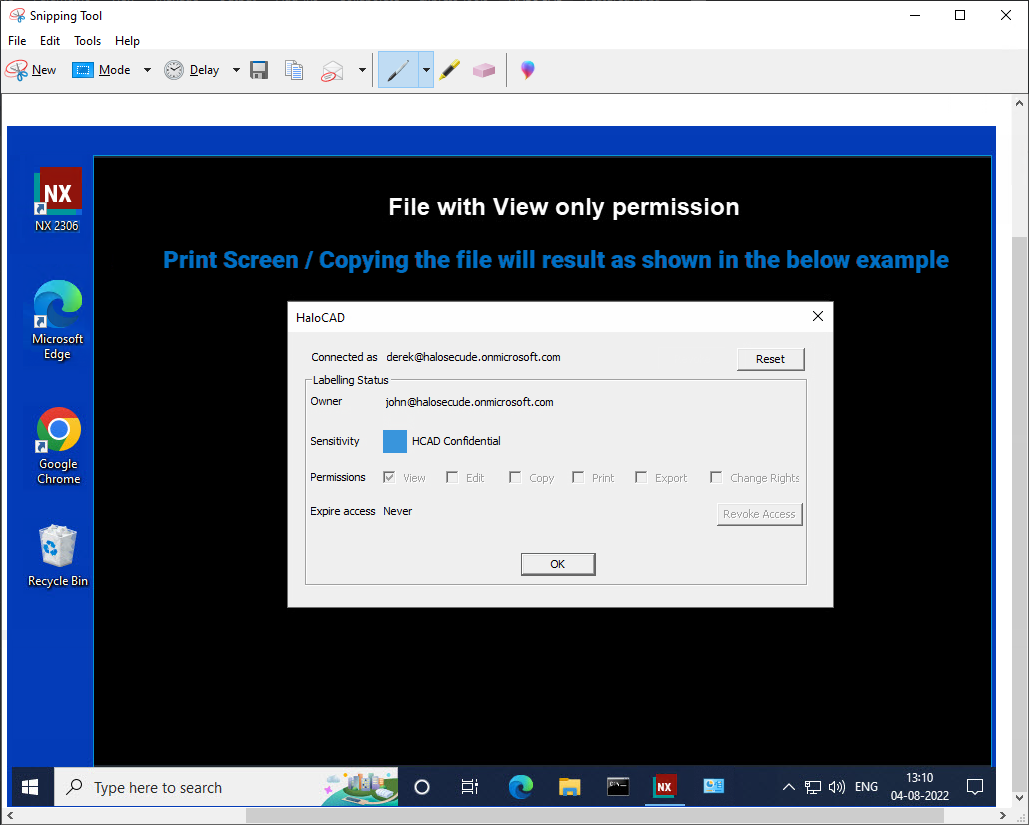
HaloCAD prevents copying data
What Happens if You Try to Relabel with Read-Only Permission?
With "Read-only / View" rights, you are only allowed to view the content; all other options, including the tab, panel, button, and pencil icon - Click to change label on the HaloCAD Sensitivity ribbon, are disabled. As a result, the imposed protection cannot be relabeled or removed.
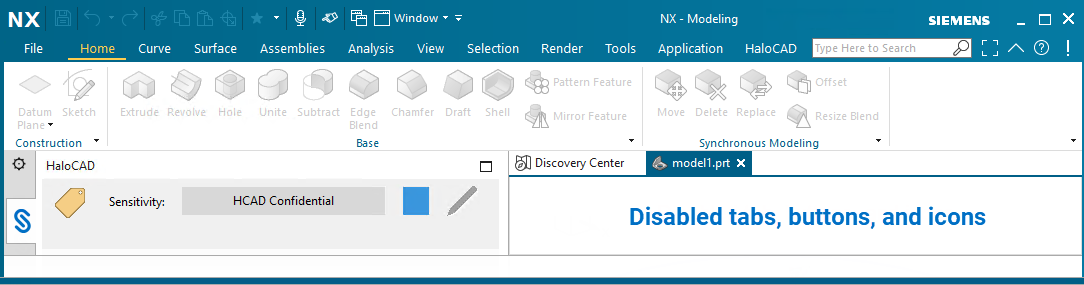
Disabled tab, buttons, and icons
Example 2: Label with Full Control Access
The file shown below is labeled HCAD Confidential, which grants the user full access, therefore all menus are enabled in the file.
Click the HaloCAD tab, then Status to see the label and your file permissions.
User with full access
What Happens if You Try to Relabel with Co-Owner Permission?
With "Co-Owner" rights, you have complete control over the content and can relabel or remove the protection as needed by clicking the pencil icon - Click to change label on the HaloCAD Sensitivity ribbon.
Example 3: Unauthorized User Access
An unauthorized user who double-clicks on a protected CAD file receives the warning shown below.
%20Unauthorized%20User%20Access%20_Warning.png?inst-v=e8176515-1662-4bbf-b91f-adc81dc0479e)
Unauthorized user opening a protected file
Example 4: Label Deleted from Microsoft Purview Portal
For instance, a label is applied to a file and is removed from the Azure portal. Users could no longer open the protected file; however, the underlying protection remains the same. A user who tries to consume this protected file will receive the following message.
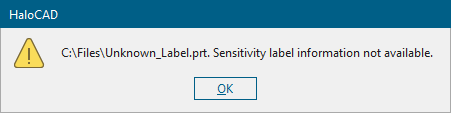
Warning message for unavailability of a label
Example 5: Labeling Dependent (Protected and Unprotected) Files
Assume, there are dependent part or sub-assembly files that are protected and unprotected in a Parent Assembly file. When you apply a label to the Parent Assembly file, you must confirm for the following action to take effect:
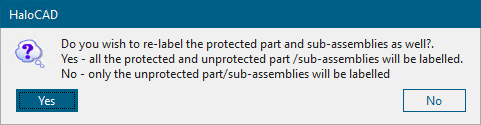
Labeling the unprotected and protected child files
If Yes, then
All the associated unprotected child files will receive the Assembly file's label uniformly.
Already protected child files will be relabeled with the Assembly file's label.
If that child file(s) does not have Owner/Co-owner rights, then the Parent's label cannot be imposed on the file.
If No, then
Only the unprotected files will get protection.
Existing protected child files will be unchanged.
Example 6: Labeling Dependent (Unprotected) Files
Assume there are dependent part or sub-assembly files that are unprotected in a Parent Assembly file. When you apply a label to the Parent Assembly file, you will receive the following message:

Labeling the unprotected child files
Click OK and the parent and the dependent files will be protected by the same label.
Example 7: Removing Protection from Assembly & Part Files
Assume there is a protected Parent Assembly file that contains part or sub-assembly files. If you want to keep the file unprotected, remove the existing label and apply --No Protection-- label to the Parent Assembly file, you will receive the following message:
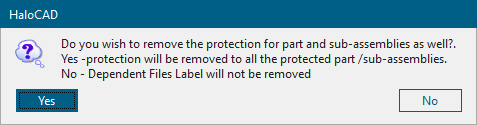
Removing protection from protected part files
You must confirm for the following action to take effect:
If Yes, then
All associated protected child file labels will be removed, and the files will be unprotected.
If that child file(s) does not have Owner/Co-owner rights, then the removing protection from the file cannot be imposed on the file.
If No, then
Only the Parent Assembly file’s label will be removed and unprotected.
The existing protected child files label will be unchanged.
Example 8: Label with Content Marking
Applying a watermark indicates what type of content it is and how it should be handled, and its presence in a file serves as a constant reminder to the user that the file contains sensitive information. The file below is labeled HCAD Secret and bears the watermark Secret.
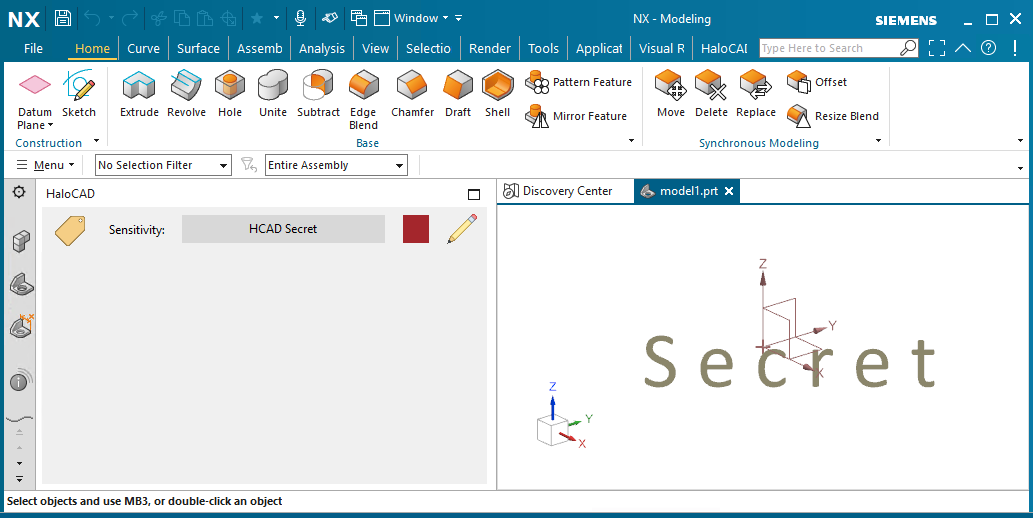
Content with watermark
Example 9: Other Use Case Scenarios
Importing a file with a restricted/least permission label
A restricted/least permission label refers to a label with the lowest permission, such as view-only access rights. A full permission label has full access rights, such as Edit, Export, Change Rights, and so on.
Case 1 - When you import a dependent part or sub-assembly file protected with a “restricted permission” label into a parent assembly file protected with a “full permission” label, the following HaloCAD pop-up message appears as “Please confirm applying least permission label from import file? Yes - Current file will be updated with import file label “XXXXXXX”. No - Import operation will be cancelled.”
If Yes, then the imported dependent part file’s label will be applied to the parent assembly file. For example, HCAD Public label with view rights will be applied.
If No, then the import will be blocked and the parent assembly file will remain unchanged.
Case 2 - When you import a dependent part or sub-assembly file protected with a “full permission” or “restricted permission” label into a parent assembly file that is unprotected, the HaloCAD pop-up message appears as described in Case 1 above. The response (Yes or No) process will also follow the same procedure as in Case 1.
Case 3 - When you import a dependent part or sub-assembly file protected with a “full permission” label into a parent assembly file protected with a “restricted permission” label, the import is allowed and no label changes occur in the parent assembly file.
Labeling a File Without Protection
In contrast to a standard MPIP label, a "label-only" MPIP label simply adds metadata to a file. In this context, "label-only" refers to adding metadata to a file.
The primary difference between the standard "MPIP label" and the "MPIP label-only" is that the former includes encryption options, whereas the latter does not. Thus, “MPIP label-only” can be added to any file that does not require protection but simply needs to be labeled.
Prerequisite: Make sure the Control access check box under Choose protection settings for the types of items you selected page is unchecked while defining the label-only in the Microsoft Purview portal.
Other key points
When the label is applied to a file, the label name will be added to the suffix, '(Label Only)'. In the example below, the actual name defined in the portal is HCAD Metadata. After applying to a file, the label name appears as 'HCAD Metadata (Label Only)'.

MPIP label-only
Full rights: A file with this label allows a user to have full rights on it.
Notifications: Similar to a standard MPIP label, the user will receive notifications when label-only is applied to a top-level parent file.
With the HaloCAD Add-on: The label details will be displayed in the Status UI, just like a standard MPIP label.
Without the HaloCAD Add-on: A file with a label-only MPIP label will behave like any other unprotected CAD file.
Attributes: To see label details, follow the instructions below:
Click on the Assembly Navigator icon, under the Descriptive Part Name tab, right-click on the file name, and then click Properties.
In the Displayed Part Properties window > Attributes tab, you see the author name, label ID, and label name under the HaloCAD node.
Furthermore, if watermarking is configured in this label, the HaloCAD node displays additional information such as the font color, font name, font size, layout, and text.
Example 10: Custom Permissions Label
Difference between Static Permission Labels and Custom Permission Labels
Static Permission Labels - These are the sensitivity labels where the administrator would define the permission set while defining the labels in the Microsoft Purview portal.
Custom Permission Labels (also known as User-defined Permissions) - These are the sensitivity labels where the HaloCAD add-on allows the user (author) to set the permission when applying a label.
Protection using Custom Permissions from Microsoft Purview Portal
Prerequisite: Make sure the custom permissions label in the portal is set to Let users assign permissions when they apply the label.
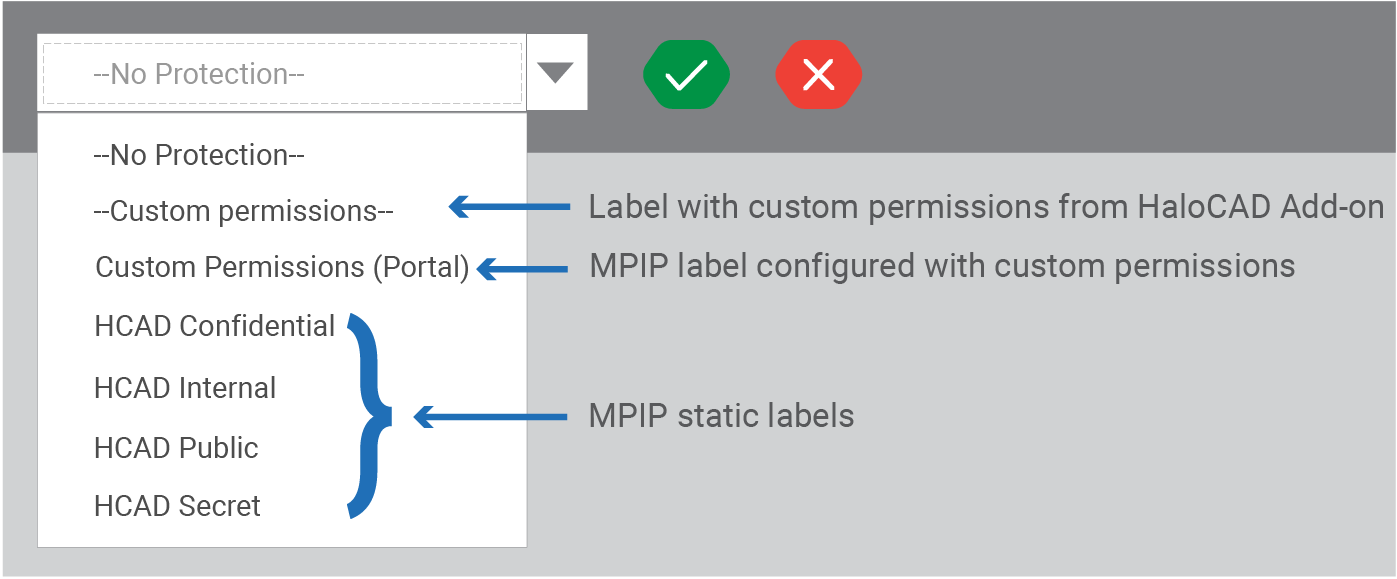
Custom permissions and other labels
Follow the procedure to apply the custom permissions label:
Open the NX application, select a model, and then create objects.
Click the Click to change label icon.
When HaloCAD downloads the labels, it will also list custom permission labels in the Sensitivity Ribbon.
For illustration, the custom permission label is named Custom Permissions (Portal).
Select the Custom Permissions (Portal) label from the list and click on the green check mark - Click to set label icon.
You will receive the HaloCAD Custom Permissions screen as shown below:
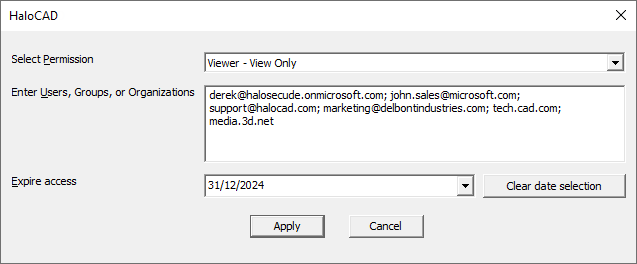
HaloCAD Custom permissions
From the Select Permissions list, select the level of access you want the users to have when you protect the file (Viewer - View Only / Reviewer - View, Edit / Co-Author - View, Edit, Copy, Print / Co-Owner - All Permissions / Only for me).
Specify the users who should have permission to access your file in Enter Users, Groups or Organizations. Type their full email address, a group email address, or a domain name from the organization for all users in that organization, separated by a comma, space, or semicolon.
You can specify how long the labeled file can be accessed in the Expire access field. Use the Never option if you want the label to never expire and to have unlimited access to the file. It can be used for less sensitive content. Alternatively, for highly sensitive content, select a date on the calendar so that recipients other than the owner cannot access the file after the expiry date.
Click the Clear date selection option to clear the previous date selection.
Click Apply to confirm the protection setting.
Results: The label is applied to the file.
What happens when a user opens the custom permissions labeled file?
Based on the user’s permission, the file can be consumed. Note: The author of this document will have full rights to this file. He can always access it, regardless of custom permissions or expiry date that might have been configured in that label. The following is an example of a label with custom permissions.
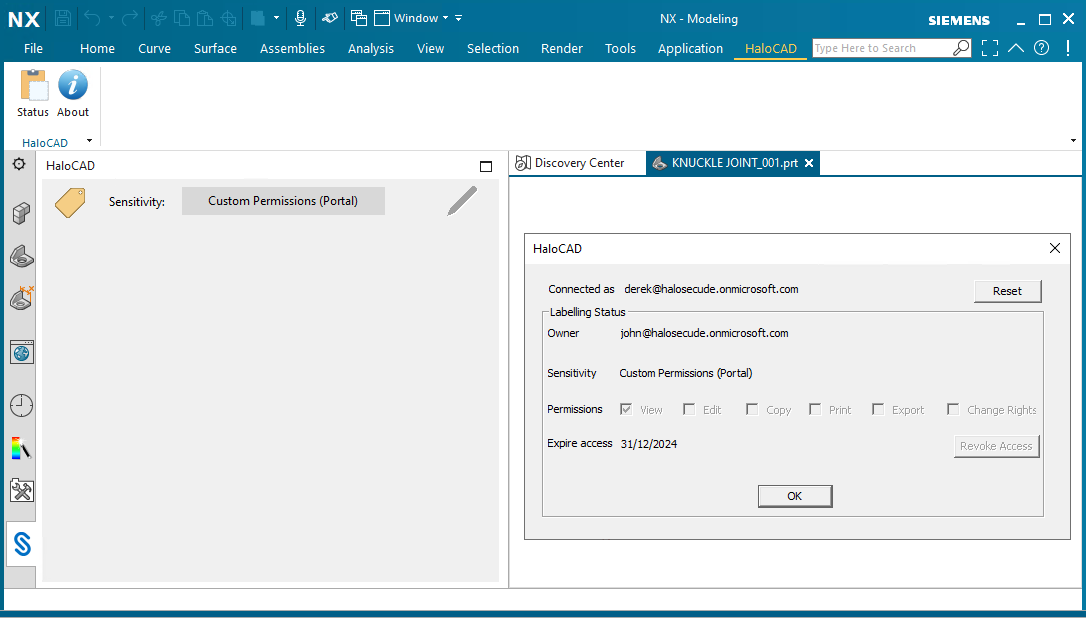
User with custom permission
Protection using Custom Permissions via HaloCAD Add-on
In comparison to the previous section, the HaloCAD add-on also includes the Custom permissions label. On the other hand, the HaloCAD add-on gives rights at the application level and is not obtained from the Microsoft Purview portal. The process for applying the label is the same as in the previous section.
Example 11: Set an Expiration Date for File Access
Prerequisites:
Make sure that the expiration date is configured in the Microsoft Purview portal in case of using a static MPIP label.
Make sure that the expiration date is configured in the Custom Permissions label if using via the Purview portal and/or HaloCAD add-on.
Why is File Expiration Necessary?
When you share a file with an external vendor, they will have access to the file long after your business contract has ended. Allowing vendors and former contractors to access your file leads to security risks.
To prevent this from happening, you can set an expiration date for the file. Defining an expiration date on your file is good practice, especially when working with external vendors or contractors. It’s one more key step to strengthening the security of your company and customer data.
For instance, assume that you have sent a file with an expiration date of 31/12/2024. Business partners who consume it cannot open it after 31/12/2024. Whenever the file is opened, HaloCAD reminds the validity of the file.
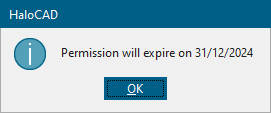
Validity of the file
What Happens When a File Expires?
When a user opens a file that has reached its expiration date (in his or her current time zone), the user will be unable to open the labeled file. HaloCAD will prompt a message “You do not have sufficient permissions to view this document”. This behavior is like unauthorized file access, as described in the section “Example 3: Unauthorized User Access”.
How to Open the Expired File?
The recipient cannot open the expired file. The author of the file can only open the expired file. If the recipient still wants to access the file, then the recipient needs to contact the author of the file to issue a new copy of the file with a different expiration date.
Example 12: Revoke a File
Prerequisite: Make sure to check that the user who wants to revoke a file has been assigned the required license, as specified in the Release Notes under the Requirements section.
MPIP offers a revoke feature to end users, which prevents any new access attempts to a protected file and seals it safely from all users except the author. Please note that revoking access also means that you are withdrawing access to all the users associated with that label.
Why Should a User Revoke a File?
A user may want to revoke access to a sensitive file for various reasons:
When an author sends out an old or unapproved version of a file by mistake.
When an author foresees an access attempt from a malicious user or location that seems suspicious.
When your network is breached, or your files are leaked.
When a recipient is no longer a part of your organization, or when you no longer want to share specific files, or when a contract expires, etc.
The author can take immediate action to prevent the further spread of the file by revoking access. Please note that when a file is revoked, it does not delete the actual file that you shared, but authorized users will NO longer be able to open it. The Revoke Access button is on the HaloCAD status screen.
How to Revoke a File?
To revoke a file, go to the HaloCAD tab > click Status > click the Revoke Access button. The following message will appear:
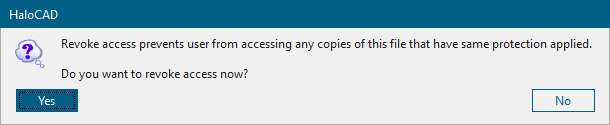
Revoke access message #1
Click Yes to confirm revoke access and continue with step 3. If you do not have the required license, it is not possible to revoke a file. In this instance, HaloCAD will show the alert as follows:

Access denied revoking a file
The following message will appear:

Revoke access message #2
Click OK and save the file.
Result:Access to the file is revoked.
Users who were previously able to access the document are no longer able to do so.
What Happens if a User Attempts to Open the Revoked File?
Once the file is revoked, the user cannot open it, although the user has accessed it before. HaloCAD shows a generic message as “You do not have sufficient permissions to view this document.” This behavior is like unauthorized file access, as described in the section “Example 3: Unauthorized User Access”.
MIP SDK
A revoked file can be accessed by the same user if it was previously opened by the same user in the same HaloCAD session. This is due to the actual behavior of the MIP SDK if you have defined the sensitivity label with the two options Allow offline access and Users have offline access to the content for this many days, the configured offline access allows users to continue to access the revoked file until the offline policy period ends.
What Happens if a User Changes the Label?
Assume that User A shares a sensitive file with User B.
Case 1: User B makes copies of the original document and when User A revokes file access, all copies of the original document will be revoked, as the label does not change.
Case 2: Assume User A has not yet revoked file access. User B with full rights changes the label. At this point, if User A revokes file access, the revocation cannot be applied to that copy of the file because of the change in the label. However, the original document will have been revoked.
How to Open the Revoked File?
A recipient cannot open a revoked file. The author of the file can only open the revoked file. If the recipient still wants to access the file, then the recipient needs to contact the author of the file to issue a copy of the file without revoking it.
Troubleshooting
This section will help you overcome the most common problems with the HaloCAD solution.
Cannot Sign in to Microsoft Sign-In Assistant
Symptoms
The user login fails with the following error message.
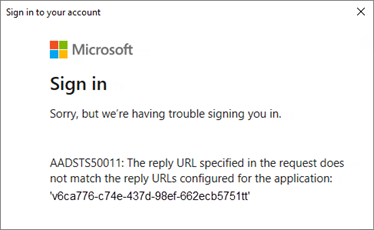
Microsoft Sign-in error message
Background
The above error occurs when a user logs in to a HaloCAD session using Microsoft Sign-In Assistant.
Probable Cause
As the Redirect URL specified in the request does not match the URL configured for the registered application, Microsoft Sign-in fails.
Corrective Action
Case 1: An incorrect Redirect URI is entered during the HaloCAD installation.
Install the HaloCAD Add-on again using the proper Redirect URI.
Launch the CAD application, click the pencil icon - Click to change label, and sign in to Microsoft Sign-In Assistant.
Case 2: Redirect URIs with the improper scheme (such as
http://contoso.com)Log in to the Microsoft Azure portal.
On the left, select the Microsoft Entra ID icon. In the middle pane, click the App registrations icon.
Click All applications, then type the name of your application into the search bar.
Select your application from the list, then the Overview icon in the middle pane, and then the 'Redirect URIs'.
Verify that the reply URL contains
https://. If not, add https and save the file.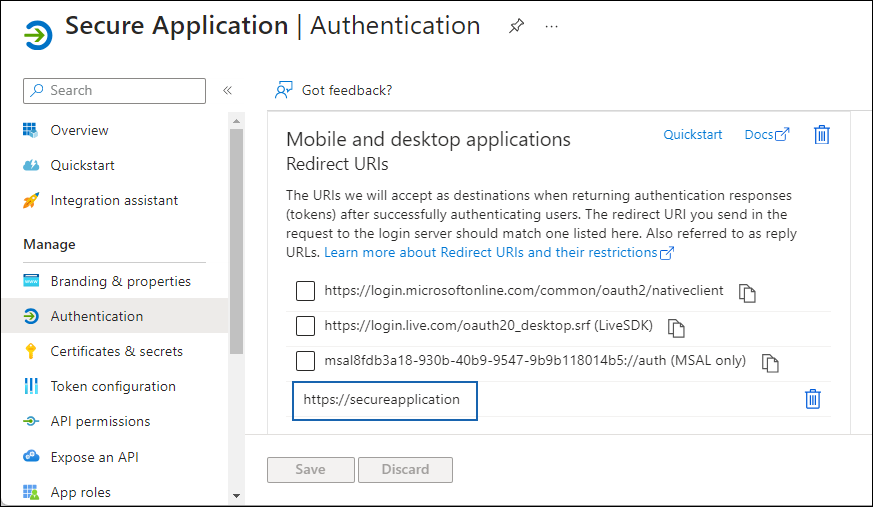
Incorrect Redirect URIs
Now, log in to Microsoft Sign-In Assistant.
Case 3: Tenant ID provided for multi-tenant application
Reinstall the HaloCAD Add-on without entering the Tenant ID.
Open the CAD application, click the pencil icon - Click to change label, and log in to Microsoft Sign-In Assistant.
Labels are not Getting Downloaded in the HaloCAD Session
Symptoms
The user could not download labels.
Background
The user logs in successfully in the HaloCAD session but cannot download labels.
Probable Cause
Improper label configuration in the Microsoft Purview portal.
Corrective Action
Log in to the Microsoft Purview portal as a global administrator.
Ensure that the labels are configured to apply protection.
Make sure the user has the policy to use the label.
Please refer to Microsoft documentation for a comprehensive description.
Label not Found in the Policy
Symptoms
HaloCAD prompts the following message:
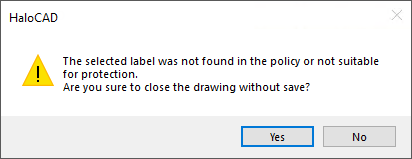
Label not found error message
Background
The above message is shown when you apply a label to a file and save it.
Probable Cause
Improper label configuration.
Corrective Action
Request your Microsoft Purview portal administrator to review the label and publish label policies.
Double Key Encryption Label Could not be Applied
Symptoms
HaloCAD prompts the following message:
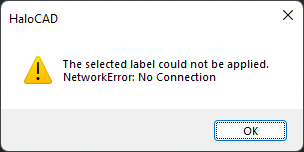
DKE label error message
Background
The above message is shown when you apply a Double Key Encryption (DKE) label to a file and save it.
Probable Cause
This issue occurs if the DKE service is stopped or unavailable.
Corrective Action
Make sure that the DKE service on the client's computer is active and accessible online.
Could not Connect to Azure RMS – Case 1
Symptoms
HaloCAD prompts the following message:
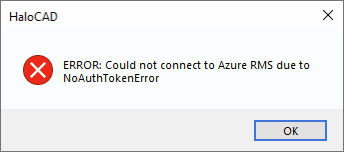
Azure RMS connection warning message #1
Background
The above error occurs when a user logs in to the HaloCAD session via Microsoft Sign-In Assistant.
Probable Cause
This issue occurs if one or more of the following conditions are true:
Case 1: You have entered the incorrect Application (client) ID, Directory (tenant) ID, and Redirect URI.
Case 2: You have closed the Microsoft Sign-In Assistant dialog unknowingly.
Corrective Action
Case 1: Make sure the correct values of Application (client) ID, Directory (tenant) ID, and Redirect URI are entered during the initialization.
Case 2: Relaunch the application and enter user credentials in the Microsoft Sign-In Assistant dialog.
Could not Connect to Azure RMS – Case 2
Symptoms
HaloCAD prompts the following message:
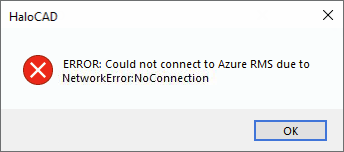
Azure RMS connection warning message #2
Background
The above error occurs when a user logs in to the HaloCAD session via Microsoft Sign-In Assistant.
Probable Cause
The most likely cause of this issue is your network is preventing you from connecting to Microsoft Purview Information Protection.
Corrective Action
Review your firewalls or network infrastructure to establish a connection with Azure.
Check if your proxy limits the URL.
HaloCAD Activation Fails
Symptoms
HaloCAD prompts the following message:
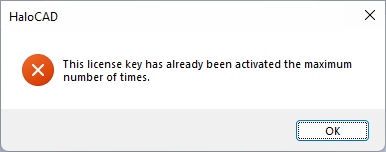
HaloCAD Activation warning message
Background
The above message is shown when you try to activate HaloCAD on a system.
Probable Cause
After the first successful license activation, the license's status changes to Active, and the number of Total activations in Secude's License Server Manager increases by one. This means that the number of Total activations increases with each activation.
For example, if you purchased ten CAD licenses, after the tenth activation, you will be unable to activate CAD on another system. The License Server Manager displays the error message because you have reached the license's maximum number of activations.
Corrective Action
Action 1: Uninstall one or more add-ons that were previously installed before activating the license key on the other add-ons.
Or Action 2: Purchase a new HaloCAD license.
Now, activate the license.
Incorrect License Key Error Message
Symptoms
HaloCAD prompts the following message:
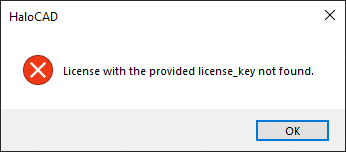
Incorrect license activation message
Background
The above message is shown when you try to activate HaloCAD on a system.
Probable Cause
There are various possible reasons, including a license key associated with another HaloCAD, an incorrect key, or an invalid key.
Corrective Action
Make sure to enter the correct licensing key, unique to this add-on, before activating it.
Why Am I Getting License Expiration Notifications?
Symptoms
HaloCAD prompts the following message:
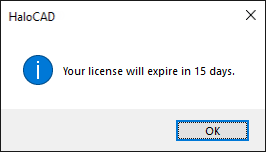
HaloCAD notification
Background
The above notification occurs once a day when a user logs into the HaloCAD session.
Probable Cause
When you run the CAD application and encounter an expiration alert, it signifies you must take action to continue using HaloCAD.
A license's end date is set when it is issued. When the license expiry is less than 30 days away, the License Manager prompts HaloCAD to notify the user. For instance, if your license expiration date is set to September 31, 2024, the user will begin receiving notifications once per day on September 1, 2024.
Corrective Action
Purchase a new HaloCAD license or renew the existing license.
Activate the license.
Other License Related Error Messages
HaloCAD License Error Messages | Root Cause | Correction Action |
|---|---|---|
The license validity period has expired | When your license had just expired. | Please contact Secude's representative to receive a new license. |
The license is not enabled. | When you try to activate a license key that is already disabled on the License portal. | Please contact Secude's representative to enable the license. |
This device is blacklisted. | When your device is blocked in the license portal for a specific reason. | Please contact Secude's representative to enable the device. |
This license cannot be activated before the start date: yyyy-mm-dd. | When attempting to activate a license before its start date. | Please make sure the license is activated on the start date. |
License-related error messages
Customer Support
Please be ready with the below-listed information before contacting our team to help you with the issue you are experiencing. The data that you provide will help us to serve you better.
Full contact details.
HaloCAD Add-on build version.
Date, time, and description of the error (if possible, provide screenshots).
What (if any) third-party products (software or other) were used in conjunction with our product?
Any other information necessary to reproduce the error.
Secude offers help and support through
Technical support email: support@secude.com
If you choose the email option to contact us, please provide your company details with a detailed description of the issue and attach the log file (if any). Our representative will respond to your email inquiry.Phone support: Call +41 41 510 70 70 to talk to our representative to diagnose and resolve the technical problem.
Other resources
Please visit https://secude.com to know about upcoming events, press releases, and to download whitepapers.
Documentation Feedback
Secude understands the importance of technical content when attempting to gain product knowledge and strives to continuously improve product documentation to ensure that users receive the information they want. To provide feedback on the documentation, please send an email to documentation@secude.com. Please include the following details in your feedback:
Product name and version
Documentation topic
Details of the suggestion or error
The technical documentation team will consider your feedback and address it in future documentation updates.