Installing the HaloCAD Add-on for Creo
This chapter describes how to install and configure the HaloCAD Add-on for Creo. This manual just briefly explains steps 1-3, which cover the prerequisites, obtaining the licensing key, and creating an encrypted JSON file; for more information, please refer to the Technical Reference manual.
Step 1 Fulfill the Prerequisites
To learn more about supported operating systems, file types, and CAD applications, please refer to the Release Notes.
Before installing the add-on, it is recommended that you fulfill the prerequisites.
Please refer to the section “Prerequisites”.
Step 2 Obtain the License Key
Obtain the license key and decide whether to activate it automatically or manually. For more information, please refer to the Technical Reference Manual.
Please refer to the section “License Activation”.
Step 3 Create an Encrypted JSON File
For a secure installation create an encrypted JSON file using this admin tool and share it with internal/external parties without disclosing the original tenant details. When the encrypted JSON file is ready, place it with the HaloCAD installer. By reading data from the hc.conf.enc file, the installer activates the license and bypasses the "Initialization" screen, which would otherwise ask for Azure credentials."
Please refer to the section “Secure Installation (Recommended)”.
Step 4 Install the Add-on
You can install the add-on in the following modes:
Graphical Mode
Graphical mode installation is an interactive, graphical user interface-based method that is driven by a wizard.Silent Mode
Silent-mode installation is a non-interactive method of installing the add-on using command lines.Via System Center Configuration Manager
With System Center Configuration Manager (SCCM), the add-on is deployed on the targeted computers across your enterprise.
Graphical Mode
Before you begin
The following prerequisites must be met:
A user who installs the HaloCAD Add-on must have administrator rights.
You must close all the CAD applications. If not, HaloCAD prompts a warning message as “Please close all the CAD applications to proceed with the installation of HaloCAD Add-on for Creo.” Therefore, we recommend closing all the applications and then start installing the HaloCAD Add-on.
Make sure that the HaloCAD Reader Add-on for Creo is not installed on the same workstation. If it is already installed, HaloCAD prompts a warning message as “No supported CAD applications are available in the system. (OR) Remove the Reader version of this product.”
Make sure your Microsoft Entra tenant information is ready to enter when the setup process prompts for a manual installation. Alternatively, for a safe and automatic installation, use
hc.conf.enc.
Installation Procedure
Install the add-on by using the GUI-based setup program that is provided in the installation package.
To begin the interactive installation, double-click the installer
HaloCAD_CREO_Setup.exefile. Depending on your Windows security settings, you may get a warning such as "Do you want to allow the following program to make changes to this computer?". If you get this security warning, click the Yes button to continue the installation.When the installer starts, you will see the startup dialog followed by the welcome dialog:

Startup dialog
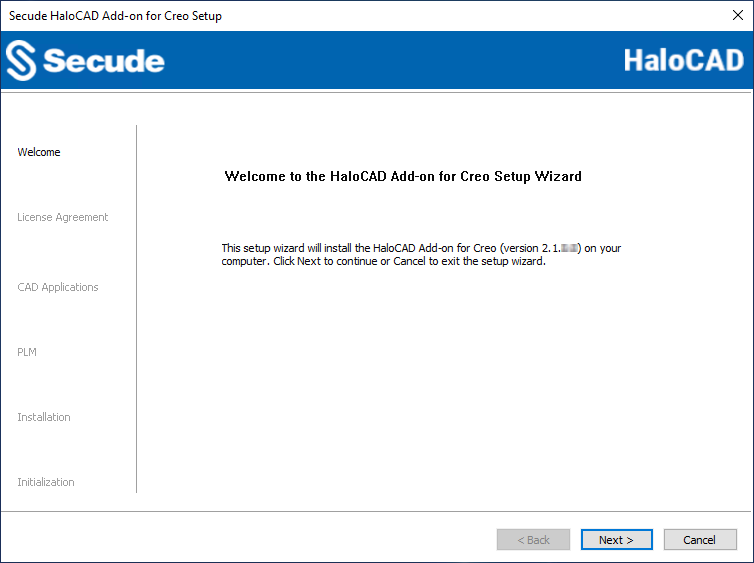
Welcome dialog
Click Next to continue the installation.
The end-user license agreement dialog will appear:
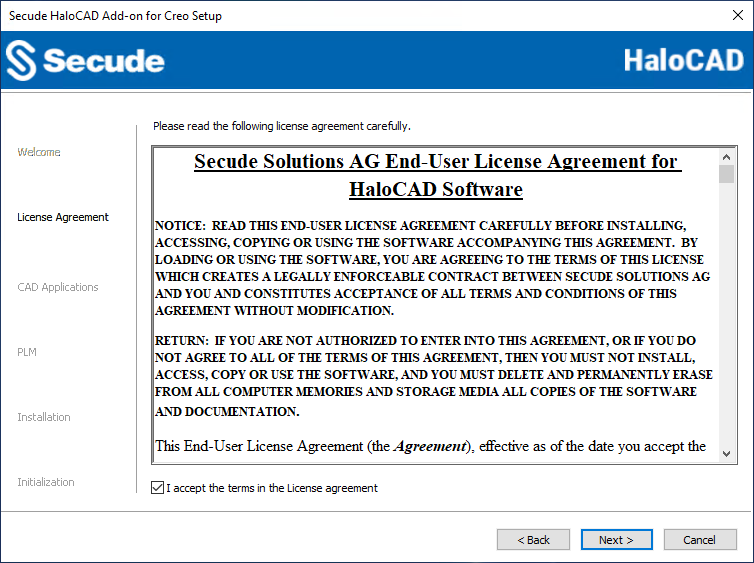
End-User License Agreement dialog
Read the End-User License Agreement. If you agree, select I accept the terms in the License Agreement and click Next.
The CAD application version selection dialog will appear:
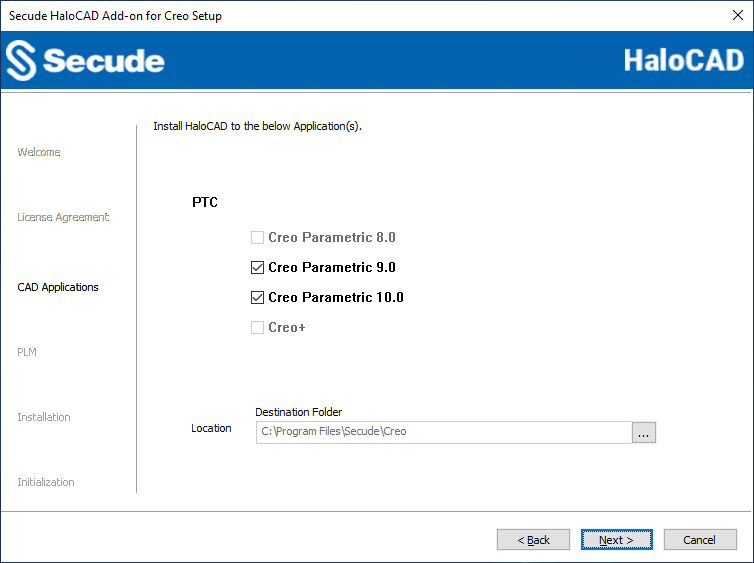
CAD application version selection dialog
Depending on your environment, select the appropriate Creo Parametric version checkboxes.
By default, application files are stored in the program files directory (
C:\Program Files\Secude\Creo). If you would like to choose an alternate location, click the Browse button and select your location preference. When you are finished, click Next.The PLM selection dialog will appear, displaying the PLM list.
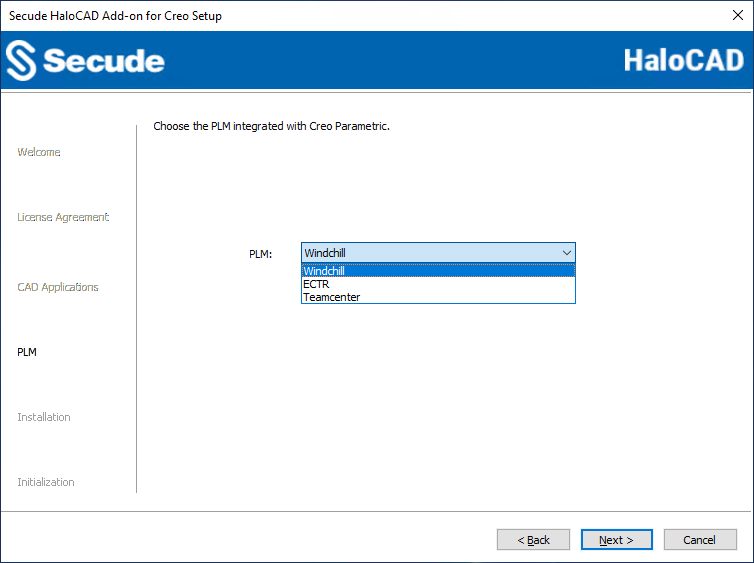
PLM selection dialog
Depending on your environment, select the following option:
With PLM: If you want to integrate the HaloCAD add-on with a PLM, select the appropriate PLM from the list—Windchill/ECTR/Teamcenter.
Without PLM: If you want to install the HaloCAD add-on as a standalone add-on, select Windchill from the list. However, Windchill is the default PLM option.
If you wish to review or change any settings, click the Back button to return to any point in the installation process. Otherwise, click Next button to allow the Setup program to install the add-on.
The installation begins and progress is shown in the dialog.
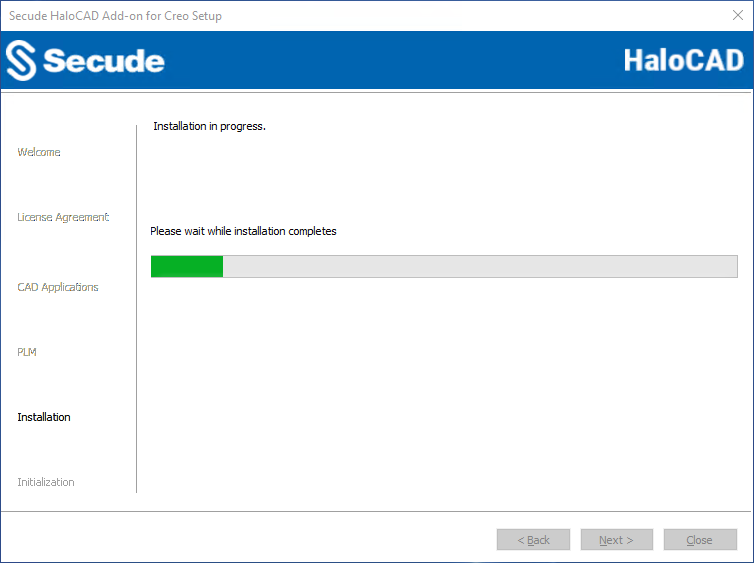
Installation progress dialog
When the installation is completed, you will see a message confirming that the add-on has been successfully installed.
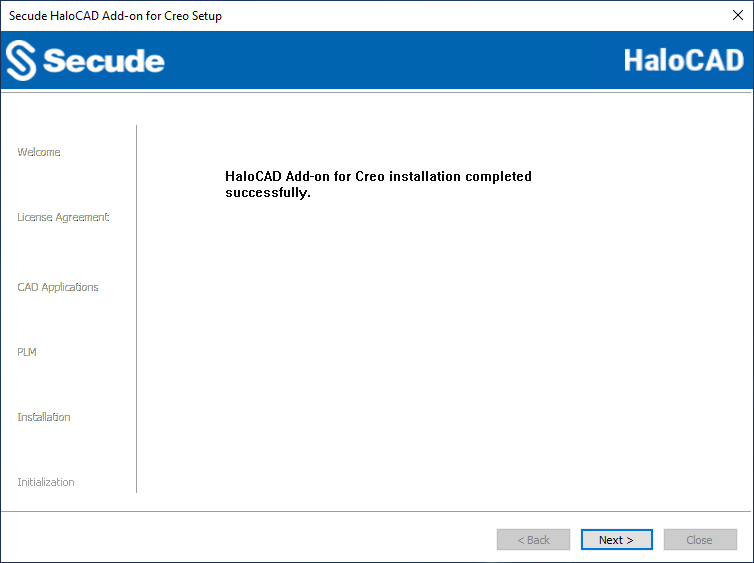
Installation completed dialog
Click Next in the installation dialog.
The initialization dialog will appear. To avoid connectivity issues, make sure to enter the correct Azure application registration information in the screen below. Note: If you have included the
hc.conf.encfile with the installer, the following initialization screen will not appear, and you will just see the completion dialog. The initialization screen appears only if thehc.conf.encfile is not included in the installer folder.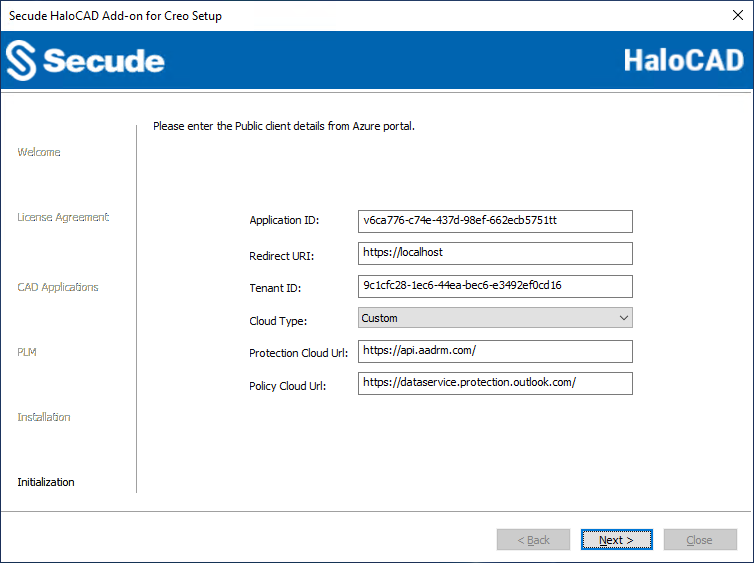
Initialization dialog
Application ID: Enter the unique identifier of your registered application. For example,
v6ca776-c74e-437d-98ef-662ecb5751ttRedirect URI: Enter the URI that was provided when registering the native application in the Azure portal. For example,
https://localhost.Tenant ID: If the registered application is Single tenant, you need to enter the globally unique identifier of your tenant if not, you can leave it empty. For example,
9c1cfc28-1ec6-44ea-bec6-e3492ef0cd16Cloud Type: By default, Commercial will be set. However, based on your Azure subscription and configuration, you can change the cloud type from the list — Commercial / Custom / Germany / US_DoD / US_GCC / US_GCC_High / US_Sec / US_Nat / China_01. In the case of Custom cloud type, you need to enter the appropriate URLs in Protection Cloud URL (for example,
https://api.aadrm.com/) and Policy Cloud URL (for example,https://dataservice.protection.outlook.com/).Click Next.
Once the initialization is completed, you will get the success message as shown below.
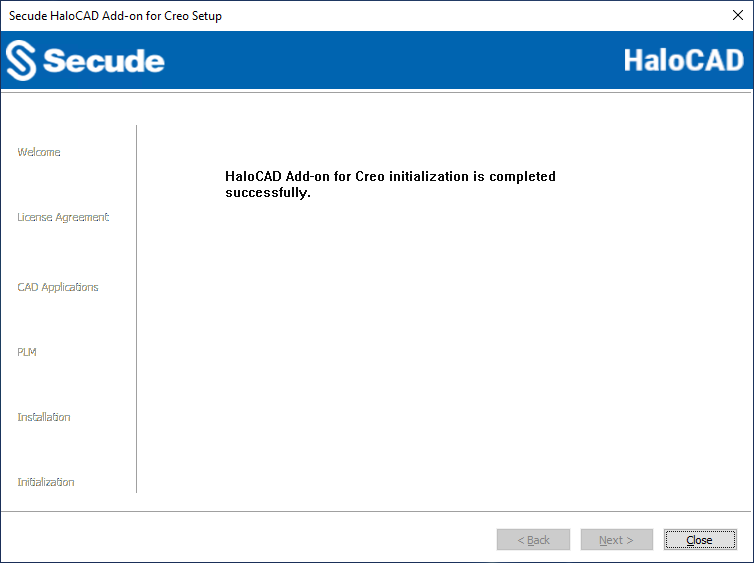
Initialization completed dialog
Click Close to close the installation wizard.
Post-installation checks:
To view the add-on, open the Creo Application > HaloCAD tab.
You can view the log files at
%AppData%\Roaming\Secude\HaloCAD\creo\halocad.log.You can now configure log-related settings in the
Registry Root Directory = HKEY_CURRENT_USER\SOFTWARE\Secude\HaloCAD Add-on for Creo. For more details, please refer to the section “Step 5 Modify Registry Settings”.If your network infrastructure includes a proxy server that provides access to external websites. Then, to connect to the Secude License Manager URL, you need to manually add the Proxy settings in the add-on. To do so, create a registry entry in the root directory,
Computer\HKEY_LOCAL_MACHINE\SOFTWARE\Secude\HaloCAD Add-on for Creo
Name:proxyuri, Type:REG_SZ, Value: The format is,<URL>:<PORT>. For example,http://10.41.0.130:808
Creo configuration file: During the installation of the HaloCAD Add-on for Creo, the installer writes an entry in the configuration file, which is in the default installation directory of Creo. For example,
<installation path\Common Files\text\Config.pro>. Thus, at the startup, Creo Parametric reads the configuration file from this location automatically and launches the HaloCAD.
However, some customers may wish to access the configuration file from a mapped network drive/server location by running scripts, in that case, please ask your administrator to add the following line with the required details into server-sideConfig.pro/Config.sup. Note: Theconfig.profile overrides anyconfig.supentries.
For the default installer location, the file is saved at For a different location, the file is saved in the installation directory provided by the user (for example, |
Silent Mode
Besides graphical mode, the add-on can be installed in silent mode, which does not require user involvement or display a user interface. It is a convenient way to streamline installation using the command at once.
Note: In case you want to install the add-on as a standalone, make sure to use "Windchill" in the PLM parameter.
Open the Command Prompt with elevated rights (Run as Administrator).
Navigate to the add-on installer directory.
To know the list of options available in silent mode, follow the steps given below:
TypeHaloCAD_CREO_Setup.exe -help
PressEnter
Output
...HaloCAD_CREO_Setup.exe -install -application < Creo Parametric 8.0 | Creo Parametric 9.0 | Creo Parametric 10.0 | Creo+ > -customdirlocation <default|custom> -PLM <Windchill | ECTR | Teamcenter > -applicationid <azure_application_id> -redirecturi <azure_redirect_url> -tenantid <azure_tenant_id for Single-tenant app|null for Multi-tenant app> [-cloudtype <Commercial|Custom|Germany|US_DoD|US_GCC|US_GCC_High|US_Sec|US_Nat|China> <protectioncloudurl> <policycloudurl>]HaloCAD_CREO_Setup.exe -uninstall
To delete HaloCAD cache through Silent Mode UninstallationHaloCAD_CREO_Setup.exe -uninstall -clearcache <yes>
For Silent Mode Installation if ENC file already exists in the same locationHaloCAD_CREO_Setup.exe -install -application < Creo Parametric 8.0 | Creo Parametric 9.0 | Creo Parametric 10.0 | Creo+ > -customdirlocation <default|custom>The following command illustrates how to install the add-on using the Azure application details.
HaloCAD_CREO_Setup.exe -install -application "Creo Parametric 9.0" -customdirlocation "C:\Program Files\Secude\Creo" -PLM "Windchill" -applicationid v6ca776-c74e-437d-98ef-662ecb5751tt -redirecturi https://localhost -tenantid 9c1cfc28-1ec6-44ea-bec6-e3492ef0cd16 -cloudtype Custom https://api.aadrm.com/ https://dataservice.protection.outlook.com/The example below shows how to install the add-on using the
hc.conf.encfile located in the same installation location.HaloCAD_CREO_Setup.exe -install -application "Creo Parametric 9.0" -customdirlocation "C:\Program Files\Secude\Creo"Press
Enter.The installation is complete.
Via System Center Configuration Manager
The Microsoft System Center Configuration Manager (SCCM) is an administration tool that enables organizations to push out relevant operating systems and applications to Windows users quickly and cost-effectively within its environment.
Using SCCM, the add-on can be installed silently and automatically on the specifically targeted computers across your enterprise.
Before you begin
Make sure that you have read the prerequisites given in the section “Graphical Mode”.
We recommend familiarizing the best practices for creating a deployment procedure.
For information about preparing your environment, please refer to the online Microsoft documentation.
Follow the below steps to deploy using SCCM:
This guide assumes that you have already set up a SCCM environment.
Use the silent mode commands mentioned in the section “Silent Mode” when needed.
Step 5 Modify Registry Settings
Prerequisite: To modify the add-on registry entries, first launch the CAD application and log in to Azure RMS for an active HaloCAD session. For more information, please refer to the Operations Manual.
Once you have logged into the HaloCAD Session, open Registry Editor, navigate to this path Registry Root Directory = HKEY_CURRENT_USER\SOFTWARE\Secude\HaloCAD Add-on for Creo, and modify the Reg Key as you wanted. For example, to change the log level, double-click loglevel, change the "Value data" using the values listed in the table below, and then click OK.
Name | Default Value | Type | Description |
|---|---|---|---|
loginterval |
| REG_SZ | It removes the log files older than the default time frame. By default, the log files older than 30 days will be deleted. |
loglevel |
| REG_DWORD | Log level information is logged in the
|
logsize |
| REG_SZ | The |
Configuration in the HaloCAD Registry
What to do next
If you have generated the encrypted configuration file together with the license key, you could launch the CAD application and start using the HaloCAD features straight away. This means that the license is activated silently while using HaloCAD features in the CAD application. For more details, please refer to the Operations Manual.
If you did not activate the license using the encrypted configuration file, follow the section “UI-based Manual License Activation” in the Technical Reference Manual.
HaloCAD Add-on with PLM
If you have installed HaloCAD as a standalone add-on in your environment, you can create a file and protect it with a suitable label. For more information, please refer to the Operations Manual.
If you have the HaloCAD add-on installed in a suitable PLM environment, it will intercept the file download and automatically protect it with a suitable label. For more information, please refer to the HaloCAD for PLM Operations Manual.
To integrate with Windchill/Teamcenter, you need to install the following components:
HaloENGINE Service
HaloENGINE
HaloCAD for Windchill/HaloCAD for Teamcenter
To integrate with SAP ECTR, you need to install the following components:
HaloENGINE Service
HaloENGINE
HaloCORE Client for NetWeaver
HaloCORE for DMS
HaloCAD KPro
Microsoft online documentation
At this stage, if you are NOT familiar with labels, you might need to refer to Microsoft online documentation.
